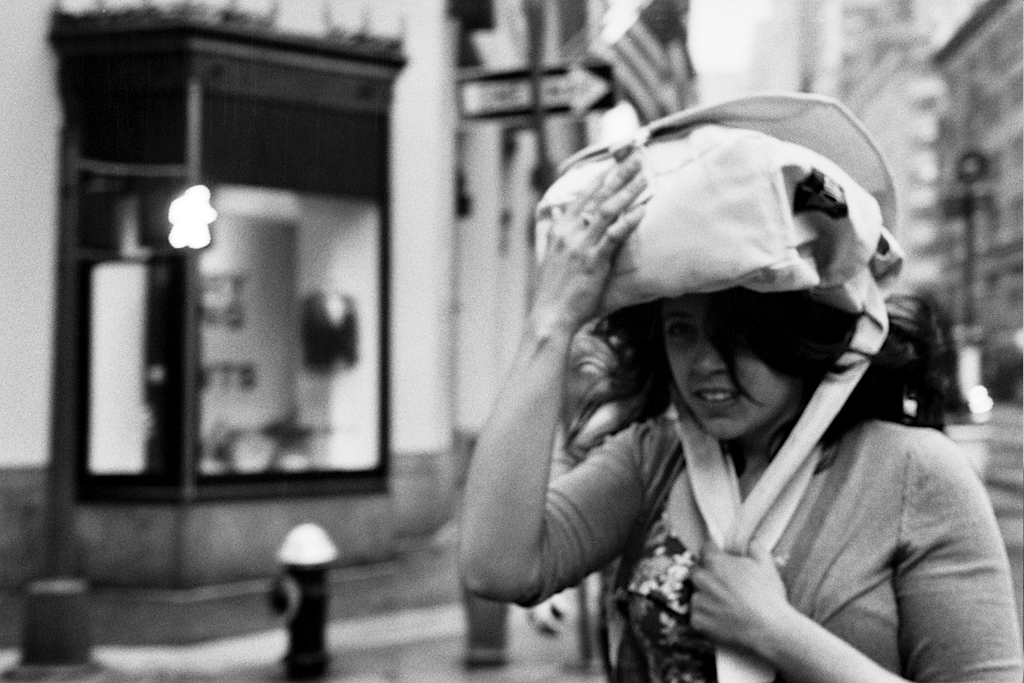
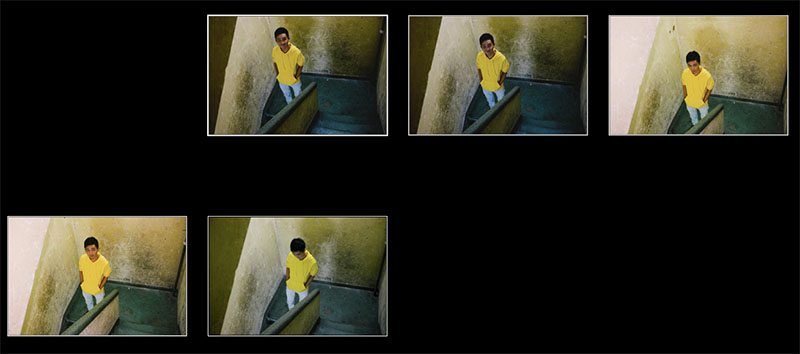
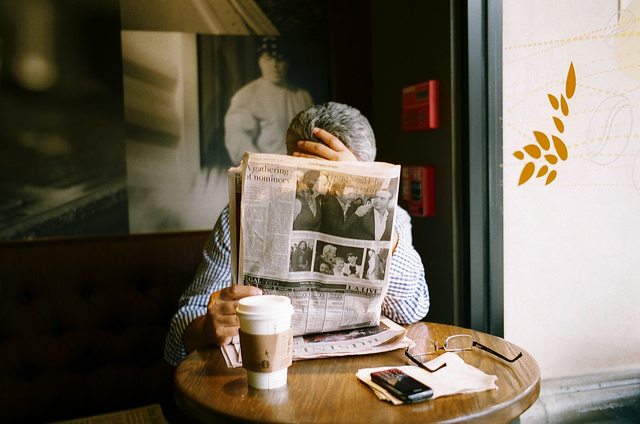
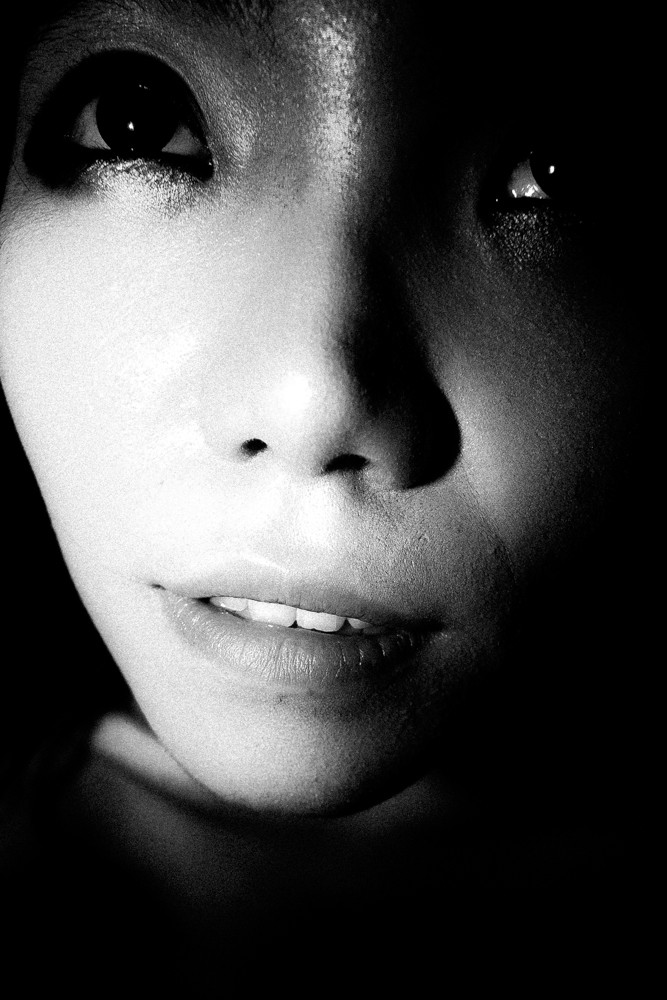
Cindy by the water in Bien Hoa, just outside of Saigon.
Hey streettogs, thank you for waiting for this new episode of “Saigon Diary“.
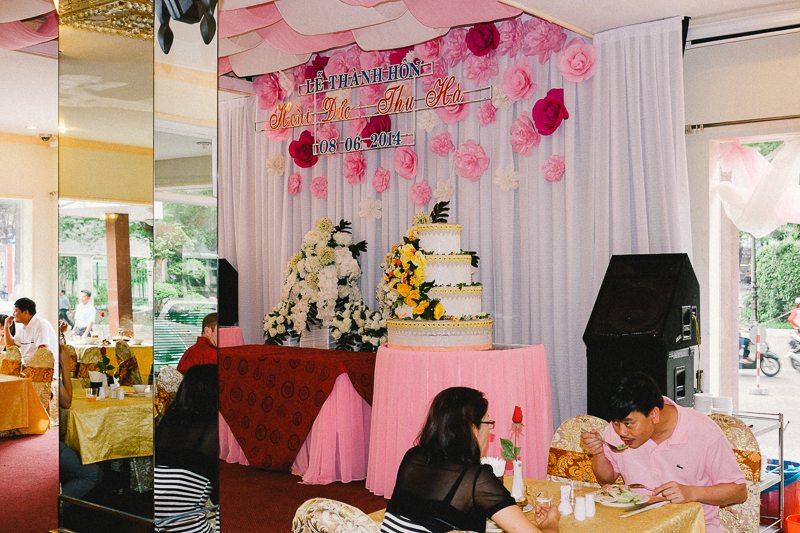
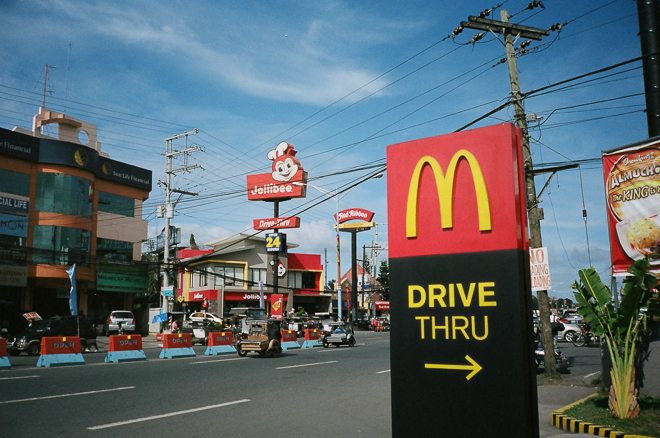
A lot has happened the last week, namely me and Cindy visiting Bien Hoa– a place about an hour outside of Saigon. Cindy’s cousin got married recently, and it was a great time getting to know her father’s side of the family (while of course, eating some delicious food).
I’ve also learned a lot more Vietnamese– and can now hold a pretty basic conversation (a 4-year old is still better than me).
I’m still not sure what I ultimately want out of this “Saigon Diary” series– nor do I expect to really make any good photos while I am here. But like I mentioned before, I want to share some personal thoughts on the trip, my photography, and keep it all as transparent as I can.
I have been quite fascinated with the square-format in street photography for a while. My fascination first came about from Jeroen Helmink, a photographer from the Netherlands (you can see a fun video we made on shooting Hasseblads). There was something quite sexy about the 6×6 format– the way that it created perfect balance in the frame, the simplicity, as well as the novelty.
Of course as Instagram has become insanely popular– the square-format just looks like an “Instagram shot.” I have heard of Instagram as “ruining” the 6×6 format (medium-format film).
However I don’t think it really matters what camera, format, or aspect ratio you shoot in. Ultimately the most important thing is to create a visually compelling image that speaks to our hearts or souls.
Hey streettogs, thanks for staying tuned in for the “Saigon Diary” series.
For the sake of getting sleep and having higher quality posts, I’ve decided not to keep a daily diary– but to update every 2-3 days (depending on how interesting my days are).
Some people are asking me why I’m showing bad photos in these series. So to clarify, I am trying to make this process of taking photos in Saigon as transparent as possible. So I am purposefully putting out bad photos, critiquing my own work, and sharing some of my thought process. My hope is that this is helpful to you!
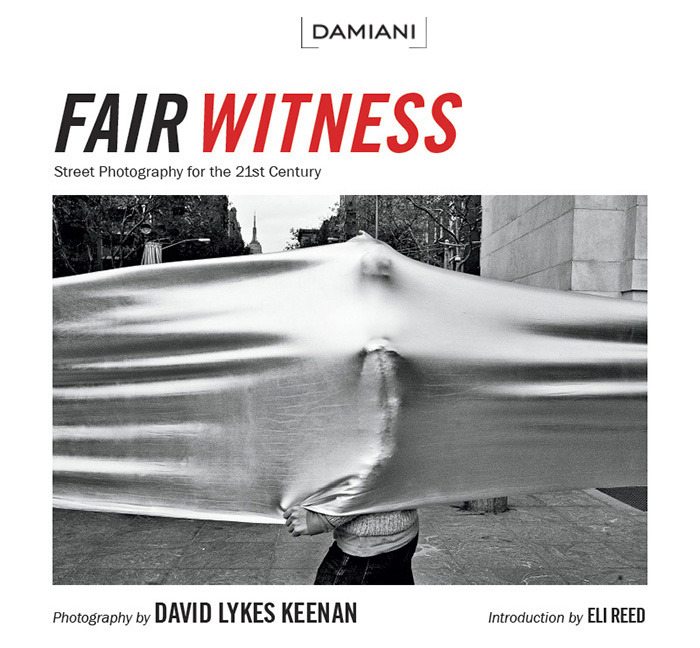
Special thanks to Clifton Barker and Gary Gumanow for putting together this interview with David Lykes Keenan, who is currently fundraising a kickstarter for his “Fair Witness” street photography book.Â
Clifton: Few have done such great things for the photography scene in Austin as David Lykes Keenan, who I have the pleasure of interviewing today. He founded the Austin Center for Photography and helped it grow during the organization’s first three years. David’s work has attracted some very impressive fans from the likes of Elliot Erwitt and Eli Reed, and ultimately brought legitimacy to the art of street photography in Austin. His book FAIR WITNESS, a collection of photos from NYC, Austin, and other cities, is positioned to be a great success, take a moment and support it on Kickstarter.
Nowadays. we are all really busy. We have countless commitments at work, at home, with our friends, and with our families. It is really hard to find time to shoot street photography. Not all of us can leave the obligations of the “real world†and just go out and shoot all the time.
Ironically enough even though I am a “full time street photographer‖ I still find it really hard to make time to shoot. I spend a lot of time with emails, social media, blogging, finances, helping out Cindy and my family, and church related activities.
If you consider yourself a busy person, here are some tips I suggest to shoot more street photography:
However, I did wake up pretty exhausted. The light from the morning light was nice, getting me up at around 8am. I slept probably around 1:30am (staying up to write Saigon Diary #2). But I think no matter how tired I am, I want to keep up this daily diary.
Anyways, went to the gym– lifted some weights, took a quick shower, and then woke up Cindy. We headed down to breakfast in a rush (at around 8:40– as breakfast ends at 9am). We enjoy our morning meal, and I practice some more Vietnamese to the chef who makes me my morning eggs.
Today is exciting because we meet up with Minh, a friend of a friend of Cindy– who teaches English and agrees to show us around town on his motorbike. I never rode a motorbike before, and am quite excited.
Due to the positive feedback from the first “Saigon Diary #1” I will see if I can do daily diary entries.
Thank you guys also for the feedback on the new blog design. I’ve been wanting to change my blog to a “responsive design” — that would look great across smartphones, tablets, and computers. I also made the change from a 2-column blog to a 1-column blog, to create a better reading experience for you guys. The 1-column design allows me to upload larger images, and also larger text.
I liked having the links on the right column, but now you can either find the articles in the “Start here” page or the “Masters” tab on top. I will play around with the design more in the upcoming weeks. Would love to hear your feedback on the new design in the comments below. Please let me know what you would like about it, and what you would like to see me add/change.
Anyways moving on– today I woke up relatively early again (around 7am). I wish I could wake up that consistently everyday back in the states (I usually get up at around 10am). I did some bodyweight squats in the room to get pumped up for the day, and also to prepare myself for breakfast.
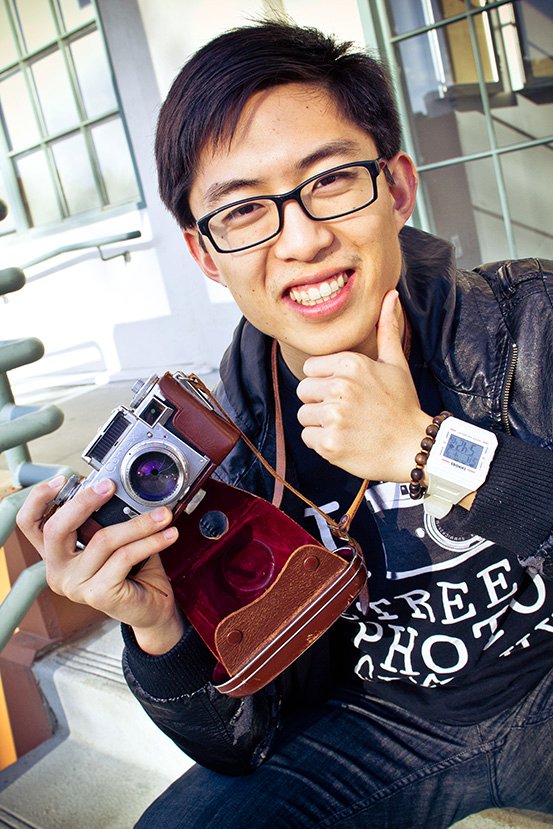
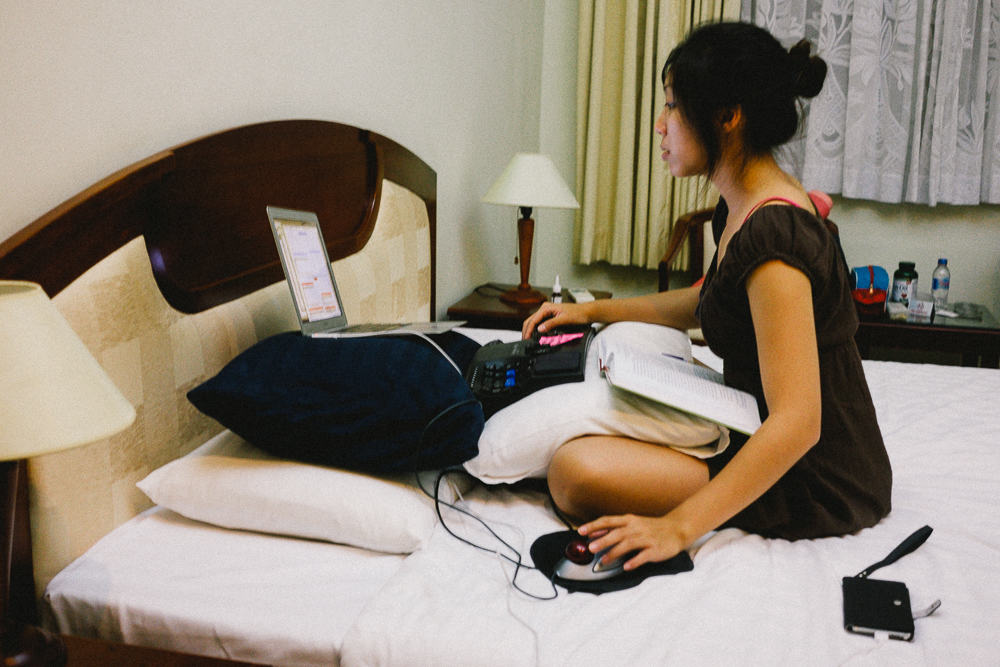
Hey what’s up streettogs– this is Eric Kim reporting live from Ho Chi Minh City (Saigon) in Vietnam. After a lovely 14-hour flight from Vancouver and a 4-hour connecting flight from Hong Kong, my girlfriend Cindy and I made it safely here!
Today over some strong Vietnamese coffee with Cindy– she helped me come up with a good idea. I wanted to document my time here in Saigon, and also document Cindy’s experience here. I am going to include the contact sheets as well — and take you behind the scenes. I hope you enjoy this journey with me!
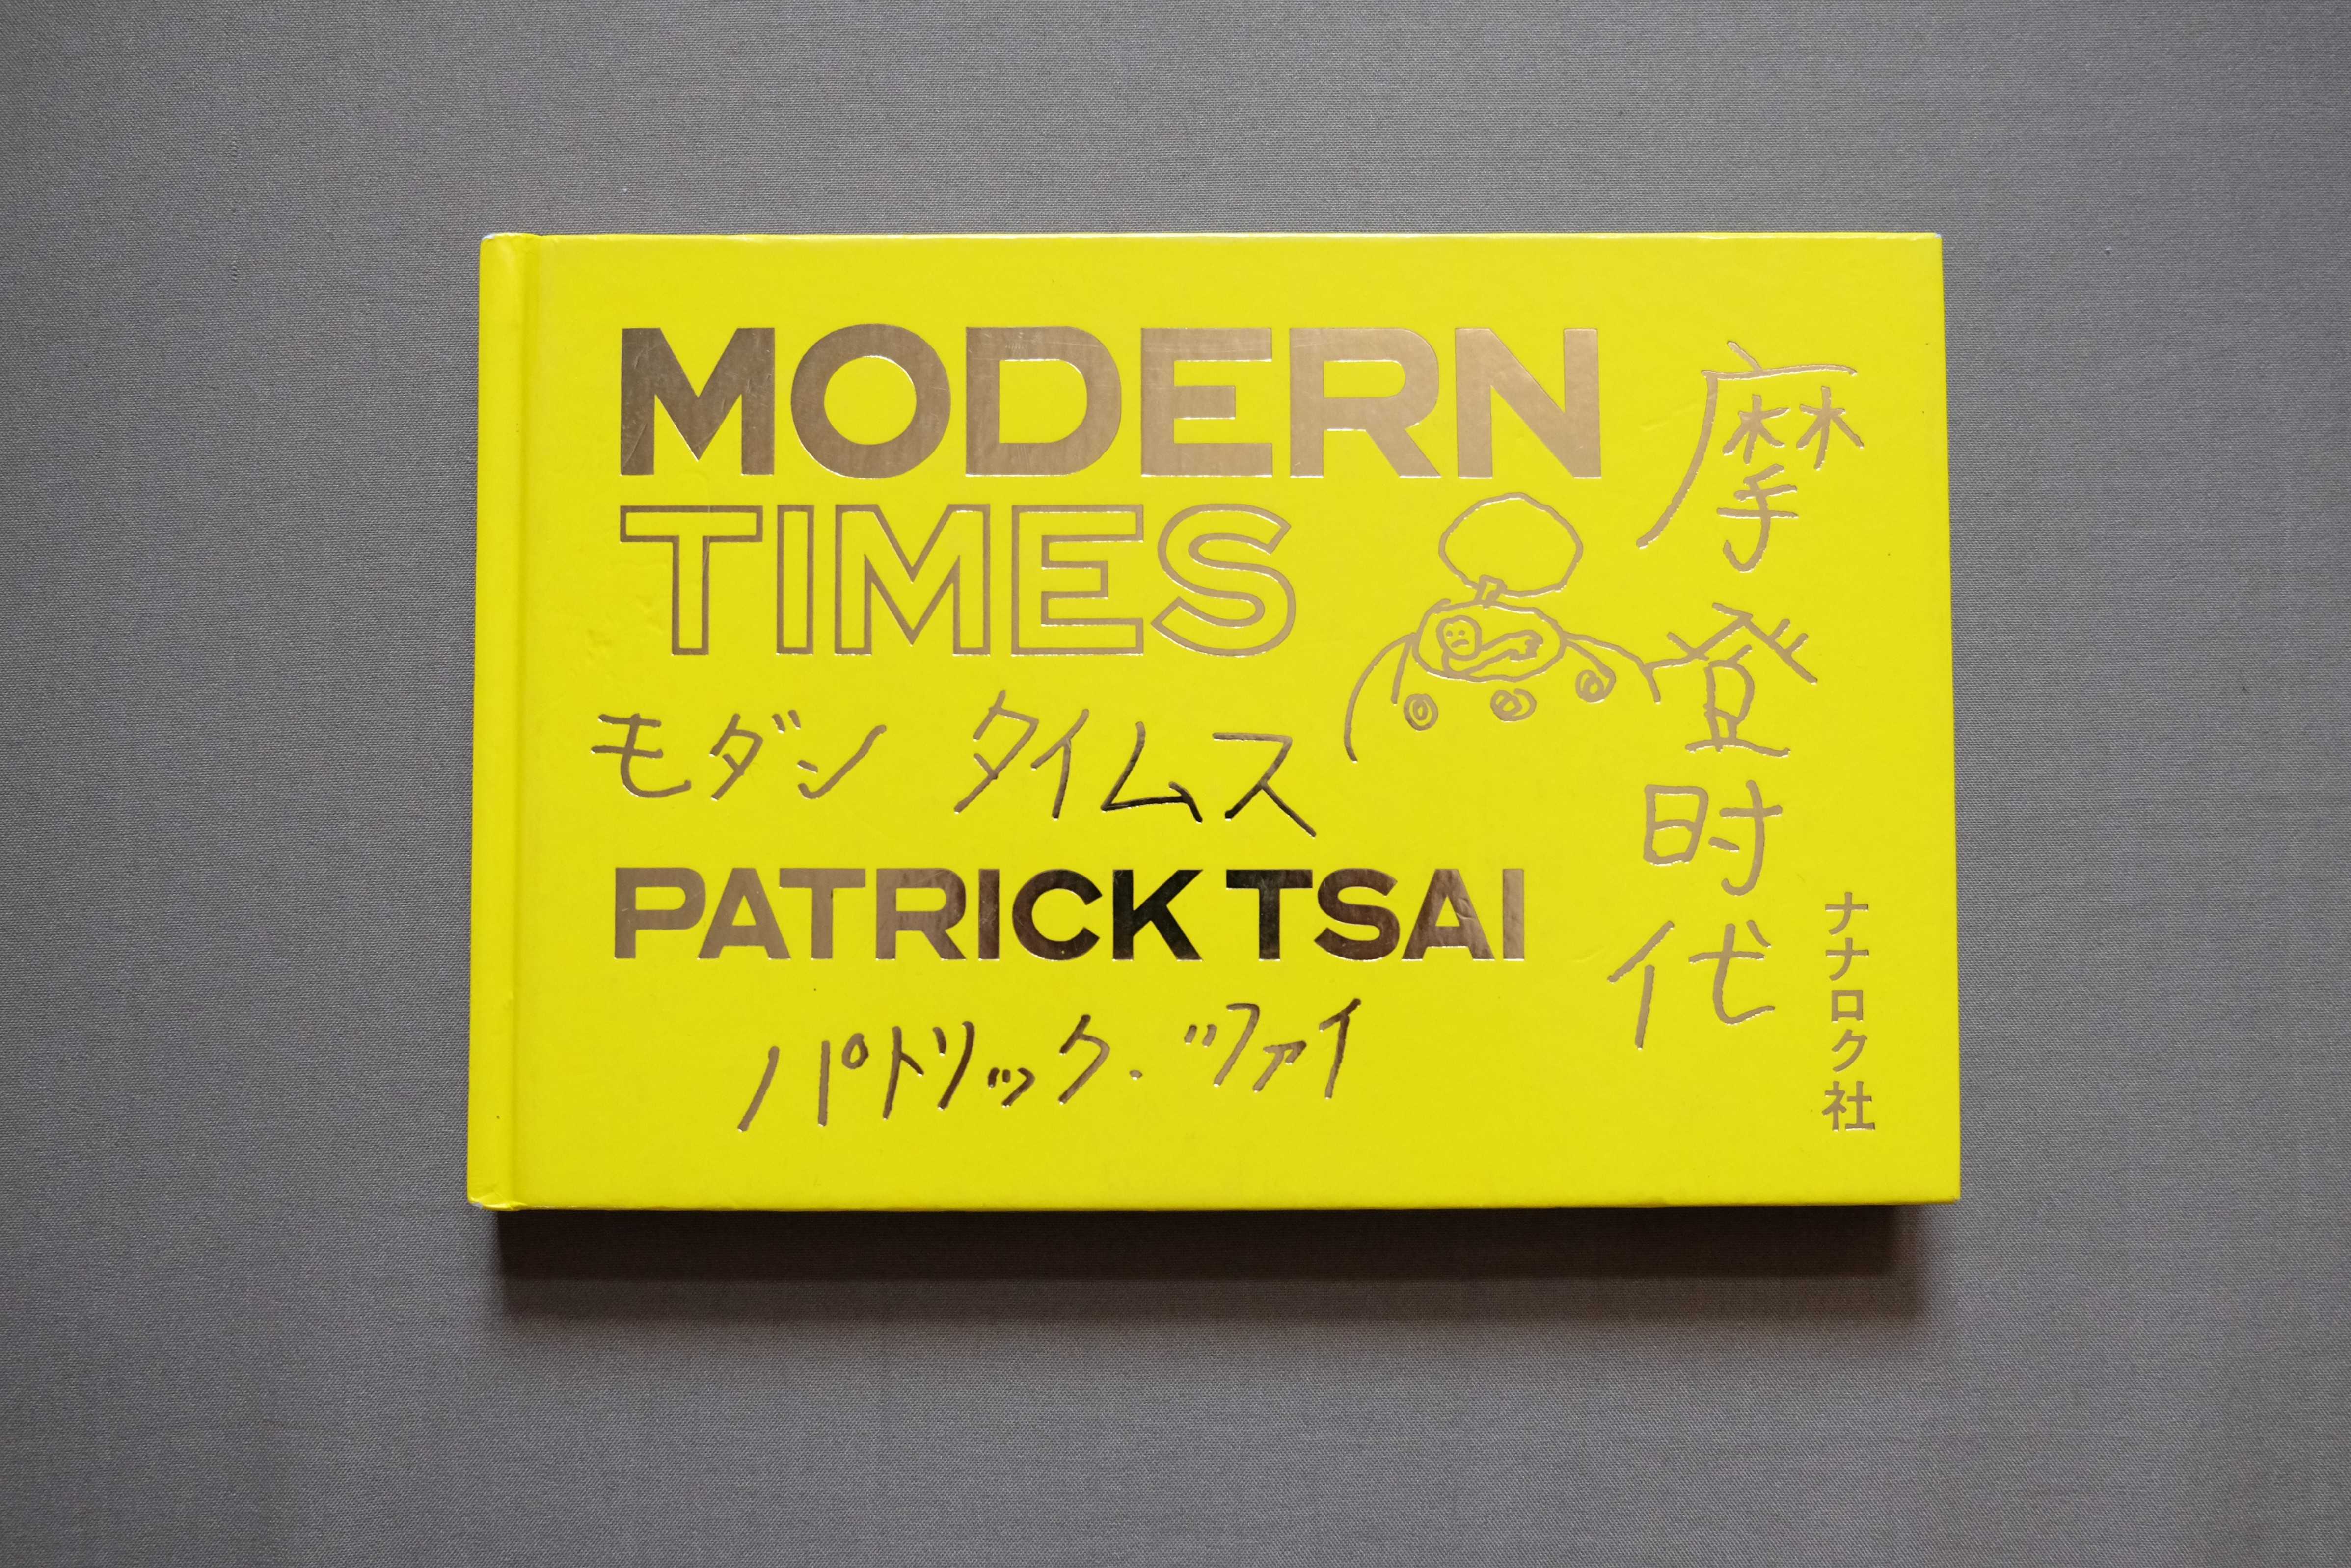
One of the best things about photography is it gives us a view of places we otherwise won’t be able to visit. Street Photography ups the ante by actually heading to side streets, roads not taken, and places that won’t appear in your usual travel guide. In Patrick Tsai’s modern times, he shows us a China devoid of media’s prejudice and how this diaristic photographer tries to prove that he can document his surroundings as well.
Is he successful? Let’s analyze his book to find out.
I recently read something quite interesting about music. The concept was when you’re listening to music, you tend to listen to the treble (high notes) and tend to ignore the bass (low notes).
Therefore the author suggested to get a richer experience listening to music, focus on listening to the bass (not the treble).
So I gave it a go myself. I listened to some of my favorite classical music, and really paid attention to the low notes of the cello in the background (instead of focusing on the high notes of these violins).
Wayne Gretzky once said, “You miss 100% of the shots you don’t takeâ€.
I find this such a beautiful quote not only in life but also street photography.
Many of us are afraid of taking risks, of taking chances. We worry about failure. We worry that others will judge us for our shortcomings. We worry about the worst case scenario.
But in life, we need to take chances. We need to take risks. We need to give things our best shot. By simply not trying, we don’t make any progress and don’t move forward.
In street photography there are a lot of risks face. Risk of getting yelled at, risk of missing the shot, risk of pissing somebody off.
We often hesitate too. For example I have missed thousands of potential photographs because of that split second in which that voice in my head goes, “Don’t take the shot, you might get in trouble or you might upset the person.†The second I have that doubt, I end up not taking the shot (and greatly regretting it afterwards).
In sports players often choke too. This has to do a lot with the pressure to perform. The second basketball players start thinking too much, they often miss the shots. Wayne Gretzky was one of the greatest hockey players in history, yet he has missed countless goal opportunities.
But you won’t ever make a shot unless you take a chance.
So in your street photography take more chances. Be bold. Take risks. Don’t worry about making bad photos. There is a nice quote I like: “To double your success rate, double your failure rate.â€
As my friend Charlie Kirk says, “When in doubt, click.†Don’t worry about making perfect photographs. Work hard, hustle, and work the scene. Take multiple photos from different angles. Crouch down. Take a step closer or take a step back. Don’t give up after only one photograph.
If you want to push yourself outside of your comfort zone in street photography, Check out one of my upcoming street photography workshops in Ho Chi Minh City, Singapore, Tokyo, Hong Kong, Melbourne, Sydney, and London.
One of the most interesting concepts I’ve learned recently is the concept of “Systems” vs “Goals” from a book written by Scott Adams titled: “How to Fail at Almost Everything and Still Win Big.”
Basically Scott Adams says that in life we should focus on “Systems” instead of “Goals”. So what is the difference? Scott Adams defines a system as the following:
“A system is something you do on a regular basis that increases your odds of happiness in the long run.”
“Systems” are daily routines or procedures we do everyday (which we tend to have a lot of control over). For example in the context of street photography, going out and shooting everyday is a system. Buying a street photography book once a month and studying it is a system. Meeting other street photographers in person to get feedback and critique on your work is a system. Systems are much more dependent on the process– not the final result.
“Goals” tend to be external accomplishments that we have far less control over. For example in street photography– goals include: getting 100+ likes on your photos, having your book published by a famous publisher, having a big solo exhibition at a prestigious gallery, and becoming rich and famous through your photography.
So in life and street photography– focus on systems instead of goals. Focus on the daily things that you have control over.
Systems focus on the small daily achievements you make– and the step-by-step progress you make forward. Goals tend to be focused too many on things you have no control over. Not only that, but we tend to get more disappointed by goals as they are harder to achieve.
In conclusion to gain more happiness and progress in street photography– focus on systems, not goals. Now go out and pound the pavement!
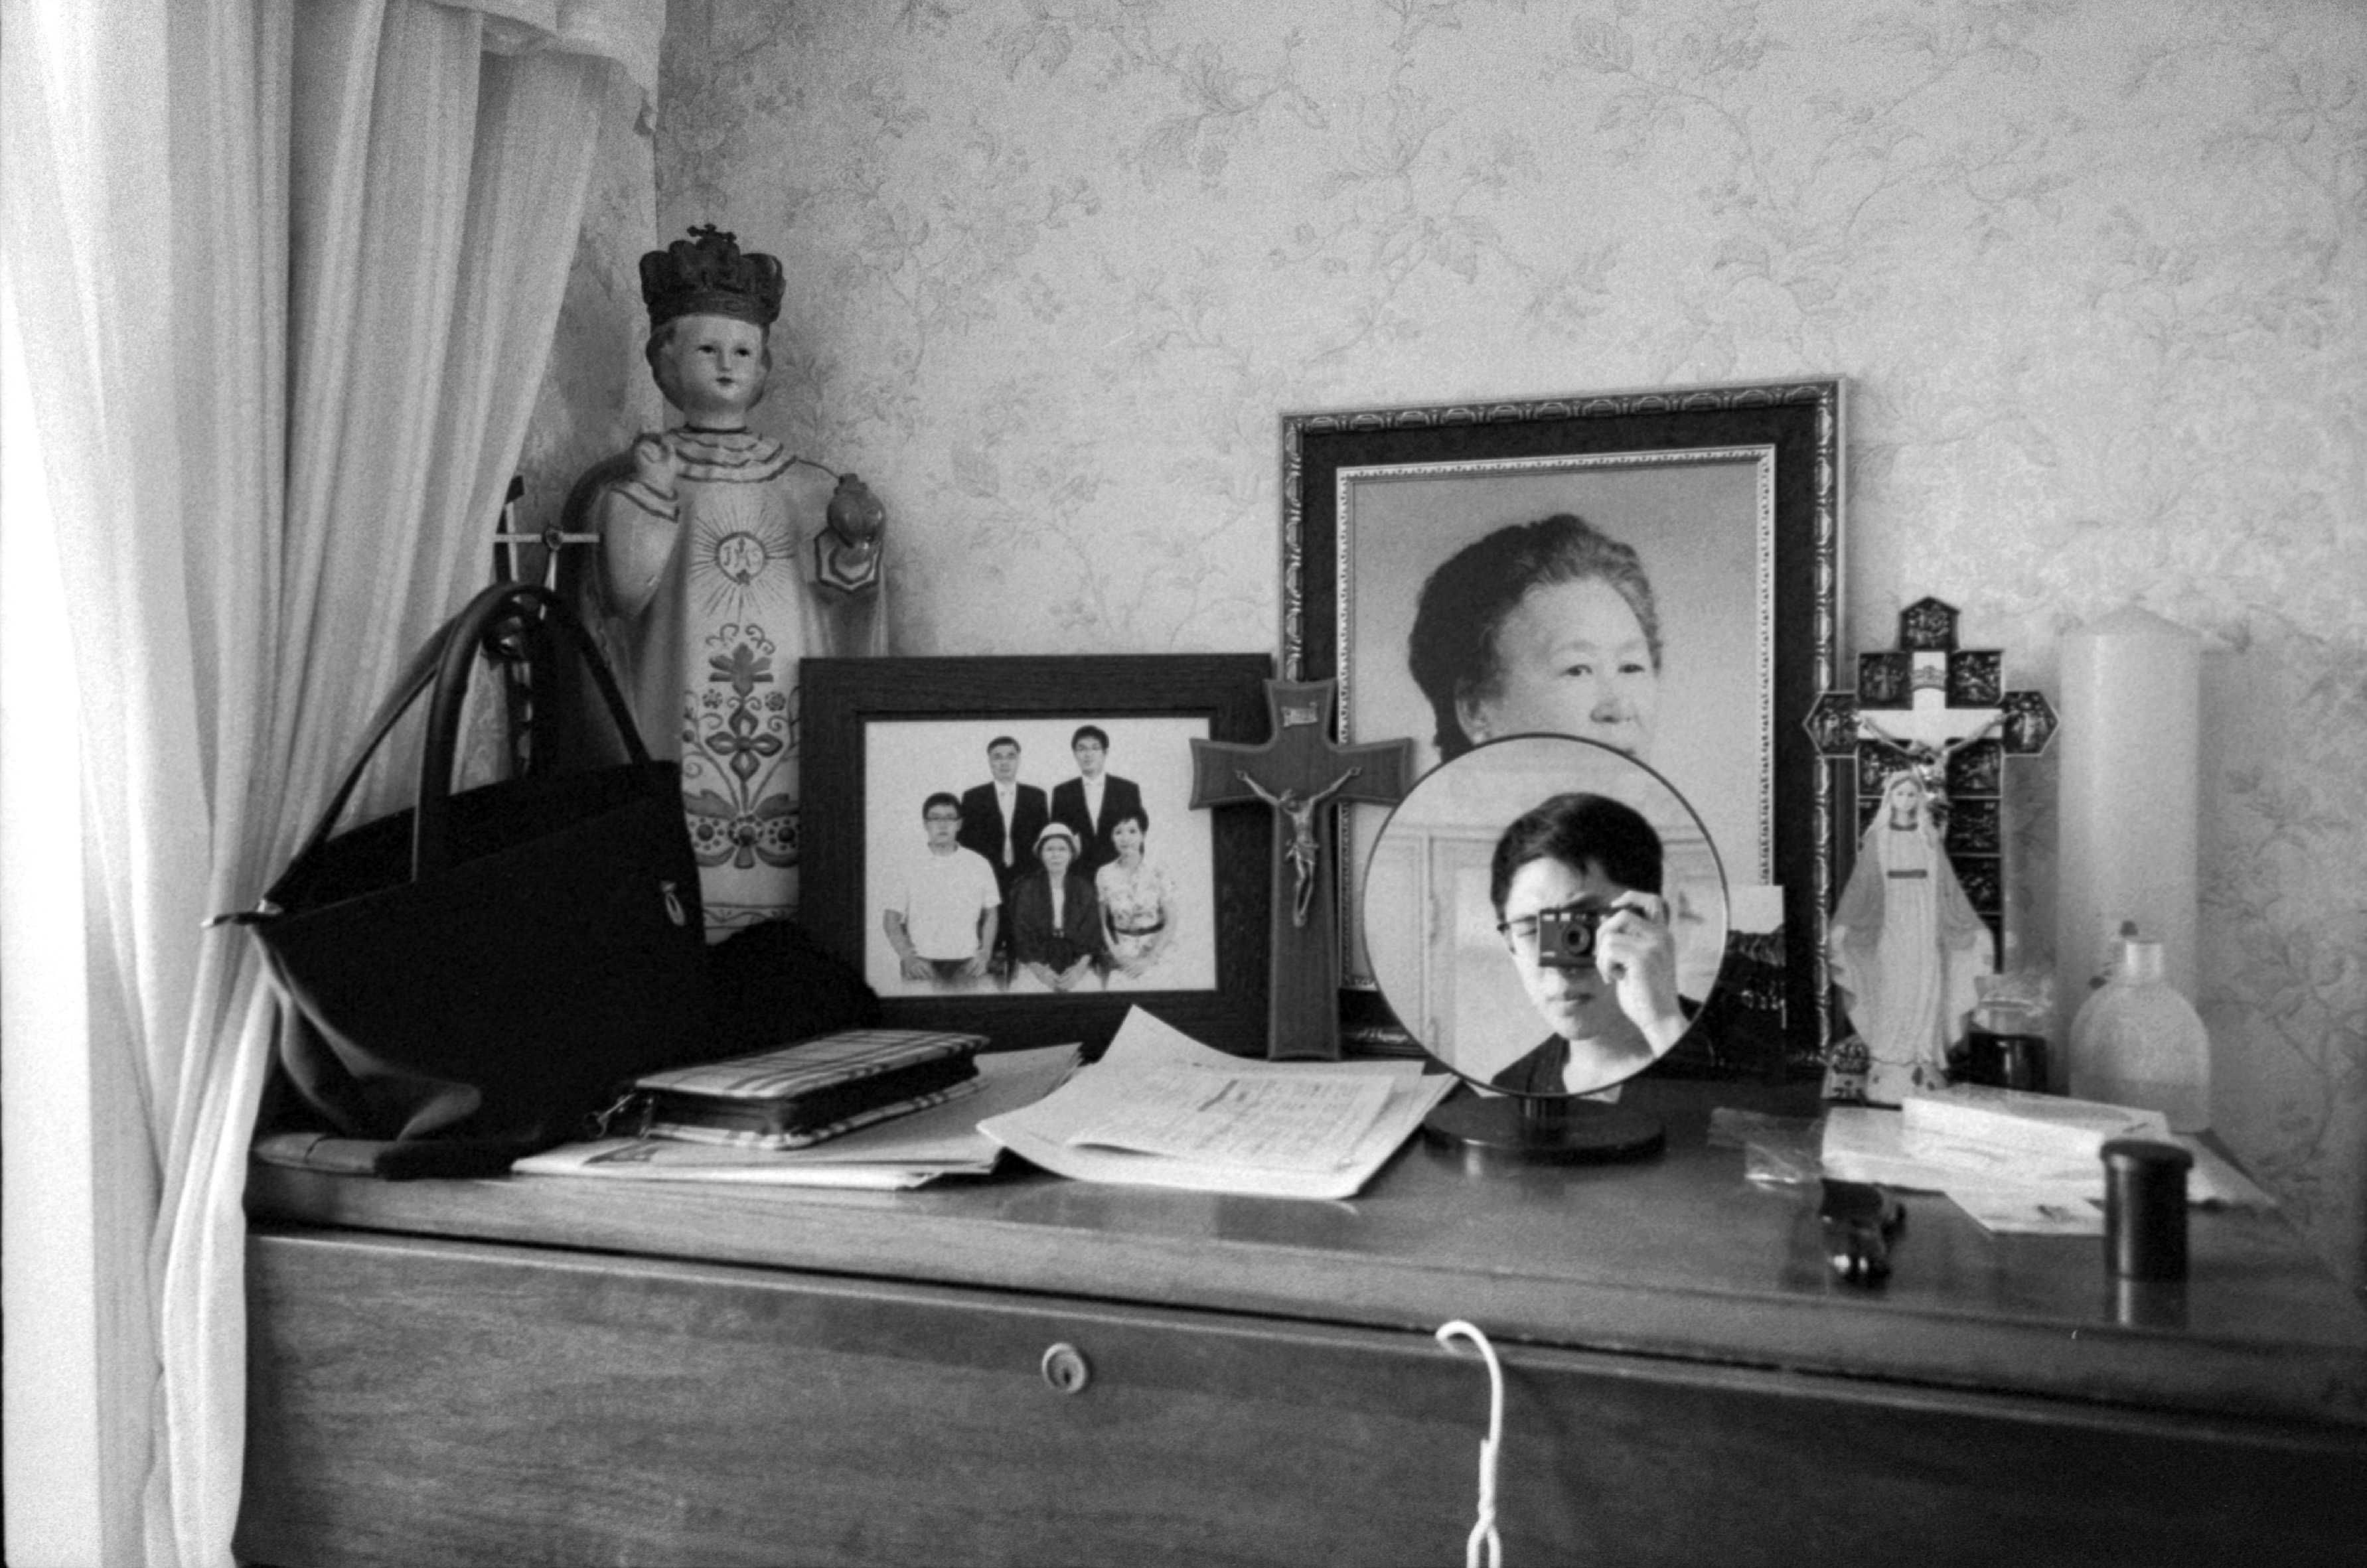
This guest blog post is by JT White, a street photographer based in Seoul, Korea.
JT: I get asked a lot about film versus digital.
I use both film and digital cameras. Which, depend really depends on a lot of things. It can depend on my mood or on the lens I want to use. I don’t think I really have much of an aesthetic style as opposed to a way of shooting. I decide what camera to use depending on what I have and what my subject is going to be.
I just finished a new book: “The Obstacle is the Way” by Ryan Holiday. The book is a huge source of inspiration for overcoming challenges– and using them to your advantage. In-fact, Ryan uses the quote from Marcus Aurelius for the title of his book: “The obstacle is the way” meaning that if it weren’t for obstacles in our life, we wouldn’t grow, develop, and mature.
I thought a lot about the obstacles I’ve faced in street photography– and how I have used those negative experiences and turned them into positive ones. Here are some thoughts on how you can continue to grow and develop in your street photography– and utilize negative experiences to your benefit.
We would all love to be more creative in our street photography. We want to create work that stands out from the crowd. We want to create images that connect emotionally to our viewers. We want our images to inspire our viewers. We want our images to speak from our heart, and communicate messages to our viewers.
How do we find more creativity in street photography? I have written about creativity in the past, but have recently been inspired by a new book– “Creativity, Inc.†by the president of Pixar.
Pixar is one of the most creative studios in the world. In my opinion, they haven’t made a bad movie so far. In addition, all of their films have been wildly successful both artistically and commercially all around the globe.
I wanted to use this article as an opportunity to meditate upon the creative process a bit more–and see how we can apply it in our street photography (and other parts of our life).
When I started off in street photography, I believed in the “myth of the decisive momentâ€. What do I mean by that?
Well, when I first heard of “The Decisive Moment†by Henri Cartier Bresson, I had the wrong impression that he only took one photo of a scene. I imagined Henri Cartier Bresson waltzing into a street scene, carefully aiming his Leica, and taking only one shot and creating masterpieces. I thought he was a demigod– a photographer who somehow had this magic behind his lens.
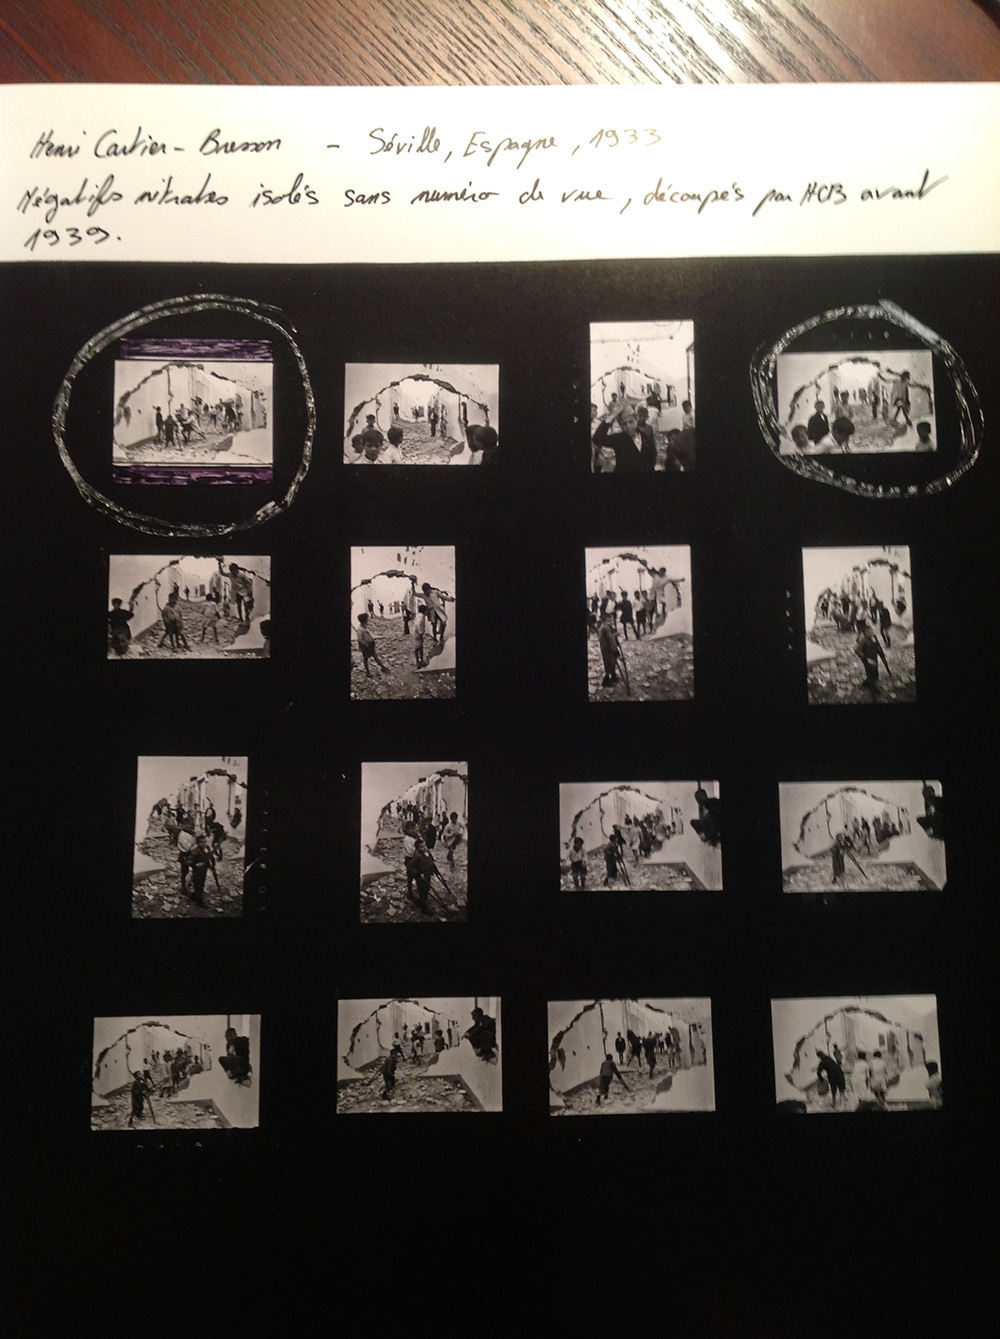
However if we look at his contact sheets, it is a different story. He (and almost all great photographers) never only take one photo of a great potential scene. Out of Henri Cartier Bresson’s contact sheets, you can see that almost all of his great images required him “working the sceneâ€â€“ taking multiple photos of the same scene at different angles, moments, and perspectives. He hustled hard to get the shots he wanted– and would spend considerable time with his contact sheets, determining which photos he decided were his “bestâ€.
Close-ups of the contact sheet from Seville, by Henri Cartier-Bresson:
One mistake that I see a lot of beginner street photographers is that they only take one photo per scene. I think this is because they too believe in the “myth of the decisive moment†and partly because of the fear that they will be caught taking photographs.
I have written about contact sheets several times before. For those of you who aren’t familiar with what a contact sheet is it is pretty much a sheet of paper which shows all the photographs a photographer shot on a roll of film. And with this sheet of paper, a photographer can use a loupe (small magnifying glass for the eye) and edit (choose) their favorite images. This was done in the days of the darkroom, and when digital didn’t exist.
Now of course, we have “Lightroom†where we can identify all of our photos of a scene digitally. Instead of having to look at tiny thumbnails, we can now see all of our “almost†photos in full resolution.
Contact sheets are the best learning tools for a photographer. You can learn from contact sheets from other photographers, and also from your own contact sheets.
Henri Cartier-Bresson. SPAIN. 1933. Valencia. Note the two versions of the photo he was considering from. This was the best.
Henri Cartier-Bresson. SPAIN. 1933. Valencia. This image wasn’t as strong as the prior.
Analyzing contact sheets from the masters who came before us is the closest thing we have to reading their minds. We can see how they “worked the sceneâ€â€“ and how they took photos from different perspectives, decided when to hit the shutter, and how many photos they decided to take. Some photographers are able to “nail†their photos in just 5-6 shots, while other photographers will shoot a full roll of 36 photos in just one scene.
Realize that all these master photographers were shooting on film, where it actually cost something to photograph. Now that most of us shoot digitally, there is no excuse for us to not “work the scene†and take many different photos of the same scene.
Okay, so we’ve talked about the importance of “working the sceneâ€â€“ and how important it is to take multiple photos of a scene (not just one photo). So how do you exactly “work the sceneâ€?
Once again, it is very tempting to only the one photograph when you see a good scene. When I started off in street photography, I would be deathly afraid of offending people or being “caught in the act†of photographing strangers.
However realize that to make a great photograph, you need to work the scene. You will never know when the “best†decisive moment will occur. In a scene, there are many different great potential “decisive momentsâ€. You generally only know which is the best “decisive moment†afterwards in the editing phase.
Another practical tip to better “work the scene†is to not “chimpâ€. What is chimping you ask? Well, it is when you look at your LCD screen after you take a photograph. Why do they call that “chimpingâ€? Well, apparently film photographers used to make fun of digital photographers by saying they looked like a bunch of “chimps†(or monkeys) when they would crowd around their LCD screens and show off the photos they just took.
So what is so bad about “chimping†anyways? I’ve written an article on why street photographers shouldn’t chimp– but to sum up, chimping kills your flow when you’re out shooting on the streets. Rather than checking your LCD screen several times while working a scene to check for exposure, framing, and what you captured– it is better to just take a lot of photos at different angles and moments and choose the best photos later.
“Lingering†is one of the most difficult things about “working the sceneâ€. Lingering is to “overstay your welcomeâ€. It is generally rude to “lingerâ€. Lingering is like “loiteringâ€â€“ you hang around longer than you should, and people look down on it.
One of the most frequently asked questions I get in my workshops is, “How long should I ‘work a scene’ and linger before I know it’s time to leave, or I got the shot?â€
Well, that is the big problem. We have no idea when we either “got the shot†or we’ve hung around “long enoughâ€.
Personally, my philosophy is to be the houseguest that overstays his or her welcome. Did you ever have a friend who asked to stay at your place for a week but ends up staying a few months? Be that guy.
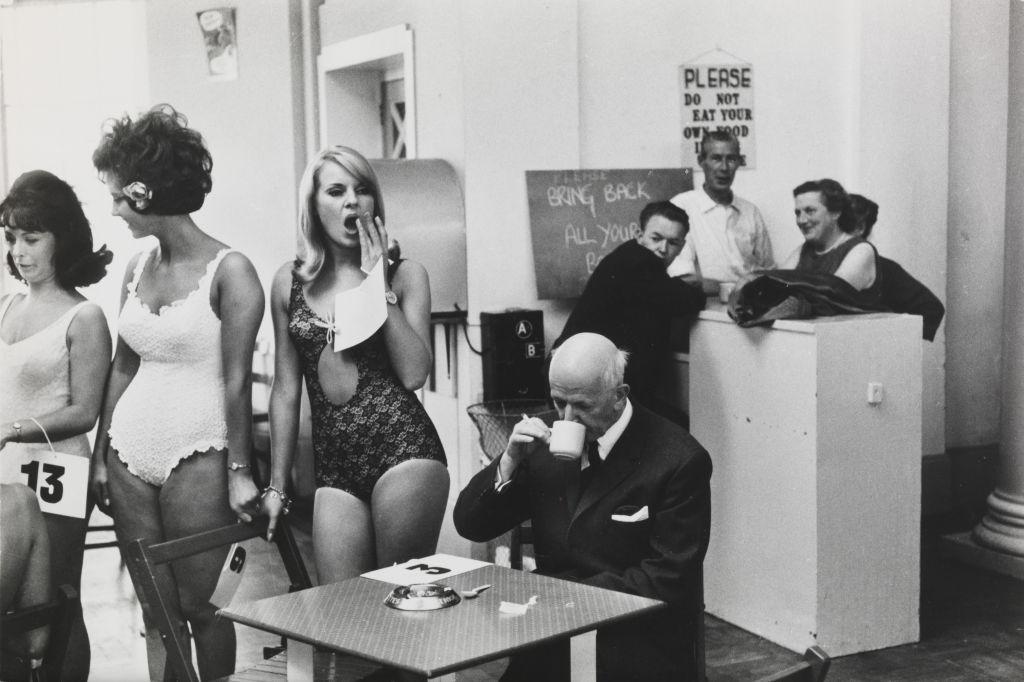
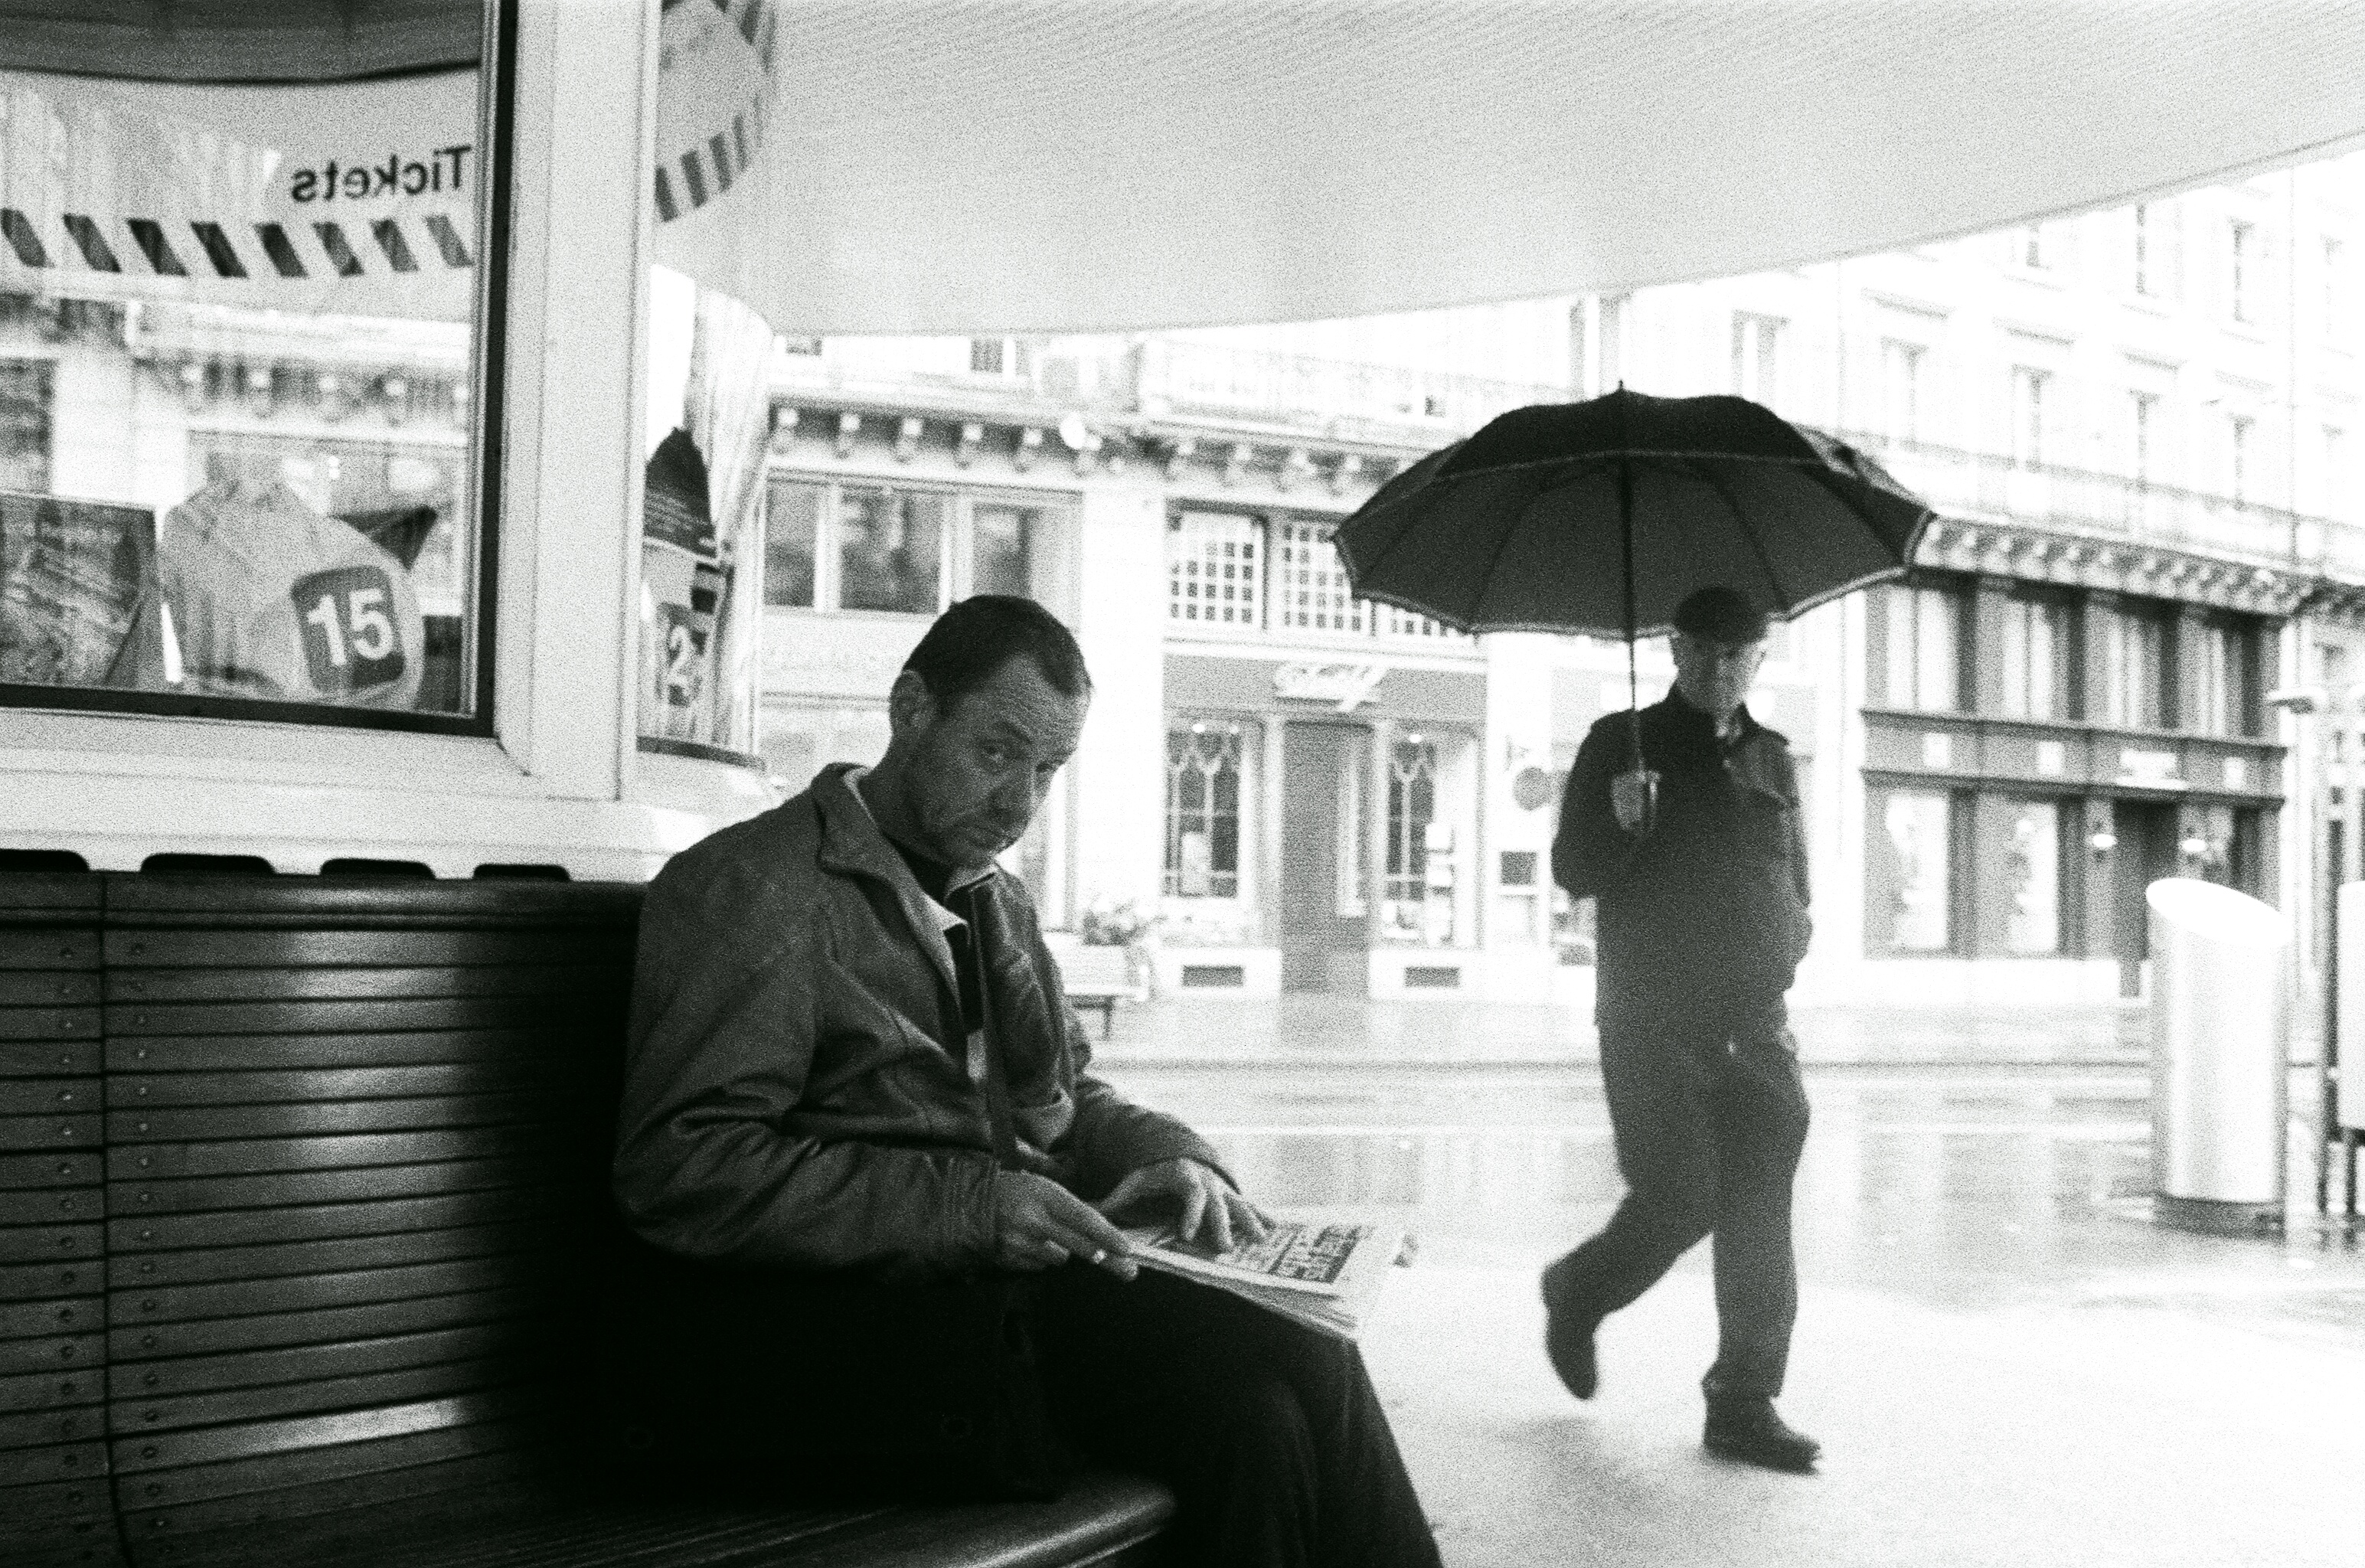
The reason I advocate for “overstaying your welcome†is because it is better to linger for a longer period of time because often your best shot will be the last shot. Looking at a lot of contact sheets, especially this image by Richard Kalvar, you see that his best image was at the very end (on his 37th frame, quite lucky). If he didn’t linger around and work the scene, he would’ve never gotten his iconic shot.
Furthermore in street photography, you will only see a great potential scene once in your life. You might see similar scenes, but you will never see the same exact scene with the same exact people, with that background, that light, and that configuration.
So don’t live with regrets, linger around longer than you should– and “overshoot†a scene.
A technique I learned from my friend Charlie Kirk is if you see a great potential scene, hang around and wait a bit longer before you go in and start taking photos. For example, if you see a cool looking guy smoking– linger around him and wait for him to take a puff– then jump in and take a few shots of him inhaling his cigarette.
Lingering is quite painful to do. It is awkward, makes you feel uncomfortable, and might make your subject feel uncomfortable.
One way I get over the awkwardness of lingering and “working the scene†is by pretending I am photographing something behind them and avoiding eye contact. Because I shoot with a 35mm lens, I don’t have to point my camera directly at my subject to get them in the frame.
Another technique is to smile and interact with my subject while photographing them. For example, if I see a good scene, I might start off by shooting candidly– then if my subject makes eye contact with me, I will also make eye contact, smile, keep shooting, and even start chatting with them (hey, you’re looking good!)
When you are “working the sceneâ€â€“ don’t just put your camera to rapid fire mode and start shooting aimlessly. Rather, be very conscious about when you decide to click the shutter.
Generally I make the decision to click the shutter when I see hand gestures. It can be a gesture of someone covering their face, holding their hands by their sides, or pointing in a certain direction.
Another great tip is to wait for eye contact. Try experimenting taking photos without eye contact, and some photos with eye contact. You never know which photograph will be better. But there is a saying: “eyes are the windows to the soulâ€â€“ which means if you get eye contact in your street photographs, they can be more intimate and emotional.
5. Keep your feet moving
If you ever watch a boxer, they rarely keep their feet still. The most important thing as a boxer is to never put your heels on the ground. The moment you stop moving is the moment you become a sitting duck– and will be a prime target to be knocked out by your opponent.
Take the same mindset as a street photographer. When working the scene, don’t just keep your feet planted on the ground. Keep your feet moving. Take photos from the left, right, take a step forward, a step backwards. Crouch down. Get different angles and perspectives.
6. Shoot both landscape and portrait photos
Contact sheet, VJ Day. Photo by Alfred Eisenstaedt
Also when working the scene, try experimenting taking your photos in both landscape (horizontal) and portrait (vertical) modes. When you are in the heat of the moment and see a great street photography scene, it is often difficult to know which is the “better†orientation of your camera for the scene.
So if you have time, try to work out both orientations of your camera– depending on what kind of image you want to create.
7. Be calm and patient
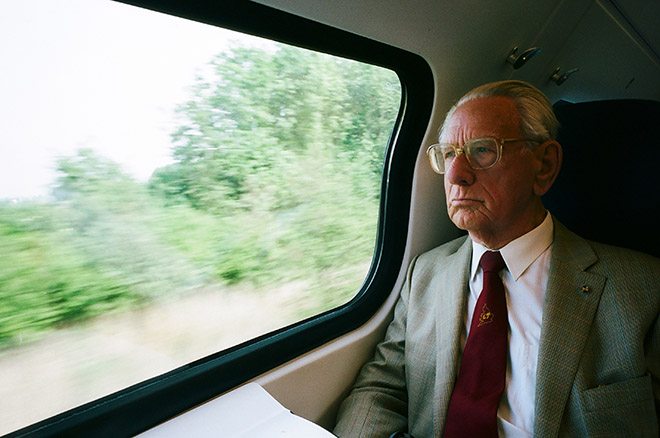
Jean Gaumy, Iran, 1986.
When you are working a scene, remember to try to stay calm and patient. We can sometimes get into a frenzy when working the scene, and trying to get “the shotâ€. However be calm and patient while you’re shooting– by analyzing when you need to hit the shutter, how close you need to be to your subject to frame them properly, and distracting elements in the background.
Jean Gaumy, Iran, 1986.
When you start off working the scene as a beginner, you might get too much of an adrenaline rush to stay calm and patient when shooting. But realize that with practice be time, you will be more calm and patient when working the scene– which will help you make better rational choices while shooting, and ultimately help you make better images.
When we are shooting on the streets, we can often focus too much on the subject and not enough on the background.
My advice is once you’ve established who your primary subject (or subjects) are– focus your eyes on the background. Try to get a clean background that doesn’t district– and adds to the scene.
Try to avoid getting random heads, poles, trees, or cars in the background. When you are working the scene, move your feet to get a cleaner background. Messy backgrounds are one of the biggest killers of great potential street photographs.
Conclusion
Contact Sheet by Martin Parr from Spain, 1997
To increase your odds of getting “keepers†in street photography, try practicing “working the scene†and lingering longer than necessary. Don’t keep your feet still, always be moving. But at the same time be patient.
Photo by Martin Parr from his “Common Sense†book. Spain, 1997
Also know that by working the scene longer than you need to, it will be strange and awkward. But with time, patience, practice, and a smile– you will be able to overcome this.
If you want to build your confidence in street photography and learn to better “work the sceneâ€â€“ join me at one of my upcoming street photography workshops!
Recently I’ve been getting really into Dieter Rams and his zen and minimalist philosophies when it comes to design. He has a famous list of “10 Principles of Good Design.” They are the following:
Good design is innovative.
Good design makes a product useful.
Good design is aesthetic.
Good design helps us to understand a product.
Good design is unobtrusive.
Good design is honest.
Good design is durable.
Good design is consequent to the last detail.
Good design is concerned with the environment.
Good design is as little design as possible.
I was inspired by his list, and thought I would do an homage to him by writing this list: “10 Principles of Good Street Photography†— read more to see how I applied Rams’ principles to street photography!
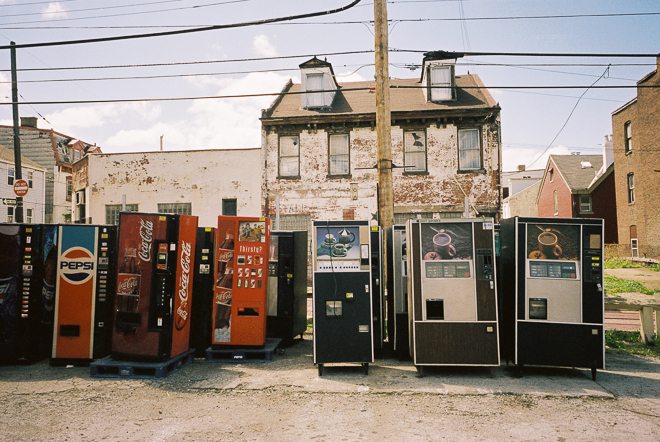
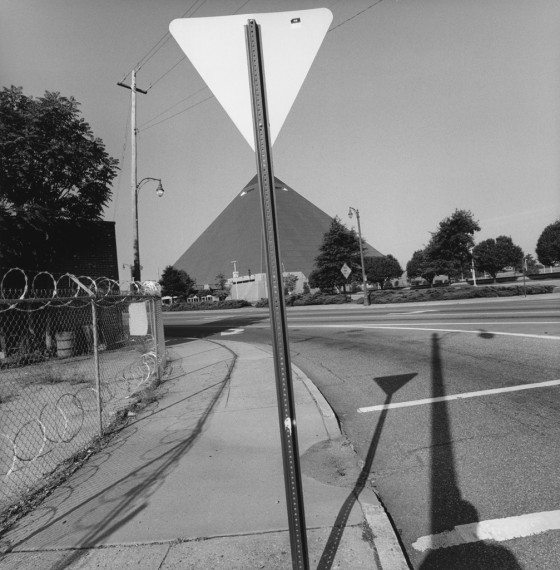
Photos in this article are part of my on-going “Somewhere in America” Urban Landscape series.
I recently finished a book titled: “Essentialism: The Disciplined Pursuit of Lessâ€, which made me think a lot about my life, the blog, and street photography. To sum up the book, the author praises the “less is more†ethos, and encourages us to do “less, but betterâ€.
I got inspired to write this article on how being an “essentialist†can help us in our street photography. Below are some ideas you can apply to your work and approach:
Brandon Stanton from Humans of New York shares some insightful tips on how to approach strangers on the street. If you’ve ever been nervous approaching strangers, this will be a great watch for you!
Rinzi and I talk about overcoming subject fatigue, the famous Rinzi style and how it came about, preparing a photo trip, the perfect street shooting camera, appearing benevolent and adjusting your energy, the importance of facial expression and, of course, the ultimate zen experience.
It doesn’t take too long to create a solid body of work. If you are diligent, you could do it in 2 years. Other bodies of work can take you 5-10 years.
This sounds like a long time, but it isn’t. Time flies by extremely quickly. Do you remember being a college freshman, blinking your eyes, and suddenly you graduated? Do you remember being at your job the last 4 years? Do you remember seeing your kids grow up the last 4 years?
Of course it is always hard to make time for our photography. Life always gets in the way. But if you stay your project or body of work today, you will have images you are proud of in just a short time.
I also advocate working on a series or a project rather than just single images. 4 years working on just single images can net you a few interesting standalone photos. But 4 years working on a project can help you create a memorable body of work, which allows you to go deep into your subject matter and create more meaningful work.
So what do you have to lose? Start your body of work today.
This post is by Dan K, a writer, camera collector, and photographer from Hong Kong.
Dan: Today I have the pleasure of summarising Eric Kim’s contribution to street photography. At a loss for ideas, I threw the question open to my social media followers. Big mistake! All I got was flames and no tips at all about actual street photography.
When the seat of my pants had sufficiently cooled, I sat back and mulled it all over. Why is one of our generation’s best known street photographers so successful when opinion of his work is so… “divided”?
What can we learn from the way he works that would be useful to the modern street photographer keen to emulate his name recognition?
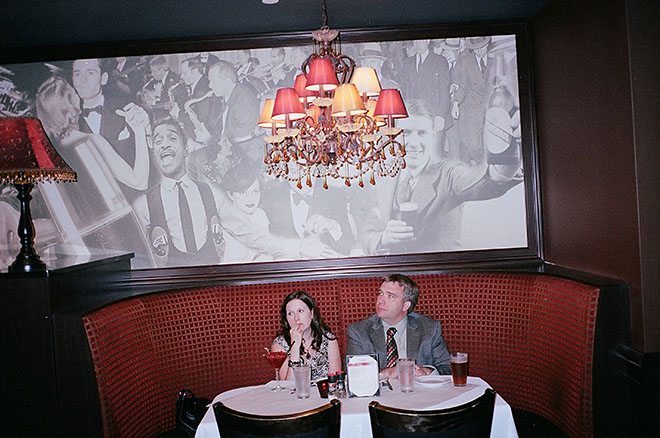
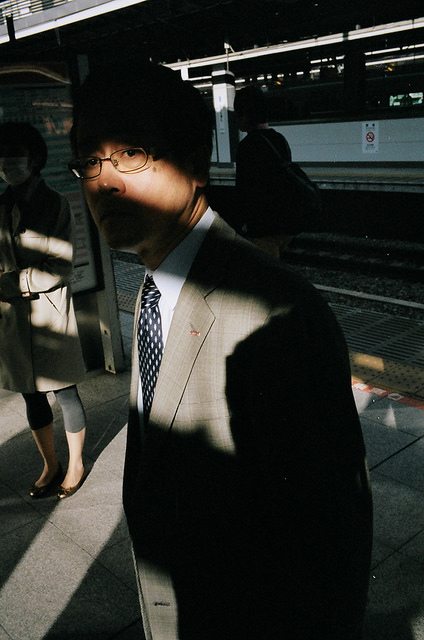
Lansing, Michigan 2013. Part of my on-going “Suits” project.
Thanks a ton to Michael Meinhardt for interviewing me for the “Shooting Street†podcast. We talked about shooting street photography with flash, finding your own style, overcoming boredom, shooting film, photo books, and ideas for the future! Check out the hour-long interview below:
The photos in this article are from my new “Detroit” series.Â
I’ve had the pleasure of being a judge for a handful of street photography competitions: including the International Street Photography Awards 2012, the Urban Picnic Street Photography Contest in 2013, and the International Street Photography Awards 2014.
It was a fascinating experience being a judge– and it has taught me a lot of lessons in terms of how to judge others’ work. More than that, it has taught me to better judge my own work. Here are some lessons I’ve personally learned being a judge, and some tips I suggest when you enter a street photography contest:
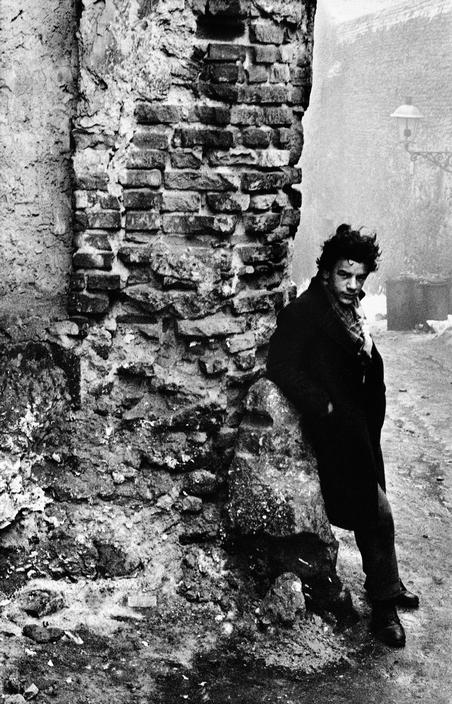
All photographs in this article are copyrighted by Josef Koudelka / Magnum Photos
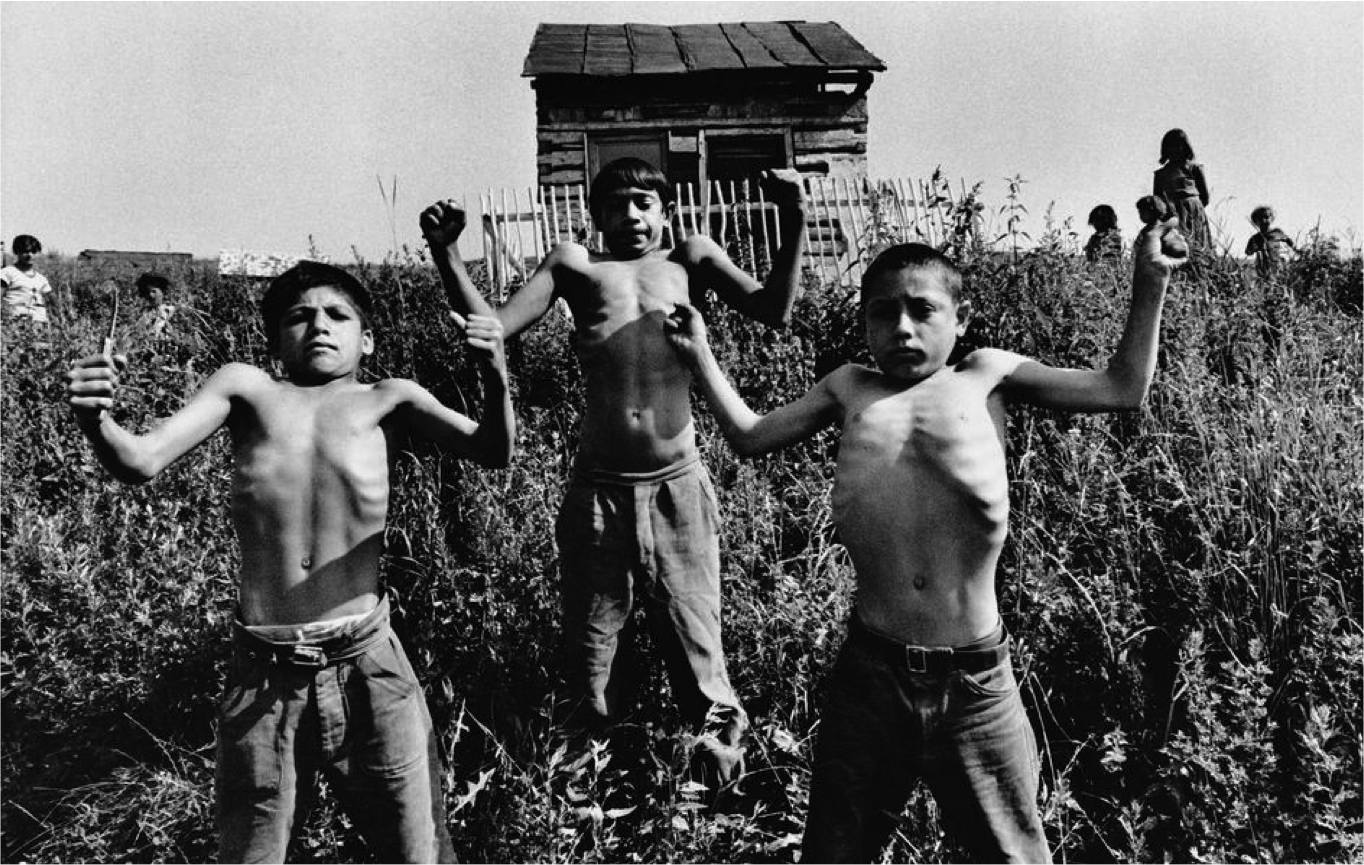
To continue my street photography book reviews, I wanted to write about “Gypsies” — one of my favorite street photography books of all-time, shot by Josef Koudelka, Magnum photographer.
To give you a bit of background, Josef Koudelka is one of the greatest living black and white photographers of the century– both revered for his phenomenal photography and his obsessive passion for photography.
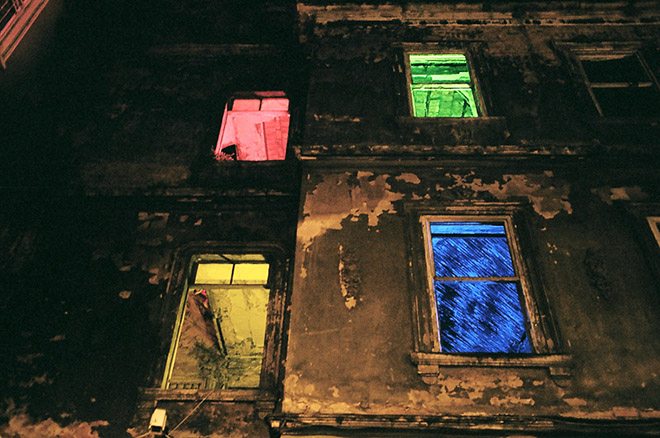
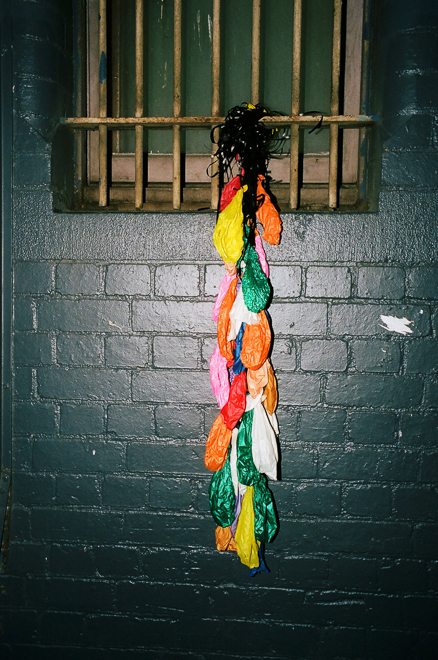
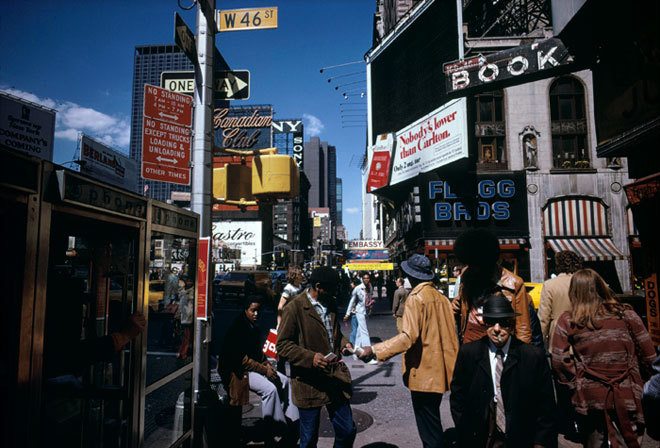
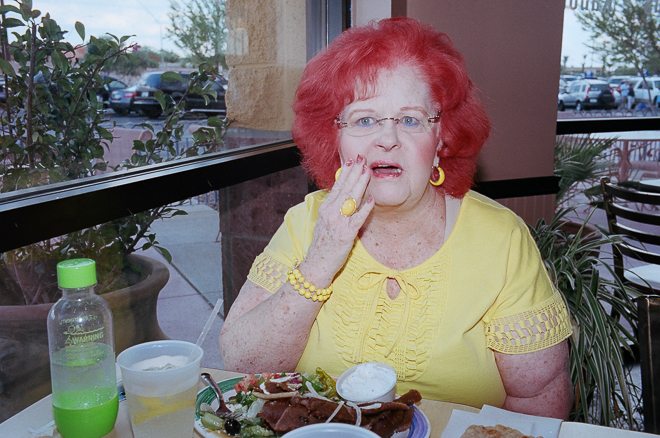
Photos in this article are from my on-going “Colors” series.
I recently read a book titled: “Die Empty: Unleash your Best Work Everyday” and found great inspiration in it. It is a great book in which the premise is easy: will you die with all of your dreams, aspirations, and talents inside of you– or will you work everyday towards emptying out your mind of al these great ideas and thoughts? Will you lie on your deathbed having any regrets? Or will you die empty having dedicated everyday towards your life work dying empty without any regrets. You certainly don’t want to die full of regrets.
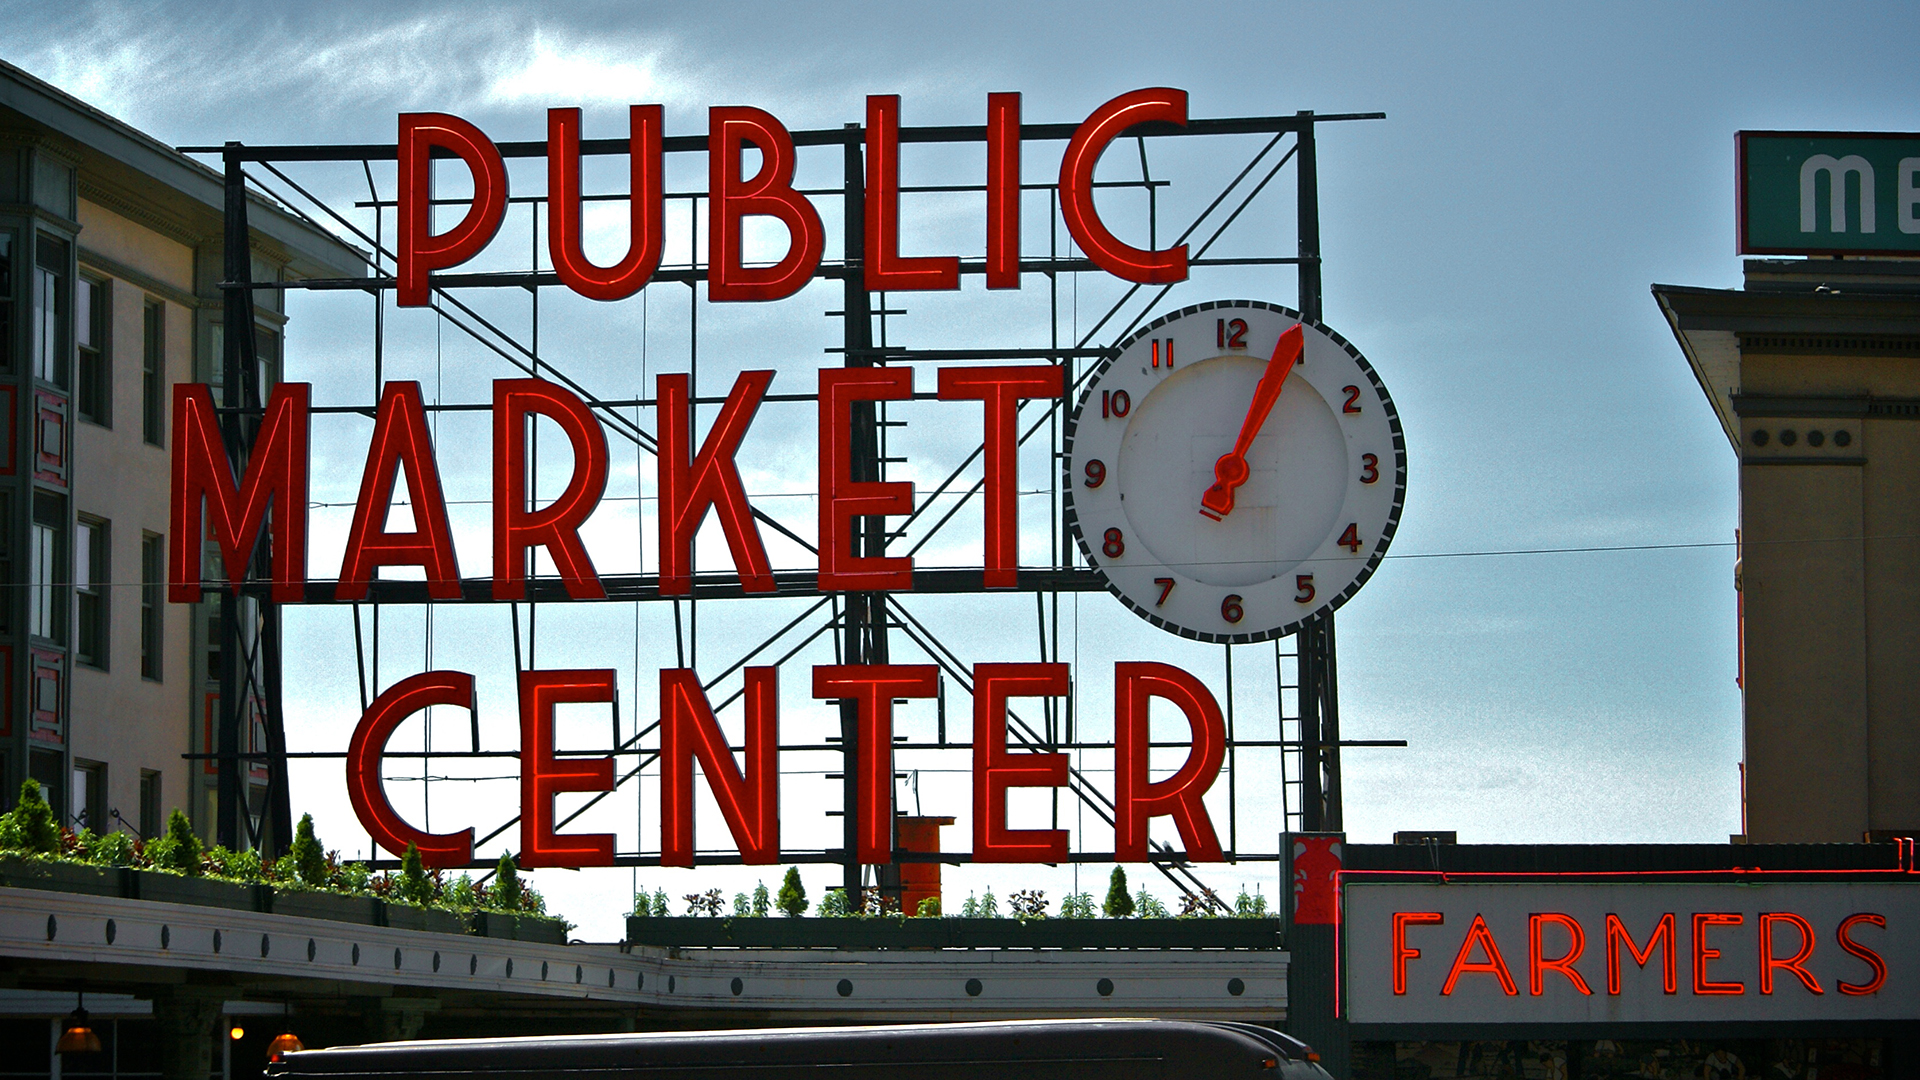
I recently traveled to Seattle and taught a street photography workshop there. As a native Californian, I never ventured to the Pacific North-West, and man– I was impressed. I think Seattle is seriously one of the most underrated places in the West Coast (and in America as well).
If you ever have the chance to visit Seattle (flights are quite affordable via Southwest, a one-way from SFO was only ~$69). So if you want a weekend getaway somewhere– Seattle is your place to go.
Huge thanks to Walter Lau who was my generous host during my time there with Cindy. He showed us all the great spots in Seattle, and here are some of his recommendations in terms of where to shoot, where to have coffee, to get food, and drinks! If anyone also wants to meet up with some other great street photographers in Seattle, check out the Seattle Streettogs Group on Facebook.
All photos in this article are copyrighted by Joel Meyerowitz.
I am surprised I haven’t written an article about Joel Meyerowitz yet. He is one of the living legends and masters in street photography, currently at 75 years old. He shot in the streets with other legends such as Garry Winogrand, Tony Ray-Jones, and even bumped into Henri Cartier-Bresson on the streets once.
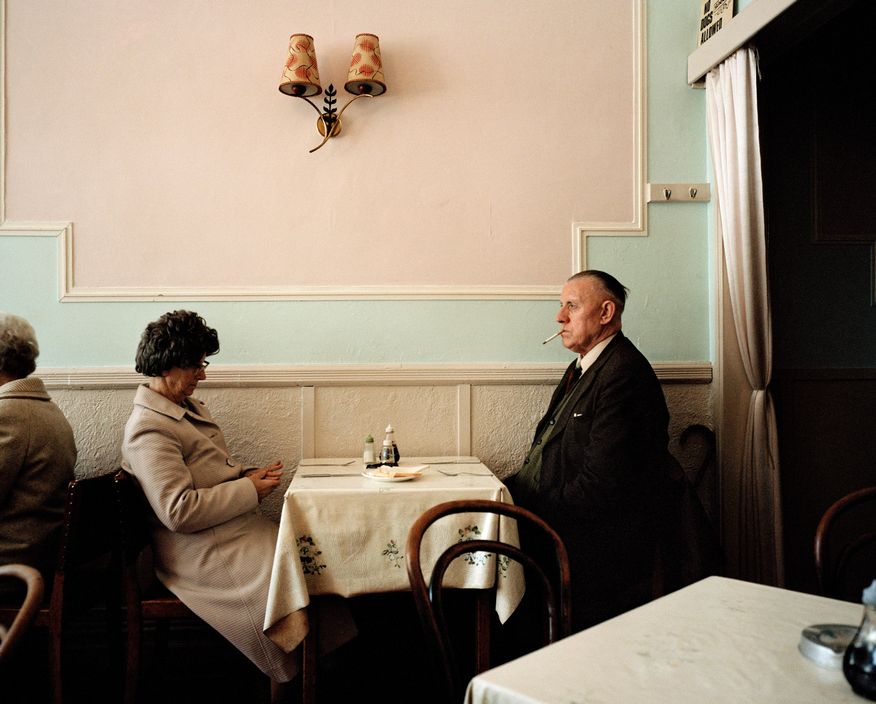
All photographs in this article are copyrighted by Martin Parr / Magnum Photos. Warning: Some of the shots in the book are NSFW as they show child nudity.
One of my favorite color photography books is “The Last Resort” by Martin Parr. For 2014, I want to start doing more book reviews– sharing some of my favorite books, sharing why I love them, and trying my best to analyze and share my observations about them.
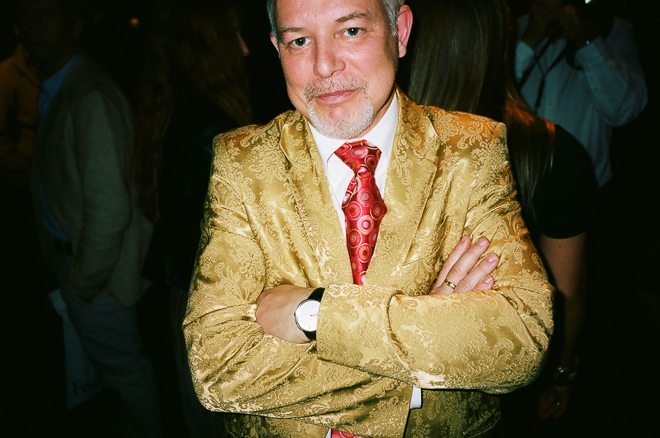
Photos in this article are outtakes/shots I am considering from my on-going “Suits” project.
One of the things I love most about street photography is how open and democratic it is. Anybody with any camera can shoot street photography. You don’t need anything fancy. Not only that, but street photography is accessible to everybody. You don’t need to be in Paris– you can simply shoot in your backyard.
However one problem that plagues street photography and life in general is this need for status.
In this article I will touch upon two aspects of status when it comes to street photography: 1) Status via cameras/equipment, and 2) Status via social media:
Photos in this article are from my on-going “Suits” project.
One of the things I notice a lot at my workshops and when I see work online is how there tends to be a lack of consistency in people’s images.
I think while it is great to experiment and try out new things– at the end of the day to create a personal style and vision– you need a sense of consistency.
Now that the new year is under way, I thought it would be a good idea that we could all choose a new year’s resolution in street photography.
I know how difficult it is to keep to a new year’s resolution, but I think it is something fun that we can all look forward to. I just came up with some ideas that we could try experimenting or doing for 2014. Feel free to pick and choose what appeals to you:
Below are some personal new years’ resolutions I am going to make for myself in 2015. I will probably break some of them, but will try my best to stick to them. This is advice I will give to myself— and feel free to pick any of these ideas for yourself (or modify them as you see fit). This list is inspired mostly by Nassim Taleb’s New Years Resolutions for 2015.
Here is my personal street photography resolutions for 2015:
Don’t buy any photo books I don’t plan on re-reading.
Buy at least 1 photo book a month (and get to really know it).
Give at least 1 in-depth comment/feedback/critique (once a week) to a street photographer who doesn’t get any favorites, comments, or feedback on his/her photos.
Try to meet a lonely photographer once a month for a coffee (with no expectation of “networking†or “gain†on my end)
Don’t go a single day without taking a photograph (smartphone is fine).
Don’t own more than 1 type of camera (only own 1 35mm camera, 1 medium-format, 1 digital). If I accrue more than one of each type of camera, either give away to friend or sell. Don’t accept any free cameras (that I wouldn’t buy with my own money).
Walk for at least 15 minutes everyday to make photos (I’m becoming a fat and lazy car-dependent American).
Focus on education and creating value (not money, fame, or external recognition). Engaging the street photography community more and always try to help.
Make my photographs more personal.
Have at least 1 exhibition of my photos (and also curate at least 1 group exhibition). Teach at least 1 free workshop for charity.
What are some New Years’ Resolutions that you have for yourself when it comes to your photography? Share them in the comments below!
I have never been the type of person to reflect on life. I generally tend to always live in the present moment– and don’t spend too much time thinking about the past or the future. But the quote that always comes to me from Socrates is: “The life unexamined is not a life worth living.”
Ever since I got laid off my job (June 13, 2011) life has been zooming past before my eyes ridiculously quickly. It has been around 2 years and 6 months since I have been doing street photography “full time.” and wanted to use this opportunity to just share some of my thoughts and what I am grateful for.
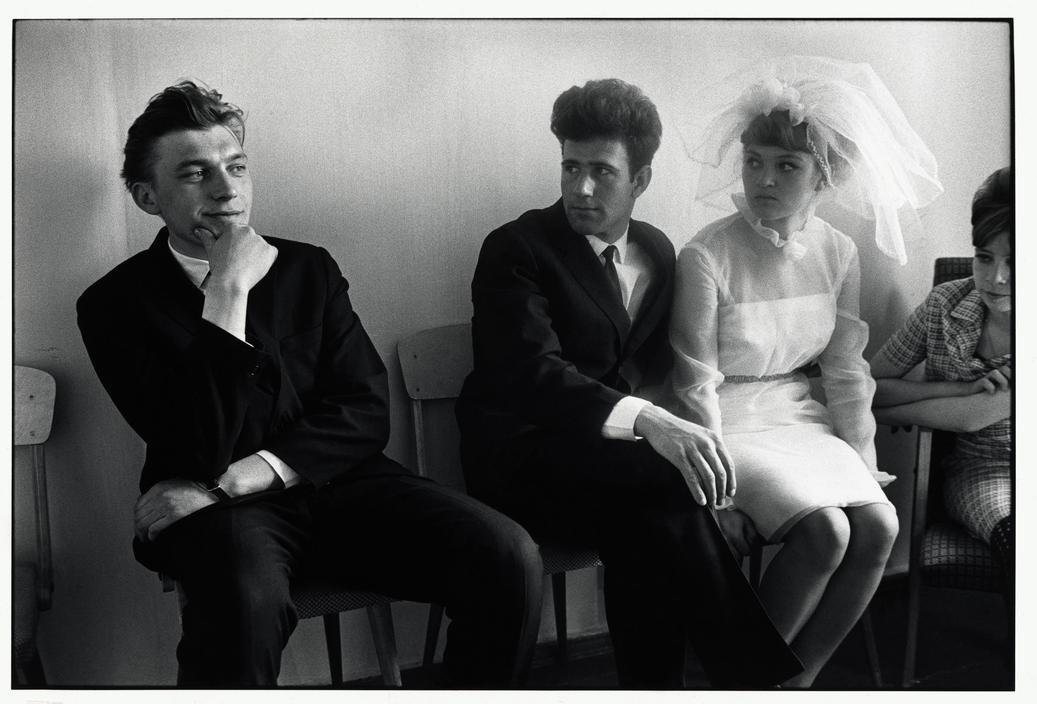
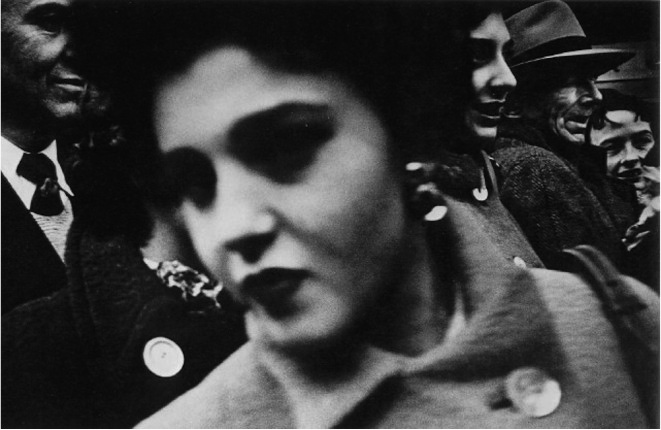
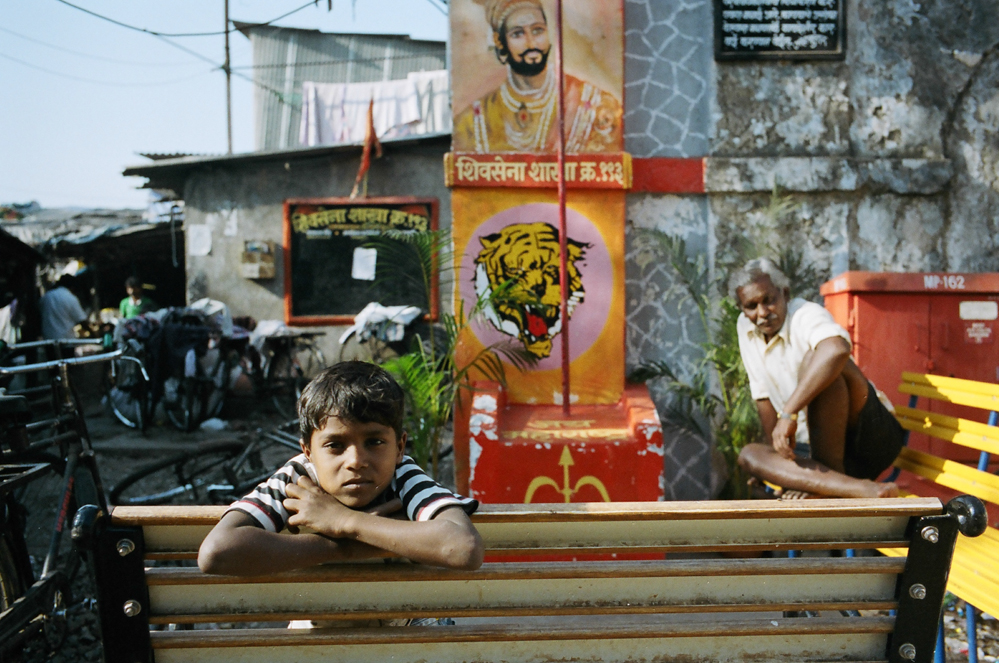
I think one of the most difficult compositional techniques in street photography is to incorporate multiple subjects in the frame — without it becoming too cluttered or overwhelming. Generally the problem is that most photographers that try to incorporate multiple subjects have some of the following problems:
Overlapping subjects
Distracting backgrounds
No central subject
Not enough points of interest
In this article I will share some of who I think are the finest photographers to have used multiple-subjects in their photos. I will analyze the images, and hopefully provide practical tips to anyone trying to incorporate more multiple subjects in the frame.
I recently attended Elliot Erwitt’s “100+1” exhibition at Fotografiska, which will be in Stockholm from December 6, 2013 to March 2, 2014. We were given a brochure with great practical advice for street photographers– which I have shared here. This text for the article is extracted from the foreword dedication written by Elliott Erwitt for the book “Personal Exposures.”
Photos in this article are from my road trip from Michigan to California.
One thing I hate about the modern world is our addiction to speed. We want everything to be done faster, more efficiently, and better optimized. We are frustrated when we are loading up a website on our smartphones and it takes longer than a few seconds. We hardly have the patience to cook anymore, so we just pop something in the microwave. We then inhale our food in a few seconds so we can get back to work and be more “productive.”
Besides street photography, I have a great interest in sociology, psychology, and philosophy. What I love about all these side-fields is that they overlap and add unto one another. Not only that, but I have probably learned more about street photography from these outside fields than from the field of photography itself.
A field I have been quite fascinated with is called “behavioral economics” the idea that us humans act “predictably irrational”. This means that we all have similar cognitive biases in certain circumstances. Although we like to think of ourselves as rational beings– we are far less rational than we’d like to believe.
In this article I want to share some insights I have learned from “behavioral economics” (which tends to fit into the field of psychology and cognitive science).
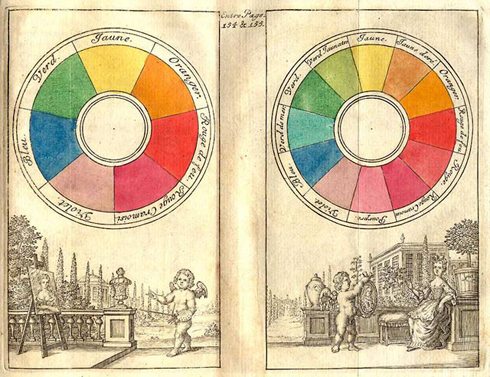
For today’s compositional lesson– I want to talk about color theory— and how you can better utilize colors when it comes to your street photography.
Personally around 2 years ago, I made the switch from shooting fully black and white — to just shooting color film (Kodak Portra 400).
Since then, I have learned to see the world in a totally different way. It has been fun, refreshing, and quite exciting.
However at the same time– shooting in color presented a new bag of worms. Whereas black and white tended to simplify a scene, color could be distracting and take away from a photo (if the colors didn’t add meaning and value).
So for this lesson we will talk about some color theory — in terms of how we can make colors better work for us. I am certainly not an expert when it comes to working in color, but I will try to share some practical tips of how you can better shoot street photography in color.
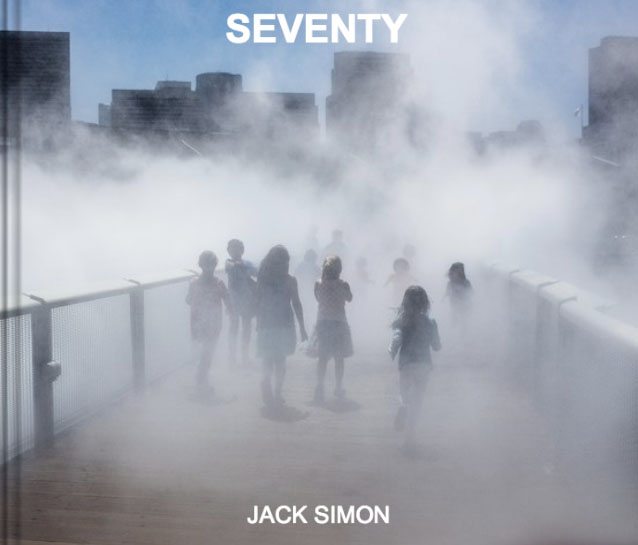
My good friend and talented street photographer Jack Simon (from Burn My Eye) has recently turned 70 years old (he looks about 2 decades younger than he is). In honor of his birthday, he recently published a new book titled: SEVENTY — which is a compilation of 70 great candid photos. He was also generous enough to offer the book free via ebook. More info about the book below from Jack:
SEVENTY is a compilation of 70 unplanned and unposed images. I enjoy the hunt for that moment of mystery, surprise, and humor in my everyday life. I seek images that hint to a larger story, like a publicity still from some forgotten movie. These fragments of fictional stories are drawn from the real world in an odd coupling of my unconscious, my intentions, and chance. As I turn 70, I celebrate these accidental glimpses into other worlds and untold stories that inhabit my surroundings.
If you want to learn more about Jack Simon and his work, you can see this in-depth interview I did with him here.
Jack Simon Shooting the Streets of SF
Below is a fun video I made with Jack shooting in the Mission District of SF:
When it comes to composition– one of the first things you should ask yourself is: “Who is the subject?”
If you have a hard time identifying the main subject (or subjects) in the photo– you are in trouble.
One of the most difficult things to do in street photography is capture multiple subjects well. When there are lots of subjects in our frame, it is often difficult for us to focus on who the main subject is.
So how do we overcome this difficulty? I propose the compositional concept of: “Spot the not.”
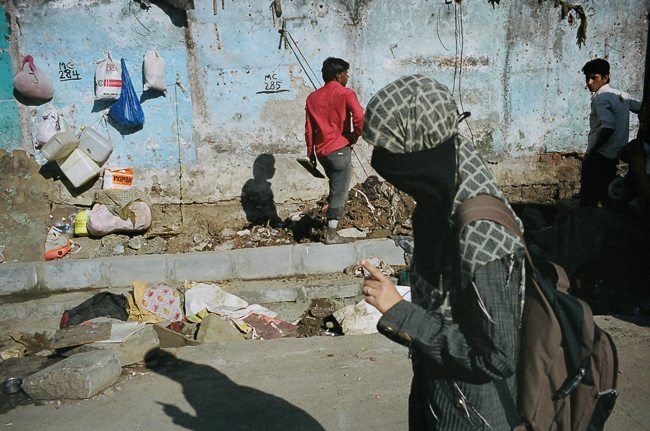
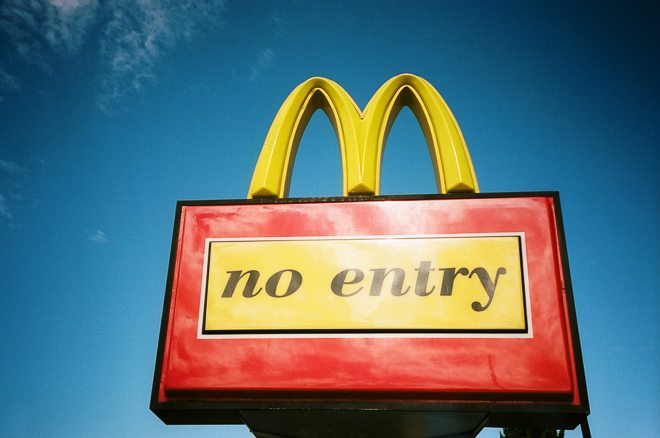
For today’s lesson I want to talk about “urban landscapes.” Urban landscapes aren’t really compositions in the specific sense (compared to lines, curves, etc)– but I still feel they are relevant when creating our street photographs.
If you guys have read my prior lessons on composition– I have thought a lot about what a “composition” really is. For me at the end of the day– a composition can really be anything. The dictionary’s definition to composition is as follows:
Composition:Â The combining of distinct parts or elements to form a whole.
So when it comes to street photography, whatever elements we capture in the background make an image.
I am not exactly sure what direction these “composition lessons” are heading– but thank you for your support. Let us continue to ride the wave– and see where it follows:
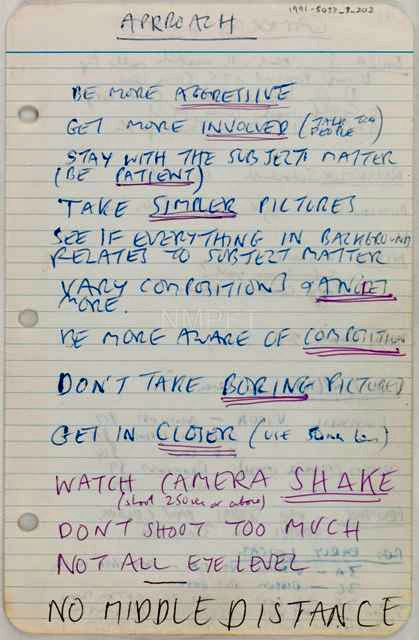
In the late 1960’s, photographer Tony Ray-Jones wrote a hand-written note on his “approach” when he took photographs. I think these tips are lessons all of us as street photographers can learn from him. Read more to see some of his inspirational images (and this list typed out):
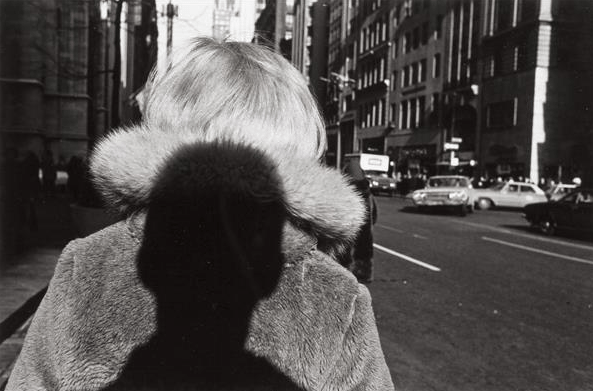
“At first, my presence in my photos was fascinating and disturbing. But as time passed and I was more a part of other ideas in my photos, I was able to add a giggle to those feelings.â€
For today’s compositional lesson I want to introduce the idea of incorporating self-portraits into your street photography.
While self-portraits don’t fit into the textbook definition of “composition” per se– I still feel that they are an interesting compositional technique we can add to our toolkit to make more interesting images.
All photographs in this article are copyrighted by their respective photographers.
For today’s compositional lesson I want to talk about perspective.
Google defines “perspective” as the following:
The art of drawing solid objects on a two-dimensional surface so as to give the right impression of their height, width, depth, and position in relation to each other when viewed from a particular point.
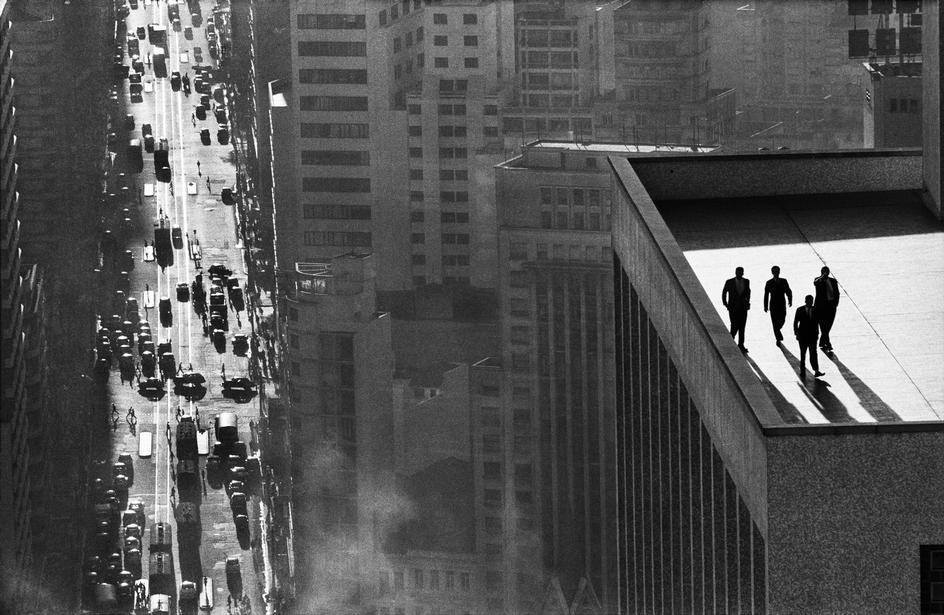
In street photography utilizing unique perspectives or vantage points make images have different impressions and feelings. I often find that street photographers don’t utilize interesting perspectives enough– most photos are just from eye-to-eye level.
To make more edgy and interesting photos, try embracing more unique perspectives (shooting from a really low angle, or getting on top of a roof and shooting from a high vantage point).
I wanted to show some great examples of how some master street photographers used low and high perspectives to make more interesting photographs.
All photos included in this article are copyrighted by their respective photographers.
For today’s street photography lesson, I want to talk about framing. Framing itself is a pretty basic compositional technique, something I am sure we all learned when we first started. But let us delve deeper into framing. Let us see examples from the masters– and how they framed their images to retain focus, energy, and depth in their images.
At the moment of writing this, I have over 30,000+ Facebook fans, 13,000+ Twitter followers, 20,000+ Google+ followers, and 12,000+ YouTube subscribers.
People have called me a bit of a “social media phenomenon” at times – and commend me for being so good at “marketing myself.”
I am certainly not the social media guru but I have learned a few things through social media through the years (especially when it comes to photography).
I wanted to write an article on some guidelines I suggest street photographers (and all photographers alike) when using social media:
All of the photos in this article are copyrighted by their respective photographers.
For today’s composition lesson I want to focus on a compositional technique that is more utilized by intermediate/advanced photographers. It is the idea of depth.
What exactly is “depth” anyways? Well, the Merrian-Webster dictionary provides this definition (which we generally think of when it comes to spatial relationships):
a: the perpendicular measurement downward from a surface
b: the direct linear measurement from front to back
For the purposes of photography and composition, we will use b (the direct linear measurement from front to back).
Some of the photos included in this post are from my on-going “Colors” project.
I am an ardent believer in the idea of “subtractive knowledge” and “via negative” meaning that we learn most from learning what not to do. For example, when I played tennis the maxims I was taught by my amazing coach Greg Lowe was the following:
Don’t be tight
Don’t miss a day of practice
Don’t try to show off
Don’t try to muscle your shots
Don’t worry about losing
Don’t worry about the racket (tennis players have the worst Gear Acquisition Syndrome [GAS])
Through this negative principle, I was able to excel in tennis– going from not making the tennis team my first year as a freshman in High School, to making the #1 doubles team by my Senior year in Varsity.
I feel that the same can be applied in street photography too.
I know that we all hate being told what not to do. After all, we should do what we enjoy, right?
I totally agree with that mentality as well– but I believe it is restrictions that can help develop our creativity.
All photos in this article are copyrighted by their respective photographers.
For today’s street photography composition lesson– I would like to discuss leading lines.
Leading lines are one of the most basic photography compositional techniques– I am sure you have all heard of it before. But it is a technique that we often don’t listen to or follow. For example, it is easy to have a leading line in the background (for example, a background) that leads your eyes away from the main subject, rather to the main subject.
Whenever I look at a photograph, the first question I ask myself is: who is the subject?
For today’s street photography composition lesson, we will discuss a compositional rule that is simple enough: the diagonal. Credit goes to Adam Marelli for teaching me about this important design element which can help street photographers all around the globe.
Diagonals are one of the strongest and most fundamental compositional elements– something that we all know quite well.
There are 3 types of main lines: the horizontal, vertical, and diagonal line. They also go in degrees of intensity (the horizontal line being the least dynamic and the diagonal line as the most dynamic).
All photos in this article are copyrighted by their respective photographers.
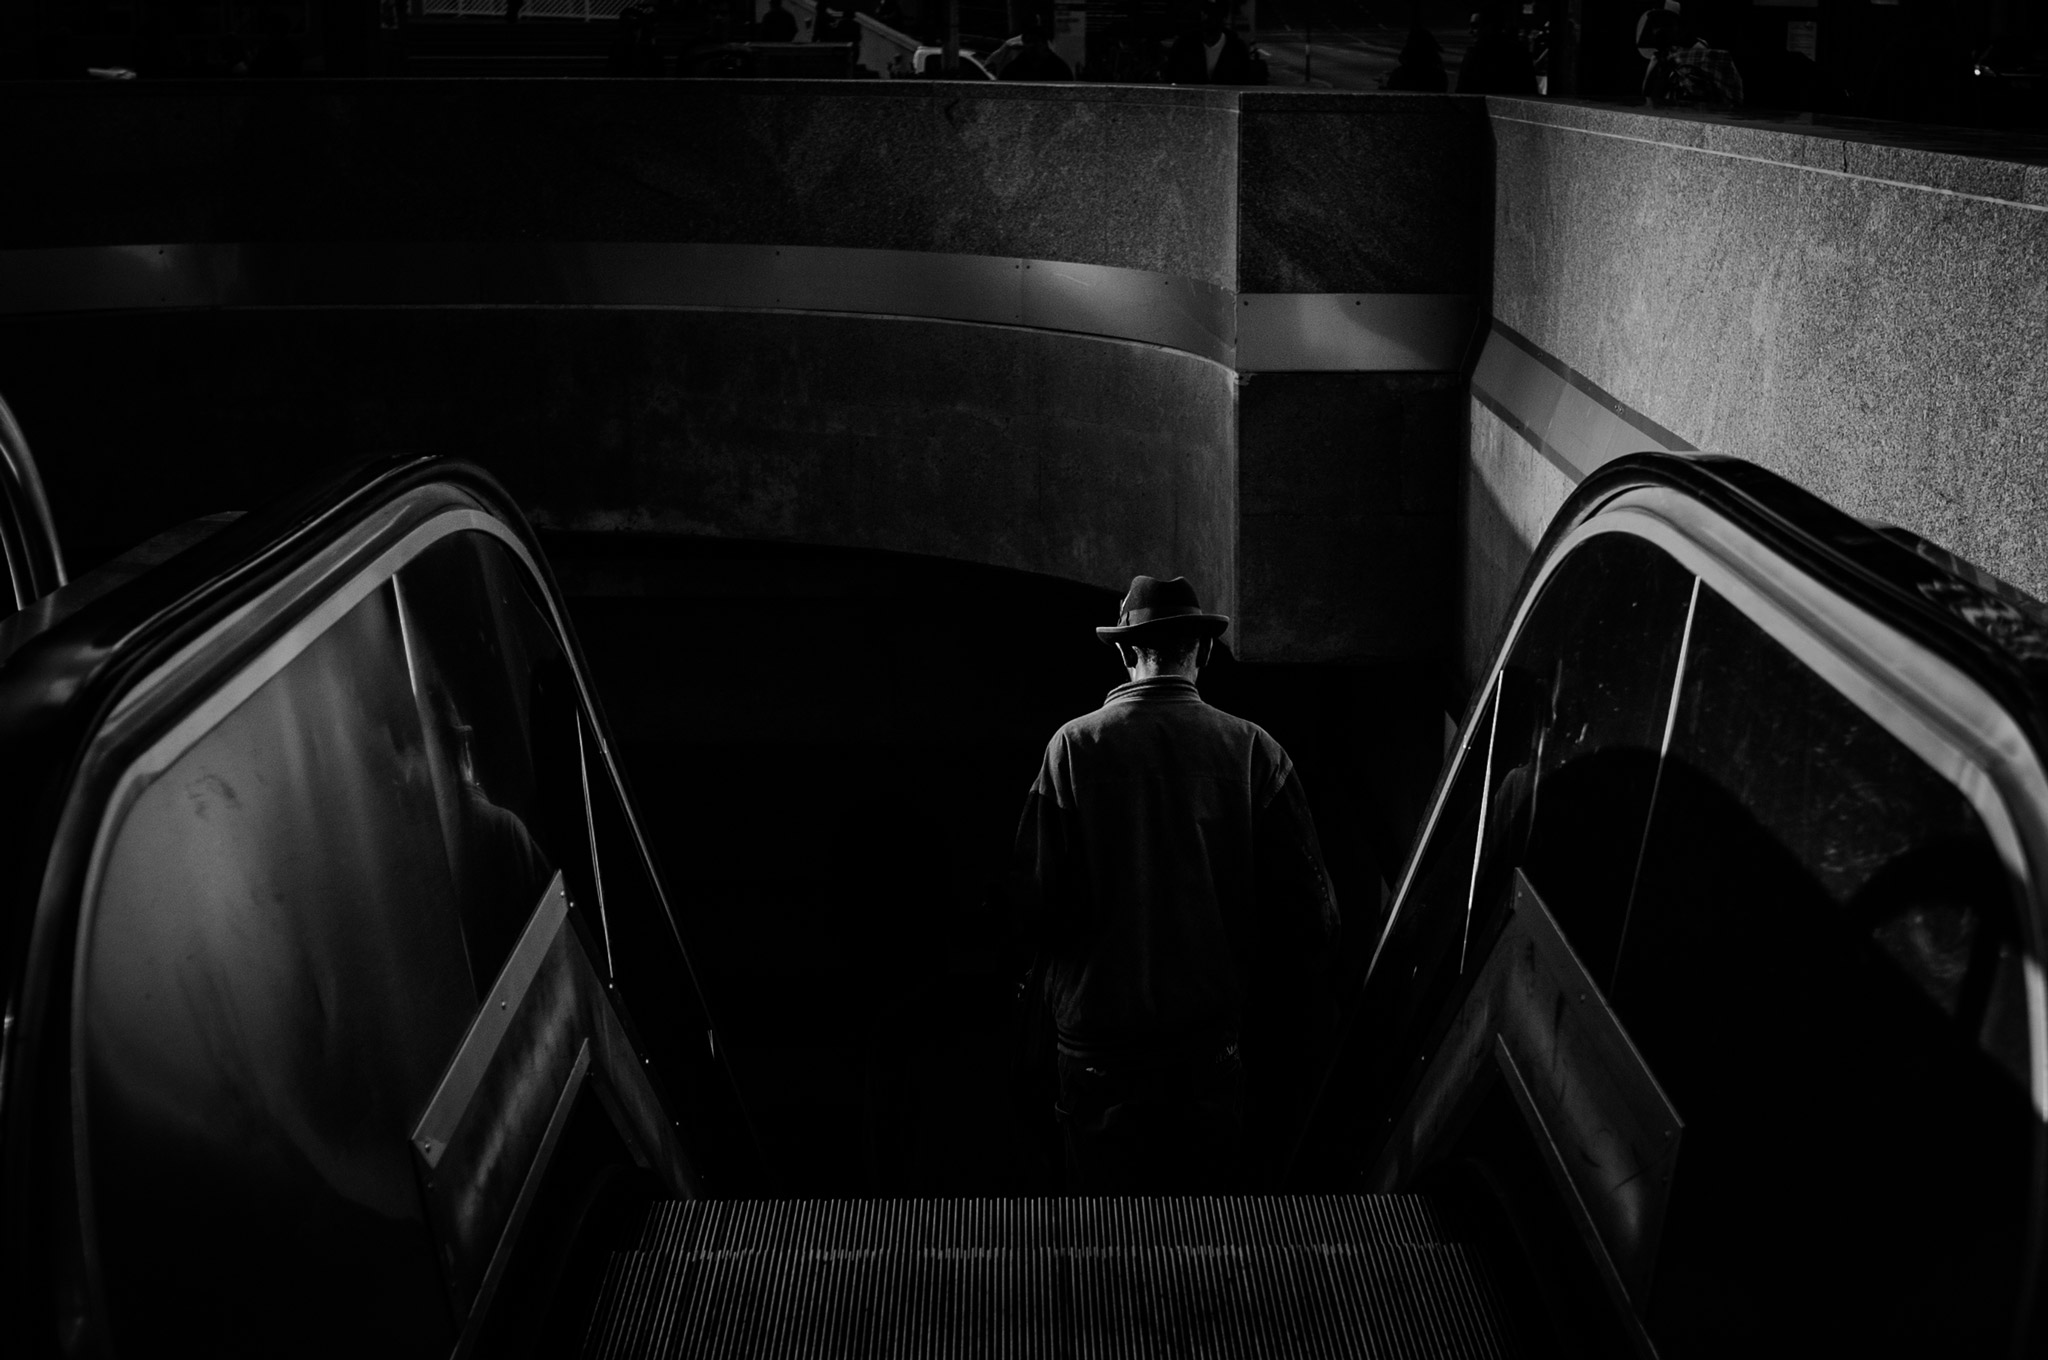
To continue my street photography composition lessons, I want to now move onto the topic of “figure-to-ground”.
What I learned from Adam Marelli is that one of the most important things in a photo is if it “reads” well. Meaning– if you look at a photo, can you tell what is going on– and see all the subjects clearly?
One of the most important principles is if a photo has strong “figure to ground.” Pretty much what figure-to-ground is having strong contrast between your subject and the background. For example, having a light subject against a dark subject, or a dark subject against a light background.
Hey guys, as a reminder– there are only 2 weeks left to submit to the Miami Street Photography Festival Contest 2013! This will be a great opportunity for you to get more exposure for your work! The winner of the contest will be exhibited and win a new Leica X2.
For those of you who can make the festival, there are also some great street photography workshops lead by Magnum photographers Bruce Gilden and Alex Webb / Rebecca Norris Webb. More details on the workshop here.
The Miami Street Photography Festival is also a registered non-profit, so don’t worry– this isn’t just some money-making scheme. They truly do it for the love of street photography! Read more for all the contest details.
More info about the contest and how to submit here.Â
All photos in this article copyrighted by their respective photographers.
One of the things I don’t talk much about is composition on my blog when it comes to street photography. To be quite honest, I am not as interested in composition of photographers when it comes to their philosophies when it comes to photography. However it is still something important to consider. Therefore I want to start a series inspired by Adam Marelli on how you can improve your compositions in street photography. Some of these lessons may be new, others familiar– and I will use the best examples in the history of street photography to illustrate the compositional techniques (while throwing in a few of my own).
Triangles are one of the best compositional techniques you can use in your street photography to fill your frame, add balance, and add movement in your images. (Thanks also to Patrick Bryan for the inspiration for doing this article).
Eugene Atget has always been sort of an enigma to me. When I started to delve into the history of street photography, a lot of people credited him to being one of the “fathers of street photography.†But when I first looked at his work, I was a bit confused. Most of his photos didn’t have any people in them. His photos were mostly of the architecture of Paris: doorways, arches, door handles, street facades, and the streets themselves.
I always thought that street photography had to include people in it. But Atget was talked about thoroughly in “Bystander: A History of Street Photography†by acclaimed photo historian Colin Westerbeck and by the great Joel Meyerowitz.
Westerbeck further explains the relevance of Eugene Atget by writing the following:
“While stop action images of people are bound to figure prominently in many collection of street photographs, this book also contains many pictures in which there are no people at all. The most salient examples are to be found in the works of Eugene atget. Yet even he was, through implication and inference, trying to show us life onthestreets. Suggesting presence in these midst of absence, he was attempting to reveal the character of the street as it inherited in the setting itself. Like every other practitioner of this genre, he wandered the streets with his camera, looking for what would they be called photo opportunities. More important, he’d was also like every other street photographer in his readiness to respond to errant details, chance juxtapositions, odd non sequiturs, peculiarities of scale, the quirkiness of life on the streets.â€
Did Atget even consider himself a street photographer? Certainly not. In no records of him did he ever call himself a street photographer (the term was coined centuries after he even took photos). Not only that, but Atget saw himself as a “collector of documents†rather than being an artistic photographer.
Over the years, I have learned a lot of lessons about street photography. Below is a compilation of some quotes, thoughts, and philosophies which have influenced me and my street photography. None of my ideas are original – some are based on personal experiences and others are based on ideas I heard from books, lectures, and on the internet. And of course, this is not a definitive list of what you “have to do” in street photography – rather it is some of my personal thoughts:
If you are not familiar with the work of Elliott Erwitt, you have definitely seen many of Elliott Erwitt’s iconic work all around the globe. As one of the original Magnum members and former president, he has one of the longest spanning photography careers- spanning over 50 years.
What I most appreciate about Elliott Erwitt is his wry sense of humor when looking at the world– as well as his straightforward and nonsensical philosophies about photography. When sharing his thoughts and advice, I think he is one of the most practical and helpful- especially based on his decades of experience.
I share some things I personally have learned from him in the article below.
Eric’s Note: This article is by Josh White, a street photographer based in Korea. You can also see my interview with him here.
Josh: One of the hardest things to do in the documentary style of photography is to work on a project. There are many reasons for this, not the least of which is just deciding on a theme or subject. Of course, that is just the start! In this post, I’ll talk about my philosophy on the subject of photographic projects and how you might start one for yourself.
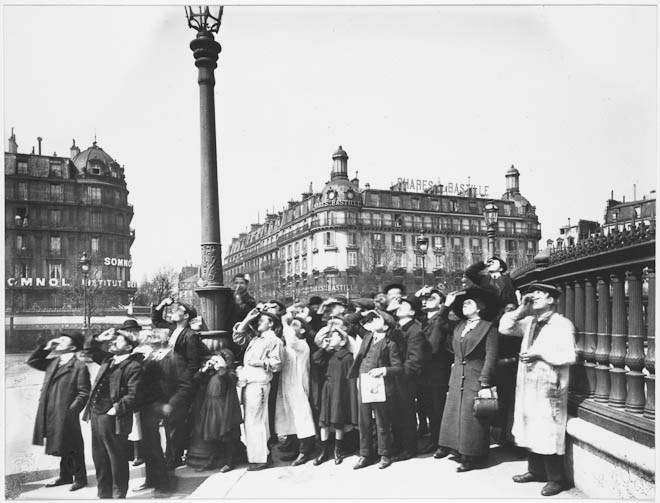
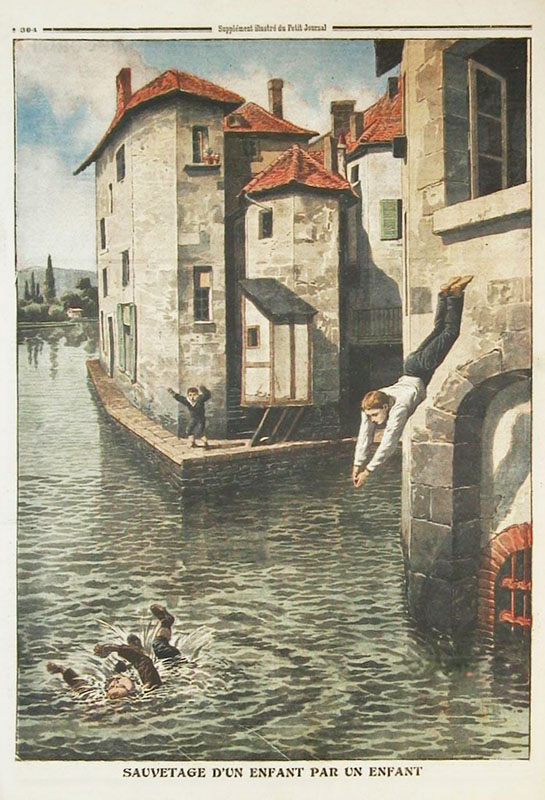
Sauvetage dun enfant par un enfant (Le Petit Journal)
Eric’s Note: This guest article is by Dan K, a British Camera collector and photography enthusiast based in Hong Kong.
Many of the great photographers whose wisdom we like to quote are successful because they have an innate artistic sensibility. For the rest of us, it is harder to grasp what makes a compelling photo.
I recently attended the gallery of one of Hong Kong’s most famous photographers. Michael Wolf made a name for himself creating images of high visual impact with a subtly dark twist of voyeurism. His own work is compelling, yet his longest wall is filled with countless rows of historical illustrations of Le Petit Journal. These lithographs portrayed the events of the day, in a highly dramatised style.
Screenshot of the free “Develop!” iPhone Application
Eric’s Note: I am excited to share this interview with Todd Breslow, a street photographer and the developer of the free “Develop!” iPhone App — which helps you process your own black and white film. He loves street photography with his Leica M3 and working in analog, and lives in Philadelphia with his spouse, two sons, and two cats. When not developing film he can be found tending to his beehives or taking a bike ride. Todd works in the Automotive industry.
Check out my interview with him on how/why he made the application for the community!
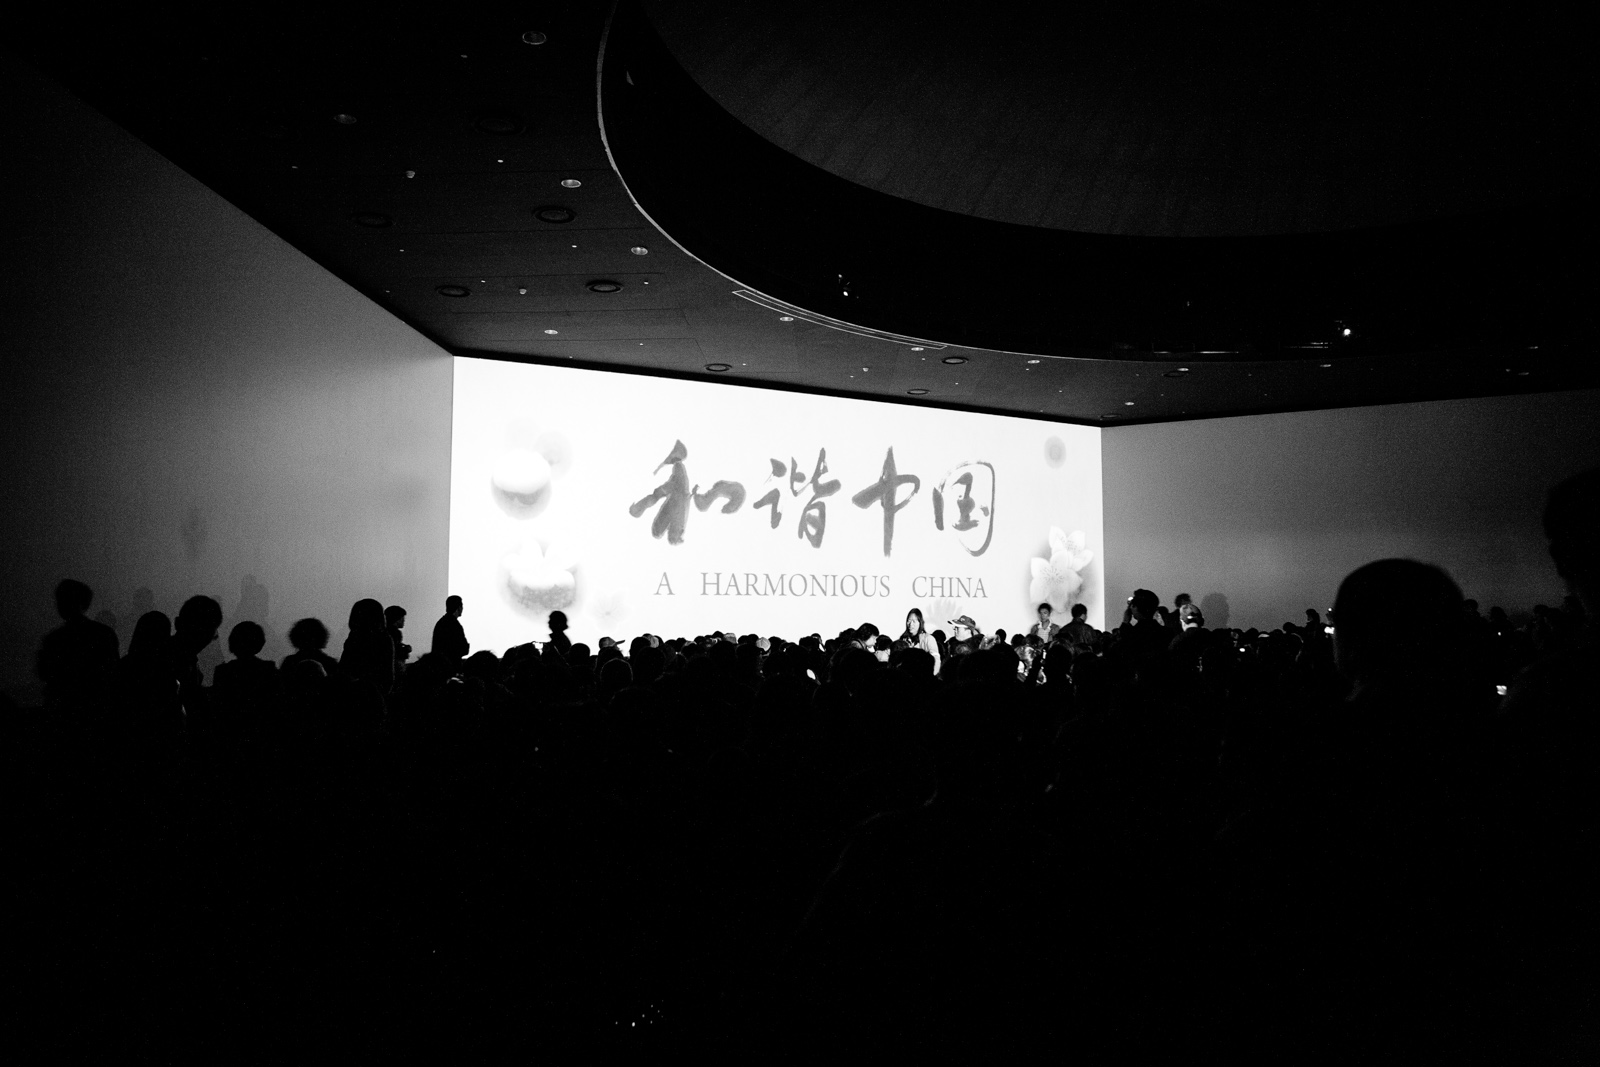
Eric: This is a guest article by Neil Ta, my homie and babysitter. In this article he shares his new project, “Harmonious China” and his thoughts about the editing process.
Neil: My good friend and International Street Photographer, Eric Kim, first introduced me to the idea of letting photos marinate. The concept is really simple. When we take photos, there is an emotional attachment or bond that reminds us how amazing we felt when we took the image. Photographers who select and post their photos immediately are often times at a disadvantage because they let their emotions at the time of taking the photograph get in the way of their better judgement. To combat this, Eric has recommended to photographers to let their images marinate. As time passes and we revisit our images, we lose that emotional bond that had initially formed and we’re better able to objectively look at our images without biases.
So why the long-winded introduction to my new project, Harmonious China? Taking Eric’s advice, I recently decided to look at my archive of images that I shot in China back in April 2011. I hadn’t looked at these images in a very long time and secretly I was hoping that (by some act of god) I was able to pull something out of there that I had previously missed.
When I began to review the images, so much time had passed that they were fresh to my eyes, Surprisingly, I was able to pull out a number of images that fit into a centralized idea. Because I let the images marinate for so long, there were a number of shots that I forgot I took or had no immediate recollection of where it was taken.
This article is written by Josh White, a street photographer that has traveled throughout Korea, Japan, and Canada. You can follow his blog here.
Josh: Photographic purists, especially ones of the docu/street genre will often argue that photography is a process. They will argue that photography should all be taken seriously and photographs should be left to permeate. They will argue that film photography is good for the up and coming photographer as it teaches patience and discipline. We are more likely to like the photographs taken more recently.
While I believe all this to be somewhat true, photographer’s itch. We itch to take photographs and to look at them. We itch to share them and get feedback. In this world of instant gratification and constant boredom patience doesn’t always come easily.
Charlie: A week or so ago, Brian Sokolowski posted on Facebook: “Is it me, or is there a whole lot of street-photography out there that’s set up and posed? No, it’s not me… there is. What’s the point of that? I mean if it’s set-up, that’s fine. But don’t try to pass it off as street-photography, because it’s not.â€Â I agreed with him and cited a few photos from the HCSP group that looked staged. I’d like to expand upon my thoughts here.
Let me start by saying that, like Brian, I am not against staged photographs per se. Jeff Wall is one of my favourite photographers, and I love the portraits of Gilden – who, I would argue, is the best “street photographer†alive today. What I take objection to is deception which may or may not be a result of a loosening of the commonly held perception that street photography is candid.
I am excited to share that submissions for the street photography exhibition for the Miami Street Photography Festival 2013 is live! For more information regarding the exhibition, read more or you can click here for all the details.


 Henri Cartier-Bresson looking at contacts at the New York Magnum Office. 1959. © Rene Burri / Magnum Photos
 Henri Cartier-Bresson. SPAIN. 1933. Valencia. Note the two versions of the photo he was considering from. This was the best.
 Henri Cartier-Bresson. SPAIN. 1933. Valencia. This image wasn’t as strong as the prior.
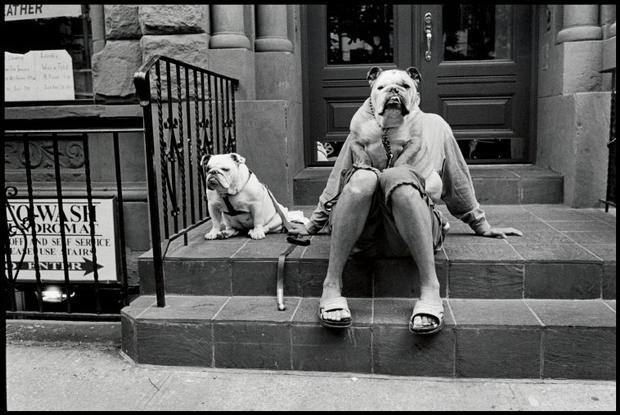
 Contact sheet of Elliott Erwitt, “Bulldogsâ€, New York, 2000. © Elliott Erwitt / Magnum Photos
 “Bulldogsâ€, New York, 2000. © Elliott Erwitt / Magnum Photos
 Alain Capeilleres, 1976. © Martine Franck / Magnum Photos.
 Photo by Martine Franck, Provence-Alpes-Côte d’Azur region. Town of Le Brusc. Pool designed by Alain Capeilleres, 1976. © Martine Franck / Magnum Photos
 Contact sheet of Richard Kalvar, “Piazza Della Rotondaâ€. Rome, Italy, 1980. © Richard Kalvar / Magnum Photos
 “Piazza Della Rotondaâ€. Rome, Italy, 1980. © Richard Kalvar / Magnum Photos
 Che contact sheet. © Rene Burri / Magnum Photos
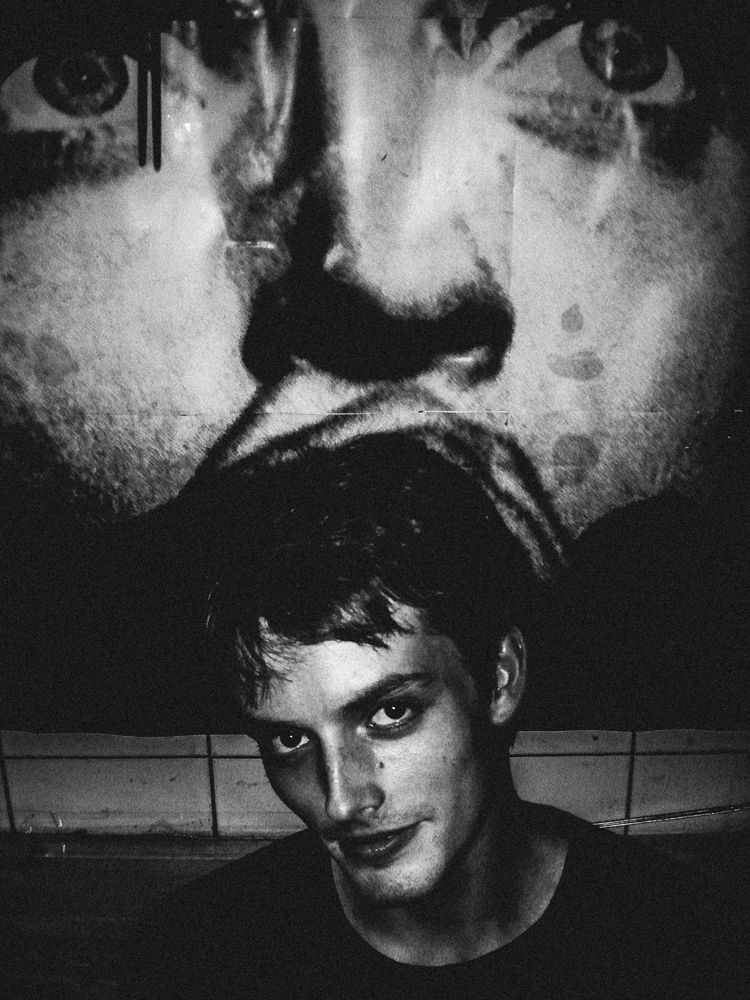
 Che Guevara. © Rene Burri / Magnum Photos
 Contact sheet, VJ Day. Photo by Alfred Eisenstaedt
 Jean Gaumy, Iran, 1986.
 Jean Gaumy, Iran, 1986.
 Martin Parr contact sheet from “
 Contact Sheet by Martin Parr from Spain, 1997
 Photo by Martin Parr from his “Common Sense†book. Spain, 1997