Street Photography Quick Links is a compilation of Links, Projects, News, Videos, Events, or anything that is related to street photography or photography in particular that I have personally consumed. Perhaps these might interest you or make you think. If you want to send some links my way, details will be at the post below.
“I never shoot without using the viewfinder.†– Garry Winogrand
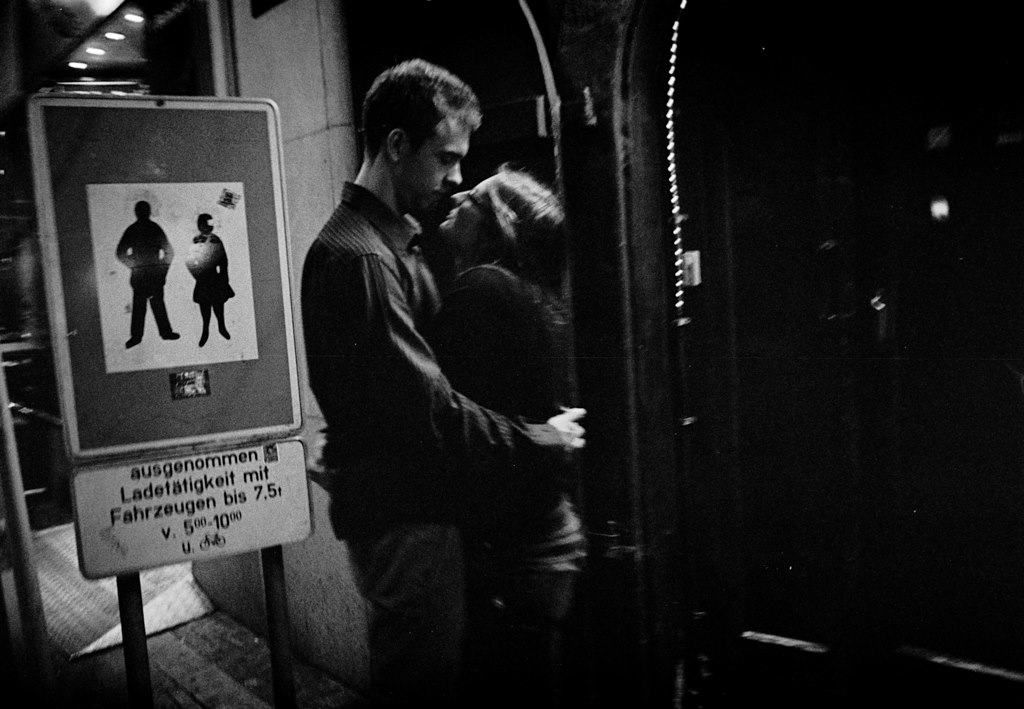
Another common mistake that aspiring street photographers make is that they try to overcome their fear of shooting street photography by shooting from the hip (photographing with your camera at waist-level and not looking through the viewfinder).
Personally when I started shooting street photography, I was dependent on “shooting from the hip.†I was too scared to bring my camera’s viewfinder up to my eye, because I was afraid of getting “caught†of taking candid photos of strangers.
Garry Winogrand was one of the most prolific street photographers in history. He shot with a Leica M4, 28mm lens, and was known for creating layered, edgy, and head-on shots.
If you go on YouTube, you can see how close he is to his subjects when shooting, and he always quickly looks through his viewfinder while shooting. This allowed him to frame properly, and capture the moments he found interesting.
Why not shoot from the hip?
“[Don’t shoot from the hip], you’ll lose control over your framing.†– Garry Winogrand
In my experience, I found that shooting from the hip was a huge crutch. The more I shot from the hip, the less confident I was as a street photographer.
Not only that, but as Garry Winogrand said, I lost control over my framing. My shots would be poorly framed, skewed, and any shot that I got that looked half-decent was because of luck.
Remember as a street photographer, you aren’t doing anything wrong. You are trying to make images that people can empathize with. If it weren’t for street photographers, historians would have no idea what people did in public spaces in the past. All of the iconic street photography done by Henri Cartier-Bresson, Helen Levitt, Robert Doisenau, and Vivian Maier wouldn’t exist.
Be confident. Have faith in yourself. By not shooting from the hip, you’re signaling to the world that you’re not doing anything wrong.
Also by using your viewfinder (or LCD screen), you can have better control over your framing and composition.
Getting “caught in the act”Â
So what happens when you’re shooting street photography (with your viewfinder), and you get “caught in the act?â€
My suggestion: Look at your subject, smile, say ‘thank you’ and move on.
The benefit of having your subjects see you while shooting them
Sometimes it is good to have your subjects notice that you are about to take a photograph of them.
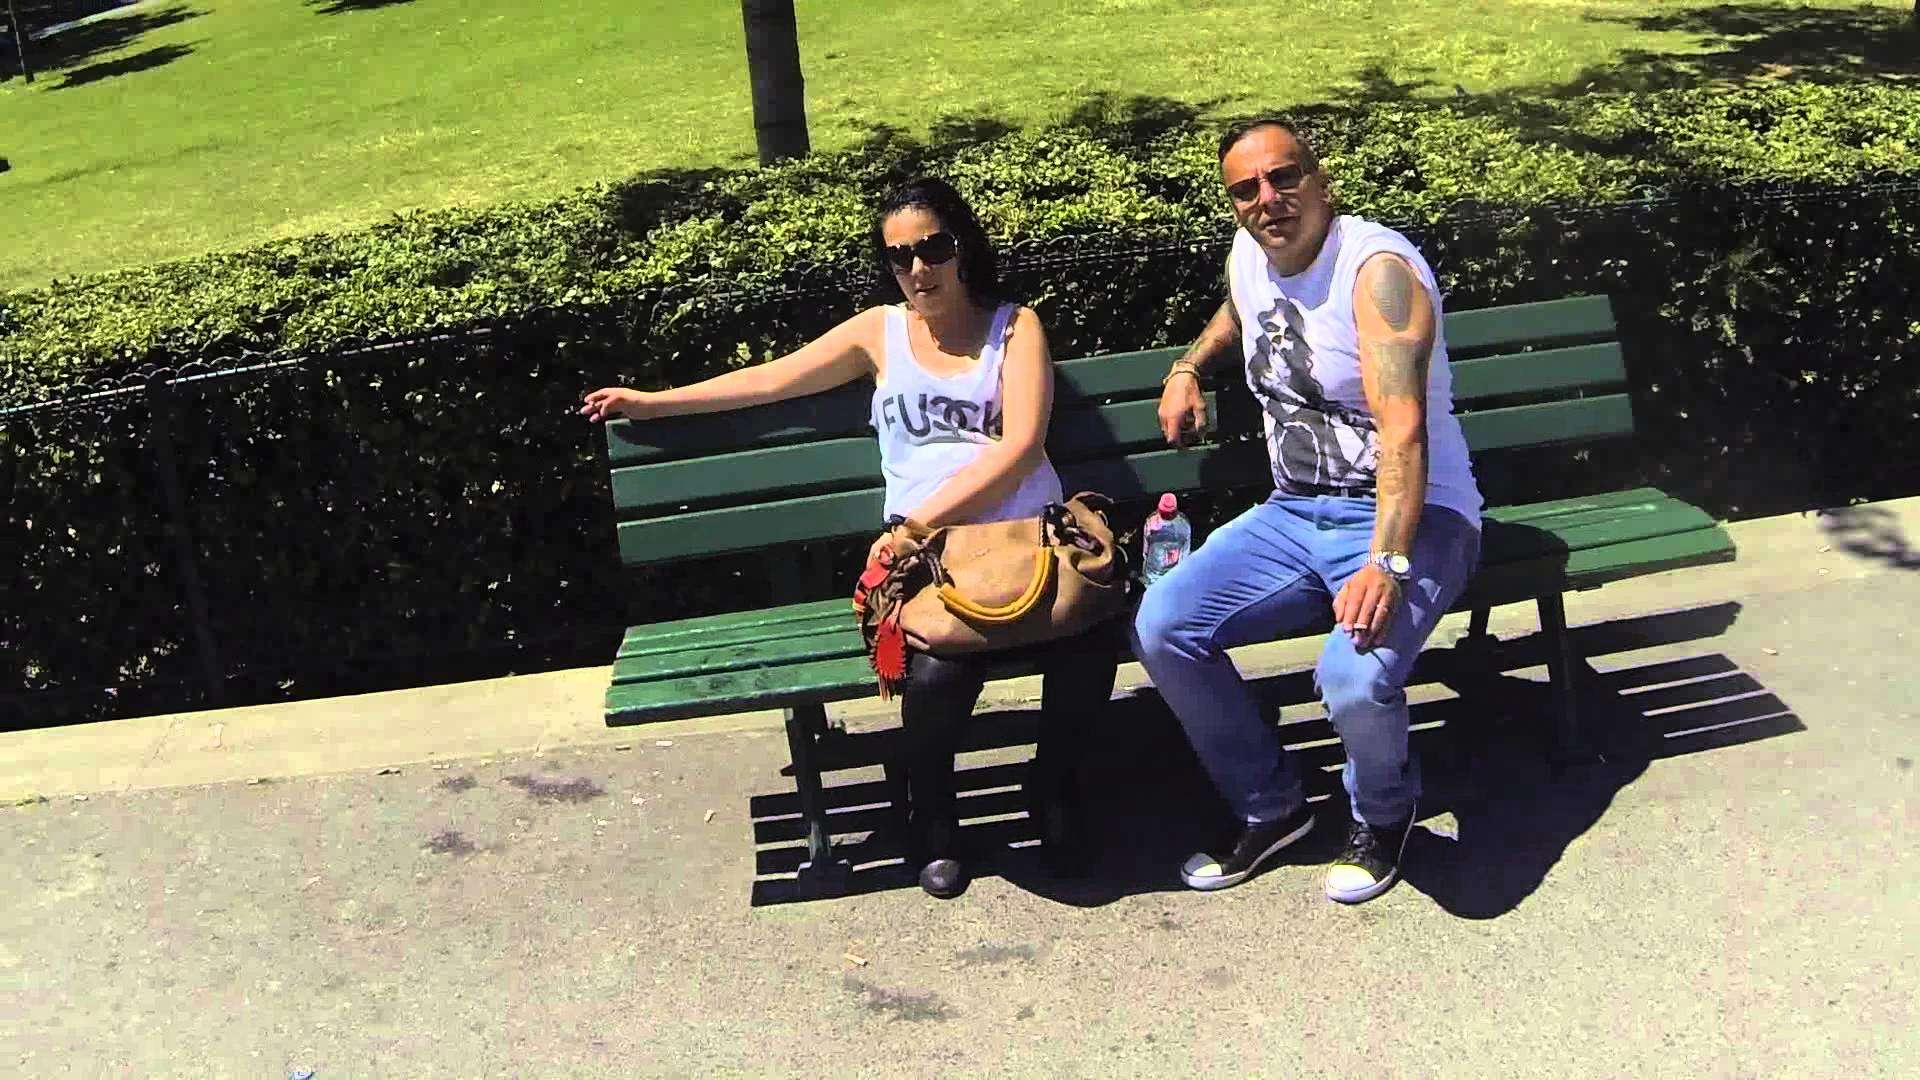
For example in this photo I shot in Hollywood, I saw this hip older lady with these great sunglasses and hat. I crouched down, and took a photograph with my Canon 5D and 24mm lens. The second I was about to take a photograph of her, she looked at me and posed with her hands (giving me the “jazz handsâ€).
Now if I shot from the hip, she might have not noticed me about to take a photograph. Therefore she would have never posed for me, and this photo would never had been created.
But does that ruin the photograph, the fact that your subject noticed you?
Absolutely not. William Klein famously engaged with his subjects a lot when he shot street photography, and his presence made his photographs more vibrant, dynamic, and edgy.
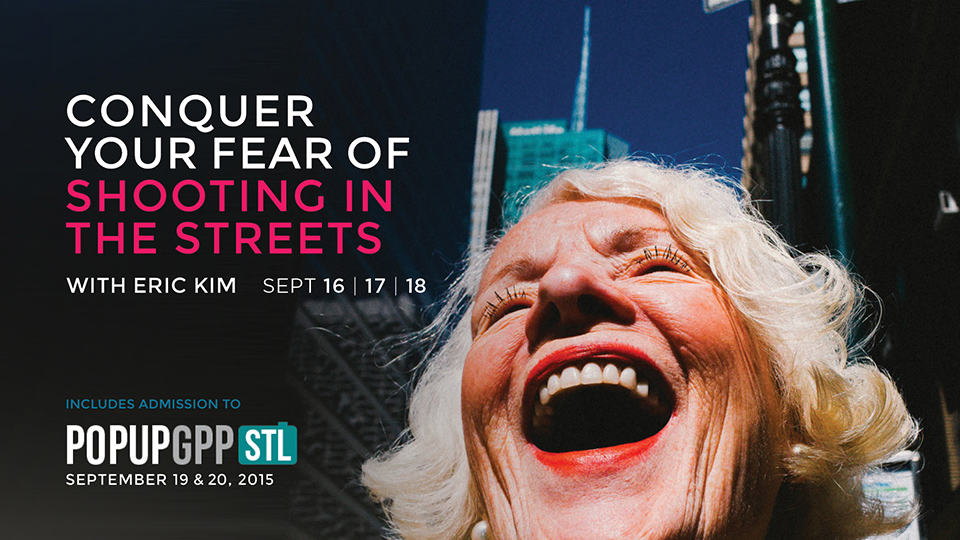
I am excited to announce I will be teaching my popular “Introduction to Street Photography Workshop” in Seattle (September 16-18, 2015) hosted by Gulf Photo Plus as part of their PopUp GPP Seattle event!
For those of you who have never heard of “Gulf Photo Plus”, it is the most happening photography educational center in Dubai. Their annual “GPP” event is also the most exciting, fun, and informative photography event that I have personally attended. You certainly don’t want to miss out on this event, and have lots of great coffee in Seattle as well!
About the workshop
In this action packed 3-day weekend workshop, you will learn the fundamentals of street photography, how to create visually compelling images, how to conquer your fear of shooting street photography, as well as tips & tricks how to capture “the decisive moment.”
The workshop is limited to an intimate class of 12 passionate individuals who want to take their street photography to new heights. The workshop will be an intimate experience in which you will learn solid fundamentals, get honest & constructive criticism on how to improve your photos, and meet other enthusiastic street photographers. This workshop is ideal for beginner or intermediate street photographers.
Who is Gulf Photo Plus?
Chio Gonzalez, Manila 2013 workshop
GPP (Gulf Photo Plus) believes in the art and science of photography as a medium of creative expression, and exists to inform, educate and inspire photographers of all levels. The Dubai-based company organises year-round photography workshops, inspirational talks, exhibitions and events for the local photography community, and is famed the world over for its biannual photofests. March 2015 was the 11th edition of the annual GPP event in Dubai.
The annual GPP event draws participants from around the world with their impressive line-up of photography educators. Past educators include Magnum’s David Alan Harvey, Zack Arias, Joe McNally, Steve Simon, David Hobby (Strobist), Greg Heisler, andJoey Lawrence to name a few! I was fortunate enough to be an instructor at GPP2014 and it was one of the most rewarding teaching experiences of my career.
What is PopUp GPP Seattle?
Jill McGuire, Seattle 2014 workshop
Following the success of PopUP GPP in London and Singapore, GPP is continuing with their winning formula – the best instructors, exceptional organisation and a passion for photography…next stop, Seattle September 19th and 20th, 2015.
Participants of my workshop September 16-18th will receive free admission to the weekend’s event, which will feature sessions from Zack Arias, Joe McNally, David Hobby, andGreg Heisler! These are all masters of their respective genres and photographers whom I have great respect and admiration for.
How Can I Register for PopUp GPP Seattle?
Shay Allen, San Francisco 2013 workshop
There are two ways you can register for the PopUp GPP Seattle event:
For more information on the two PopUp GPP Seattle events, contact Gulf Photo Plus at hello@popupgpp.com. They promise to get back to you within 24 hours except on weekends – weekends are Friday and Saturday in Dubai so bear with us if you send an email on the weekend. You can also reach them by phone at  +971 4 380 8545.
This article is written by Josh White, originally posted here. The views posted here are his and his alone and may or may not be shared by the website as a whole ;)
Hi.
My name is Josh and I’m an addict.
No, I never did drugs. I don’t smoke. I hardly even drink.
I’m addicted to something more pricey than any of those. I’m addicted to cameras.
Any kind of camera. I don’t discriminate. I don’t care anymore if it is expensive. I don’t care if it is new. I don’t care if I’ve tried it before. If it is out there to be bought, I probably want to buy it.
I get angry at other addicts. This stems from a strong denial of my affliction. Stems from the inability to admit my own flaws.
Some say there isn’t anything wrong. This ISN’T an addiction. I’m here to say, they are wrong. Addiction by definition is the inability to stop a habit.
There are many symptoms. First, the morning coffee. The coffee, a different addiction, is just a means to sit in front of a computer and feed. The first thing you may check is ESPN or the news. That makes the addiction feel less real. Next though, the reality of it.
The next part depends on the “drug” of choice. Maybe you go directly to the newest gear news. If you prefer the old stuff, you check used shops for their newest posts. I used to be the prior but have migrated towards the later. “Wow, that is interesting” or “I took one of my favorite pictures with one of those.” The starting thoughts to a chain of events leading to getting a fix.
At this point, “you” still don’t feel there is a problem.
“I’m just looking..”
At work during free moments you check forums or reviews. Listen to other addicts talk about why they needed that fix. If you’re like me, you look at the old photos you took with the current “mark.”
“I remember when I took this. I really loved that camera…”
Other people need to latest and greatest. They aren’t the nostalgic type addicts like myself. They can forget the past easily because it will never be as good as the future. I was like this before. I remember the feeling of not wanting to use my current because I knew I would get the newer. The “lame duck” mentality.
“What if I take the picture of my life with this? How can I get something else then?”
This leads to another problem. Hoarding. The inability to let go because at some point something may be needed. Some day, you may want to fondle or hold. I’ve never really been a hoarder, but addiction is unpredictable.
Justification. The crux of the matter.
“If I only had that camera I could take the shots I want.”
Weirdly, that thought is very rarely followed by:
“I wonder how I can take interesting shots with the camera I have?”
At least not in the mind of an addict.
In our hypothetical day, the addict will then spend the rest of it daydreaming about what they could do with the new camera. They will dream of the inspiration. Somehow, when looking at forums and reviews they don’t seem to see the negatives. Either that or ignore them.
Finally before the day is over the website is checked one last time. Some small part of your brain wants it to be sold.
Not because you want the addiction to stop but because you want it to continue.
“It wasn’t really that good anyway. Tomorrow, there will be something better.”
Seoul, South Korea. 2014.
When I look at my favorite photographers, there is something interesting about them. For the most part, they have a very specific style. Their photos have a “look.” They have a clearly defined “feeling” to their photos. Something that isn’t easily explained aside from with another hypothetical situation.
I open flickr and I see a photo without the name because, I am of course at work and the browser window is minimized. Even so, I know right away that photo was taken by Junku Nishimura ( a friend from Japan and probably one of the best contemporary street photographers in existence). I don’t need his name to know the photo is his.
People will argue this point. Most of the people that argue will be addicts. I know because I did so myself. They will say that if you have a style you can take photos of that style with anything. This is true, on some levels, but not all. Not because of specifications or technical details but because of the vision of the artist. Their camera is just their tool. It is a method to expose a frame. A medium on which to capture.
Anyway, I digress. I am slowly recovering. It is hard, I still fall back into the routine of addiction. Maybe I will always be an addict. In fact, I think I will be. I just want to learn how to deal with it better. I NEED to. I want to be proud of the work I’ve made and want it to be consistent. This addiction doesn’t allow for that.
So, I’ve decided to start with the 12 steps. 12 steps of my own invention. Consider this, step one.
Admitting I have a problem.
Step 2 is maybe the first on the actual road to recovery. A pact. A pact to use one camera and one lens for a year. 365 days. More on this tomorrow.
(Cover photo by Assignment No. 12 Community’s choice Forrest Walker)
All the things we do are best done when you love what you are doing. This is an emotion natural to all of us that is open to a lot of possibilities and executions. With that said, here are some of the best of the best for Assignment No. 12:
“My photography is not ‘brain photography’. I put my brain under the pillow when I shoot. I shoot with my heart and with my stomach.†– Anders Petersen
Anders Petersen is one of the most influential contemporary master photographers. He shoots with a simple point-and-shoot film camera (Contax T3) and shoots soulful black and white images which he refers to as “personal documentary.†He makes himself and the people he meets as his main subjects, and he shoots from the heart.
A photograph without emotion is dead. The problem that a lot of photographers make is that they try to become too analytical with their photography. They are too preoccupied with composition, framing, form, nice light, and they forget the most important thing of making a memorable image: creating an image that has heart, soul, and passion.
So when you’re out shooting, try not too be too analytical. Shoot from your intuition and your guts. If you find anything even remotely interesting, don’t self-censor yourself. Don’t let your brain tell you: “Don’t take that shot, it is boring, and nobody will find it interesting.†Take the photograph anyways, because you can always edit it out (remove it) later.
When is it time to become analytical?
Eric Kim / Tokyo, 2011
“It is more after when I am shooting when I am looking at my contact sheets, and then I try to analyze and put things together.†– Anders Petersen
Shoot from your gut when you’re out on the streets, but use your brain when you’re at home and editing your shots. Analyze your images after-the-fact as a post-mortem, and learn how to “kill your babies†(your weak photos that you are emotionally attached to, but you know aren’t great photos).
Separate the shooting and editing sides of your photography. They use different parts of your brains, and if you try to do both of them at the same time, you will fail. As a practical tip, turn off your LCD screen when shooting, and refrain from looking at your images immediately. Let your shots “marinate†by not looking at them until a week after you have made your images.
Letting a photograph “marinateâ€
I shoot both film and digital, but one of the biggest advantages of shooting film is that you’re forced not to look at your photos immediately after you’ve shot it. I generally don’t get my film processed until 6 months-1 year after I’ve shot it. This helps me truly help disconnect myself emotionally from my shots, which allows me to look at my photos more objectively.
For digital I find it a lot harder to let my shots “marinate,†as I am prone to “chimping†(looking at your LCD screen immediately after you’ve taken photographs).
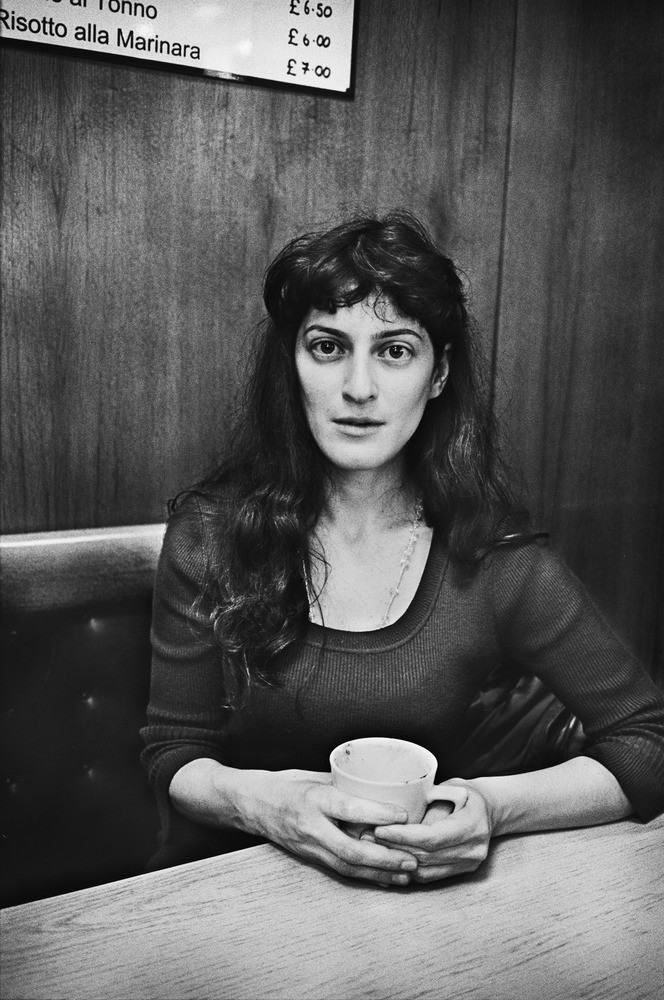
For this photograph above, I saw this woman juxtaposed against this billboard behind her in London. I got close to her, and took two photos: both with a flash. One of them she was looking away, and one she was looking directly at me.
At first I didn’t think that it was an interesting shot, but then I let the shot “marinateâ€â€” and the longer I sat on the image, the more I ended up liking it. I also ended up showing the photograph to a couple of my close friends, who all agreed that it was a strong image.
For some shots, the longer you let your shots “marinate,†the more you like them. For others, the longer you let your shots “marinate,†the less you like them. Imagine oil and water in a bottle. You shake the bottle hard, and they are both mixed. But the longer you wait, the oil will soon rise to the top (your good photos), while the water will sink to the bottom (your weak photos).
Learn From the Masters
If you want to learn more practical wisdom from the masters of street photography, read more below:
You’ve read that right! Colin Westerbeck, acclaimed curator and author of the book, Bystander: A brief history of Street Photography together with Acuity press and PDN are looking for your best work to be part of a book that will showcase the current practice of street photography. It will be juried by Eric together with Ken Schles, Matt Stewart, Daniel Arnold, and John Free.
Hey streettogs, I’m starting a new book on a distillation of all the “Learn from the Masters” articles I’ve written. I hope these daily lessons can inspire you, I know they inspired me!
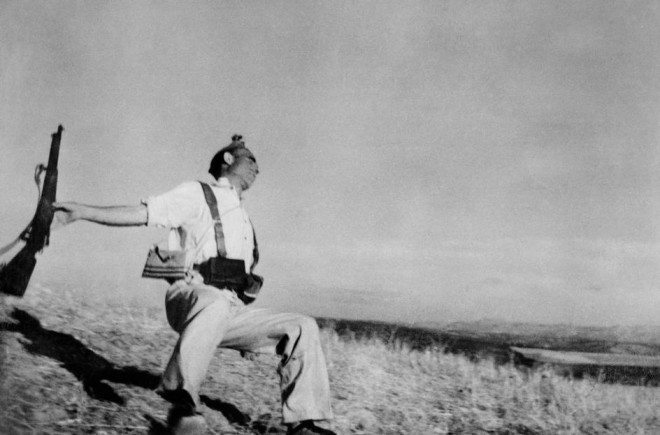
“If your photographs aren’t good enough, you’re not close enough.†– Robert Capa
One of the common mistakes that many beginning street photographers make is this: they don’t get close enough.
We have many fears and provide a lot of excuses for not getting close enough in our street photography. We are worried about pissing people off, we are worried about making other people feel uncomfortable, and we are worried that strangers might call the cops on us (or even worse, physically assault us).
However realize that this is all in your head. By getting closer to a stranger, you won’t die. In-fact, I have learned that in photography (and life), with physical proximity comes emotional proximity.
It isn’t enough to use a telephoto or zoom lens to get “close†to your subject. That is fake intimacy. By using a telephoto lens, you are treating your subjects like zoo animals, and your photography is a safari hunt.
However when we read the quote from Robert Capa on closeness, it doesn’t necessarily mean physical proximity. You can be physically close to your subject, and still emotionally distant. The most important thing as a street photographer is to empathize with your subject and try to connect with them, their emotions, feelings, and condition.
In street photography I generally recommend using a 35mm lens (full-frame equivalent) for most photographers (Alex Webb, Constantine Manos, and Anders Petersen shoot with this focal length). The human eye sees the world in around a 40mm field-of-view, and I find that shooting with a 35mm lens gives you enough wiggle-room around the edges of the frame.
A 50mm is fine too (Henri Cartier-Bresson was famous for using it for nearly his entire life), but in today’s crowded world, I find it to be a bit too tight. A 28mm is fantastic too (William Klein, Bruce Gilden, and Garry Winogrand have used this focal length), but realize that you have to be close enough with this lens to fill the frame.
As a rule-of-thumb, I try to shoot with a 35mm at least two-arm-lengths away (or closer). 2 arm-lengths is 1.2 meters (around 4 feet). Therefore I always have my camera pre-focused to 1.2 meters, set at f/8, ISO 1600, and I simply go out to find moments to shoot.
The .7 Meter Challenge
To truly get comfortable getting closer to your subjects, try this assignment from my friend Satoki Nagata: For an entire month, only take photos of your subjects from .7 meters (1-arm-length). For this assignment, switch your camera to manual-focusing mode, and tape the focusing mechanism of your lens to that distance. By setting yourself this “creative constraint,†you will learn how to better engage your subjects and get them comfortable with you shooting at such a close distance.
Start off by asking for permission, then once you feel more courageous, start shooting candidly.
You don’t always need to shoot with a wide angle lens. Some of the greatest street photographers have used a longer lens, such as Saul Leiter, Tony Ray Jones, and Rene Burri. They used long lenses intentionally to compress their backgrounds and make unique images. However their images still have emotion and soul to them, as they caught moments of the “human condition.”
Ultimately use the lens and focal length which suits your personality. But if you’ve never tried shooting wide and getting physically close in street photography, I recommend you to try it out, and push yourself out of your comfort zone.
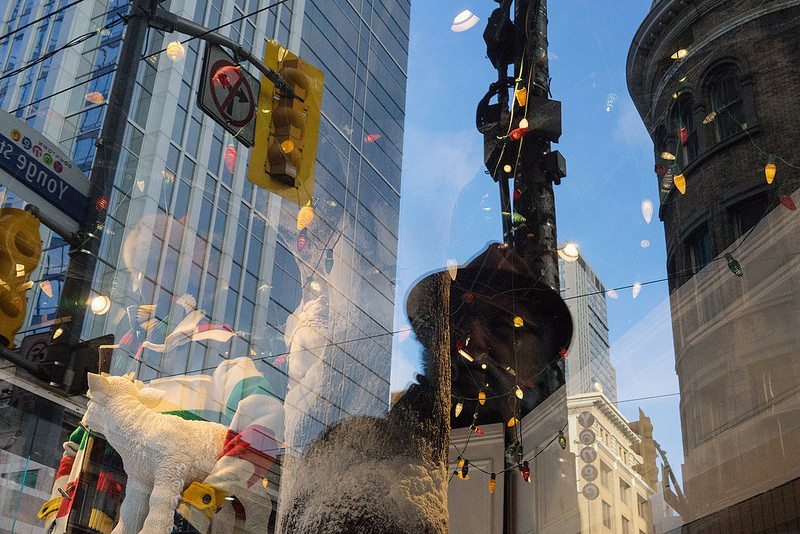
(Interview by A.g. De Mesa. All photos by Siri Thompson)
Siri Thompson is a photographer based in Toronto, Canada. She constantly photographs her city in a manner inspired by her photographic heroes while putting her own unique twist. Siri also has a soft place in her heart for animals. Her photos feature a lot of imagination as seen by the layers of content in her frame but they can be easily understood. It is a mixture of mundane daily life and deceptively complex scenes.
Find out more about how she photographs and what keeps her fascinated with our interview below:
Getting my laptop stolen recently has been the best thing that happened to me recently. Let me explain why.
Not having a laptop the last week, I’ve been making all these excuses not to blog and write. I generally prefer working with a a laptop, having a keyboard, and the flexibility of having a “real” computer.
So the last week I’ve been just dependent on my smartphone. And damn, I’m pretty impressed and realize how much I can truly do with a smartphone. I can (obviously) check my email, plan my schedule, pay bills, but even better– I can record videos, take photos, process my photos, update my blog, and even “write” (actually “text”) articles on my smartphone (like I’m doing now on my smartphone).
Funny enough, I can probably text as fast as I can type. I use android and with the “SwiftKey” keyboard, I rarely make typos. Not only that, but I can write ideas while standing (not possible on a laptop with keyboard), while waiting in line at the store, or when in a cramped airline (Ryanair).
In fact, I’m starting to really wonder nowadays with the cloud and Google services what we really need laptops for. Of course for the power user (heavy video or photo editing) or Excel gurus you’re going to need a computer. But I really feel that 99% of “normal” people no longer need a “normal” computer.
Bringing the topic back to excuses, there were a lot of articles I wanted to write but I made the excuse that because I didn’t have a laptop, I couldn’t write it. But then I really wanted to write, so I used the only tool I had: my smartphone. And I’m able to “write” on my smartphone just fine.
So perhaps moving forward, I’m going to do less “writing” on a laptop, and putting down more ideas on my smartphone using Evernote. I really have no more excuses for my tools being insufficient for writing.
I also used to make excuses that my camera wasn’t good enough for street photography because I didn’t own a Leica. Now that I own a Leica I have finally leaned (the hard way) that the camera is an excuse. Not having a good enough camera is always a bad excuse. The only limitation is your creativity, inspiration, and vision of the world.
What other excuses have I made in my life and art?
I don’t have enough money to travel to shoot interesting street photos. Solution: shoot your own city.
My camera isn’t good enough. Solution: use the camera you already use.
I don’t know any other photographers to inspire me. Solution: buy photo books and make masters of photography your personal tutors.
I don’t have enough time to shoot. Solution: try to take at least 1 photo a day during your lunch break, before work, after work, or of people you know.
I’m too old. Solution: use your age as benefit (you have great wisdom that young people don’t have, which can aid your learning process). Jack Simon didn’t pick up street photography until he was 65, and at age 70 is one of the best in the world.
I’m not talented or artistic enough. Solution: educate yourself by investing in photography education (artists are made, not born).
I’m too lazy. Solution: use your laziness to your advantage and just use a smartphone and make “boring” photos of your everyday life.
I don’t understand technology. Solution: just use a disposable film camera and get the shots printed at the nearest drugstore as 4×6 prints.
I’m afraid to take photos of strangers without permission. Solution: start off by asking permission. If scared of asking for permission start off by asking friends and family to take their photos. Worst case scenario: your mom will never say no.
I’m not inspired. Solution: shoot first, the inspiration will follow.
Restricting to open up. How less can be more when going out to shoot.
I am strongly convinced that creating restrictions leads to more freedom and development when it comes to creativity. This may sound very counterintuitive but I have experiences to back up my claims. I just finished an intense week of photographing which led to an exhibition opening last night. It was a great experience and I would like to share some of the things I came across and learned during this week.
I think we all know how it sometimes can be hard to go out and shoot. We’re all very good at coming up with excuses and it can be tough to break the cycle of non-activity. Next to that it may sometimes feel like we’ve gotten used to a certain way of working which slows down our development so much that it feels like we got stuck and keep coming home with different but the same photographs time after time.
Work within a frame
What I like to do to work around this is to set up some rules and make agreements that involve others to push myself a step further. This past week I did exactly that, really enjoyed it and think this can be of help to others as well.
My project
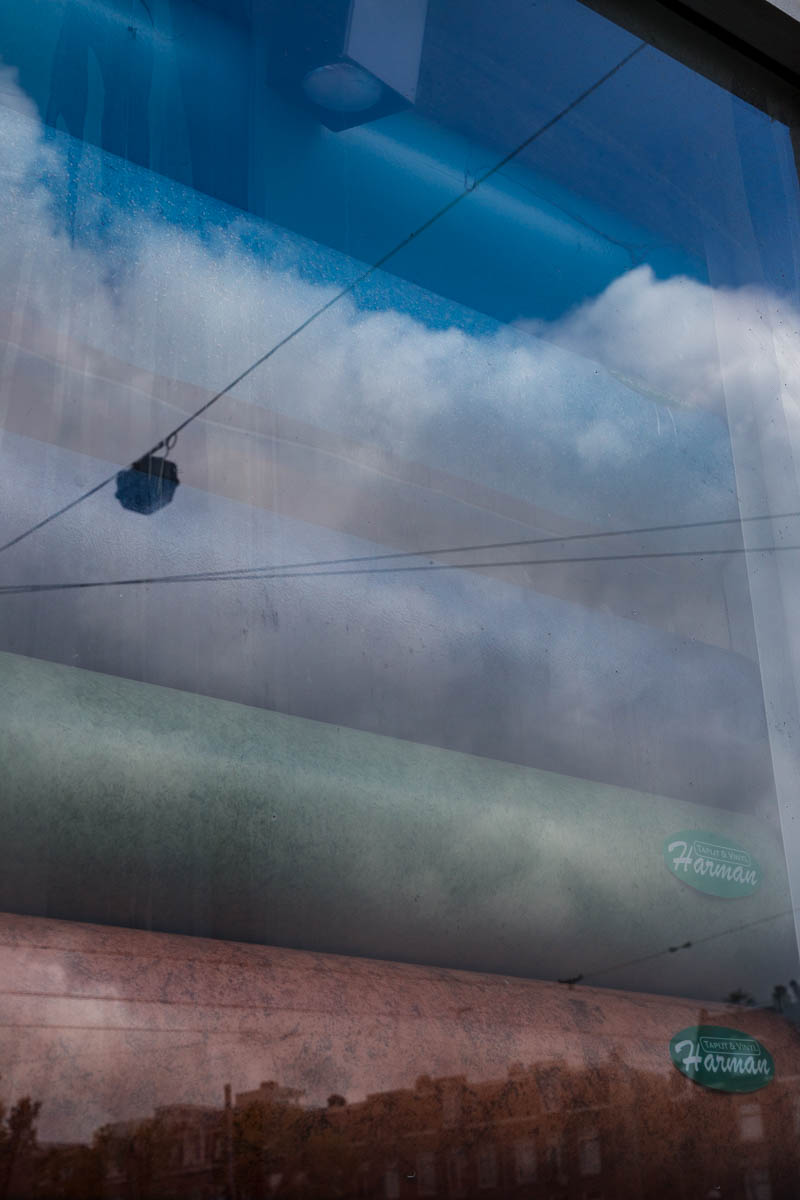
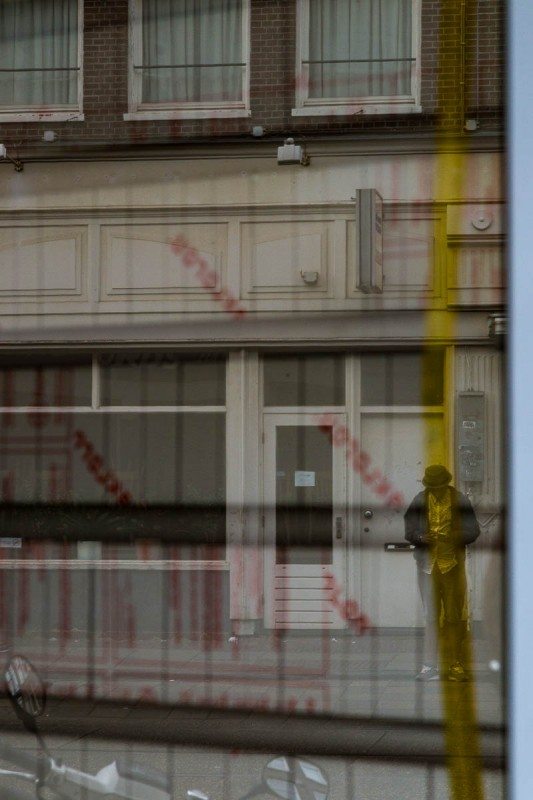
I came up with the plan to shoot within a 1000 meter radius only, then pick one photograph each day to be printed and finish up the project by showing the outcome in an exhibition. I pitched the plan – Siting: Qlick Editions – to the nice people of photo gallery Qlick Editions in Amsterdam who were very enthusiastic about the idea and we set a date for the project to happen. As the moment to start came closer I made sure I had nothing else going on during this week and dropped all of my other routines so I could fully focus on this one-week project.
Each day of the past week I walked through the area, accompanied by my camera, for about 8 to 9 hours and would come back into the space to make my selection. Not always an easy task, but very rewarding as the photo would be printed and delivered to the gallery the next day. As you may know from your own experience it can be very tough to choose that one photo on the day you took it. That’s why I worked together with Eric: every day I would send him my final selection of around 8 images and he would get back to me with constructive criticism; very helpful in order to get to the pick of the day.
I also devoted a blog to this project on my website so anyone interested could be really involved in the process. I attempted to keep it as open as I could by sharing a lot of the images that did not make the cut, to give some insight into my way of working. Also I used geotagged images to place on a google map to make it possible to see where each image was taken.
I developed this project with the intention to explore different areas in different cities all over Europe and hopefully on other continents as well.
My experiences
Restriction leads to digging deeper into the possibilities that are at hand which may lead to some exciting new discoveries. I truly believe you can find beauty and interesting subject matter anywhere as long as you force yourself to look for it. By limiting the area to work in I did just that and it really gave me a clearer idea of what I’m looking for when I go out searching for interesting photographs. I had to look harder, but also learned to faster recognise the situations that trigger my attention. I had to pull myself through moments when I felt nothing was good enough and exterminate the fear of ending up with a shit picture getting printed. I had to go on when the weather was not as I prefer it when I go take pictures and learned to shoot when it’s a rainy day. I narrowed my scope but didn’t become closed minded, this project actually opened my view and made me see (and capture) things I wouldn’t have seen a month ago.
Make decisions
Dealing with the time constraint is a challenge but it keeps you from procrastinating to make decisions that have to be made regardless. Most of the time it really doesn’t help to postpone a decision. Do it now and you are relieved of one more thing that’s in the back of your head messing with your focus and concentration.
Develop your own project
I don’t think the boundaries I set myself are necessarily the right ones for you. Restriction can come in many forms and it’s only a matter of applying one or more simple rules to your workflow. For example shoot only between 6 and 7 am, use only one camera and one lens (less really is more and healthy for your back and wallet as well), shoot only in portrait orientation, shoot only one photograph of each scene (edit before shooting) etcetera.
Also think about restricting yourself in the process that follows a shoot: choose the one best image within an hour after coming home, don’t crop any of your images, make a print of your favourite image once a week and hang it someplace where others can see it (or give it away, people love getting a printed image). Involving others is a very good way to keep things going and stay sharp anyway!
Change it up
I believe setting up rules is a very effective way to boost your creative qualities, but it only works when you change it up. Don’t stick with the same rules and restrictions forever, in the end the most important things is to enjoy it and shed a new light on your photography.
Conclusion
By restricting you have less to worry about and more energy to focus on what you really want and love to do: make better pictures. It makes you look for other ways to achieve the result you have in mind. It also forces you to get better at working with the smaller amount of tools and possibilities you have left. You will learn to exploit what you have at hand and become better at what you do.
Go for it, I’m sure you will get something out of it!
About Maarten
Maarten Rots is an artist working with photography based out of Amsterdam. In his photographs you can see a sense of abstraction and surrealism found in everyday situations, captured by the camera. He loves printed photography and one of the ways he shares his work is through his self-published quarterly photography magazine March & Rock.
The exhibition with the results of his one-week project Siting: Qlick Editions will still be on show during the coming week atQlick Editions in Amsterdam.
I’ve been shooting a lot of photos on my smartphone lately (Samsung Galaxy s6). It has been so much fun and I’ve enjoyed it so much, that I wanted to write an article about my personal experiences and thoughts about the benefits of shooting street photography (and any photos) on a smartphone.
I often get a lot of questions from aspiring street photographers or photographers in general what kind of advice I would give in terms of what camera to buy. Honestly, my frank answer? Just start off by shooting on your smartphone. There are so many benefits. Some ideas below:
1. You increase your rate of learning
Seattle, 2015. Galaxy S6 processed with VSCO b5 preset
Some of the best street photographers I know shoot with only smartphones. Not only that, but their rate of learning is incredible. Many talented street photographers on Instagram have only been shooting for a year or two, and have made incredible growth and progress in their photography.
How? They have constant feedback and quickly learn through shooting all the time, and by sharing images on social media.
The #1 excuse (and problem) that all of us photographers face is that we don’t shoot enough, and we don’t have our cameras with us.
But if you think about it, the smartphone is the ultimate camera. It is small, unobtrusive, always with you, and convenient.
A lot of people say that smartphones aren’t apt cameras because it isn’t “full frame” or whatever. But to be honest, the cameras in the modern smartphones (iPhone 6, Galaxy S6, LG G4, and many others) are pretty incredible. They’re just as good as high end point and shoots from just a few years back.
Of course a smartphone isn’t going to have the same quality as a full frame, DSLR, or any other “real camera.” But at the end of the day, it isn’t image resolution that makes a good photograph. It is the “quality” of your images, in terms of the emotion, composition, and feeling you give your viewers.
I shoot with several cameras at the moment; a film Leica MP, a digital Ricoh GR, and a Galaxy S6. Funny enough I’ve been uploading a lot of photos shot on my smartphone on Instagram (after processing in VSCO with the a6 preset), and people have thought they were film Portra 400 shots. Morale of the story? Photos shot on a smartphone can look good.
Another example: Michael Christopher Brown shot much of his work on his iPhone in Africa, and have made compelling images (that got him into Magnum as a nominee). He didn’t need a fancy or experience Leica to get him in.
2. You focus on the light
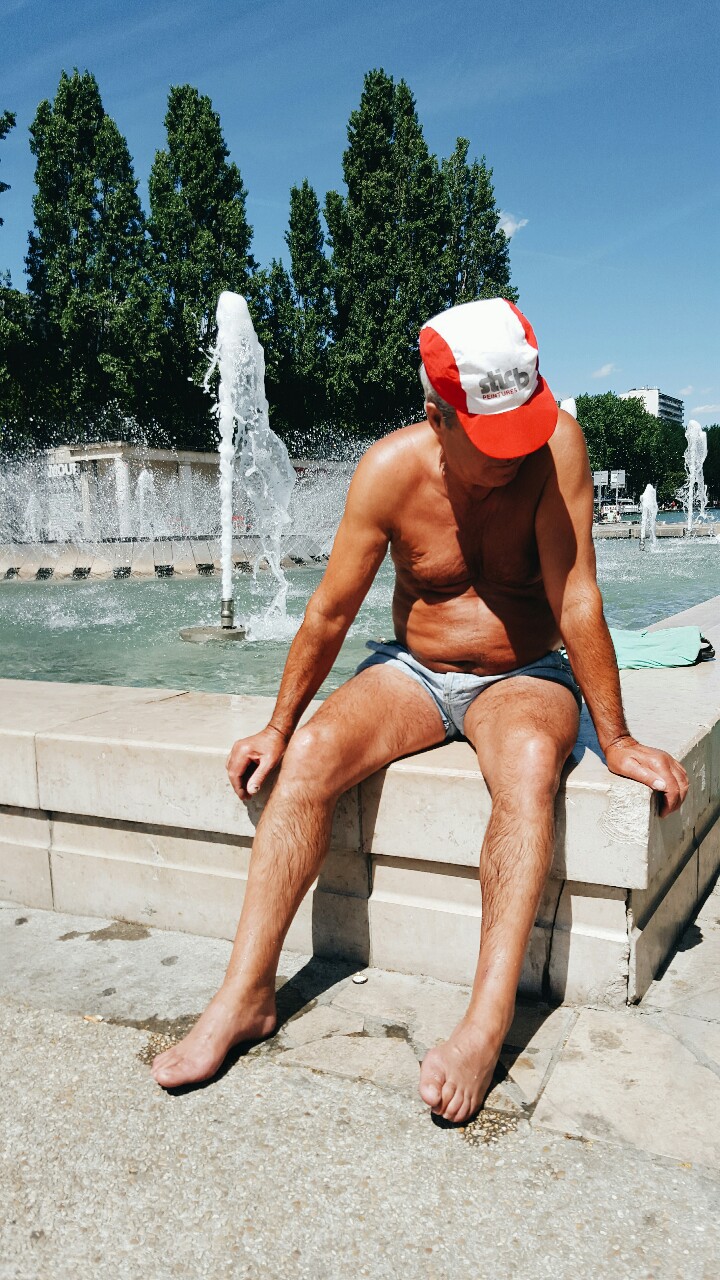
Paris, 2015. Galaxy S6
Another thing about smartphones that can help you become a better photographer: you need to focus on capturing good light.
The sensor of smartphones (while pretty good) still don’t compare to the dynamic range of most high end digital cameras. Therefore getting good light and exposure is even more important.
One of the biggest fundamentals in photography I wish I learned earlier on is how important light is. I remember when I got my first DSLR (Canon Rebel XT 350D) and was frustrated that my photos didn’t look as epic as the photos I saw online. My mistake? I only shot in shitty and harsh light, and didn’t know anything about good light (shooting at Golden hour or through windows).
No matter how expensive your camera is, you can’t fake capturing good light. Even if you have mad photoshop skills, you can’t fake good exposure.
Light can truly transform an ordinary image into an extraordinary one. Epic light evokes emotion, awe, suspense, and drama.
Therefore if you shoot street photography on your smartphone, really try to focus shooting in good light. Try to focus shooting sunrise or sunset, or just photographing people next to windows or open doorways (Steve McCurry style).
3. Keep your processing consistent
Paris, 2015. Galaxy S6
I think VSCO is the best smartphone app ever made for photography. The minimalist interface runs like butter, but even better: the presets look damn good. Their analog presets (the “a” series) looks the closest to Kodak Portra 400. Their black and white presets also look amazing.
I try to shoot with my smartphone like I’m shooting film; I try to stay consistent with one “look.” I am in love with the A6 preset, and always apply it to my images, and therefore all my smartphone images look consistent.
My advice? Play around with the presets and find one “look” that you dig and stick with it for a while.
A common mistake I see photographers make is that they have too much variety in their photos by using too many different presets or post processing techniques. Would we love Henri Cartier-Bresson’s work as much if he shot with 20 different types of film in his lifetime? Probably not, we love the consistency of his low contrast black and white images (focused on good composition). We also still remember and love the consistency (and beauty) of Kodachrome color film with Alex Webb and Steve McCurry.
It’s still fine to experiment with different “looks” in your photography. Just try to do it in different projects (like how a film director uses different equipment and film for different movies).
3. You can’t make excuses
Oakland, 2015. Galaxy Note 4
If you are like most modern people, you are probably connected more to your smartphone than your mother or first born child. I know I’m attached to this thing like a leash. I check it first thing when I wake up, and the last thing when I sleep at night. It is so bad that sometimes I get anxiety if my phone isn’t in my pocket (or a foot away).
In the past I have missed so many shots because I didn’t have a camera on me. But now that I have a smartphone I have no excuses. Sure I would prefer to shoot all of my shots on film. But if I’m at the grocery store or having dinner with Cindy, my smartphone is generally much quicker to take out and shoot with.
So really we have no more excuses for not having “time” to shoot. The only limitation we have is our own imagination, our curiosity of life, and ability to see the beauty in the mundane.
If you’re a photographer who owns a big ass camera (or doesn’t carry your camera with you wherever you go) try this experiment: only shoot with a smartphone for a month. Lock all of your expensive cameras in a drawer for that period of time, and you’re only allowed to shoot on your phone. Not only that but shoot everyday.
After a month, see if this liberates or frustrates you. It might liberate you (and you never end up shooting on a “normal” camera ever again) or you are frustrated enough that you build the diligence to carry your “better” camera with you everywhere you go.
4. Who cares what you shot it on?
Orange County, 2015. LG G4
The most annoying thing a photographer can ask (I’m guilty of this too) is: “What camera did you shoot that photo on?” Personally whenever I ask another photographer that question what I’m really saying is: “Wow I really love your photos, and I aspire to make photos as good as yours. But currently my photos isn’t good enough and I think it is because my camera isn’t good enough or suitable for the job. If I bought your camera, could I become as good a photographer as you?”
I had a friend (Misho Baranovic) who had a street photography show with my other mate Olly Lang. Both talented street photographers, and had their photos printed for the exhibition. Some random people came by and asked: “Wow, these photos look great. What did you shoot it on?” To pull their let they said: “On a Leica.” One photographer then said: “Oh yeah you can totally tell by the quality of the Leica glass! You really get that “Leica look”, depth, and three dimensional character.” When we told him he was joking and it was shot an iPhone, and we all laughed together.
If you make a memorable photograph, who gives a damn what camera you shot it on? Do you honestly care? Or are you worried that other people care? Do you feel insecure that if people “found out” you shot a photo on a smartphone, it would somehow devalue your photo?
For me, I actually respect photographers more when I see that they shot a certain photo on a smartphone. Why? They were able to make a beautiful image with such basic equipment.
When it comes to photography, sometimes it can be a big dick measuring contest (at least for men). Photography can sometimes be just about showing off your gear and how rich you are, or your status. It’s kind of how the most insecure people buy the most brand name clothes, watches, purses, cars, etc. Funny enough, as a general rule, the more expensive the gear a photographer has, the more insecure they are about their photography.
Personally one of the main reasons I wanted to get a Leica was because I was lured by the prestige, status, and the legend of Leica. I truly did think that buying a Leica would make me more inspired, creative, cultured, whatever.
But in reality, it hasn’t changed my photography much. The only real things that have helped my photography: reading photo books, learning from the masters, and shooting more. Sure at the end of the day, I still prefer shooting on a film Leica for the simplicity and ease of use, but at the end of the day, a camera is just a camera.
5. But what if my smartphone camera sucks?
Pacific Northwest, 2015. Galaxy Note 4
Unfortunately there are a lot of smartphone cameras out there with really low resolution.
In these cases, use that as a benefit. Dando Moriyama shot with a cheap film Ricoh GR and made super grainy black and white shots, while others were using fancy Leica cameras or sharp slr lenses.
So my suggestion: try shooting black and white and intentionally make your shots high contrast and gritty. Use the downside (low image resolution camera) to your benefit.
If you use an iPhone (older generations), I’m a big fan of Hipstamatic and the filters. If you use android, get the new snapseed app (which is epic and has great monochrome filters).
6. Practical tips shooting street photography on a smartphone
Some practical tips I’ve learned shooting on a smartphone;
a) Shoot a lot
The benefit of shooting digital is that it doesn’t matter if you shoot a lot. It doesn’t cost extra money. I also think it is generally better to overshoot a scene than undershoot a scene. Sometimes subtle differences can make the difference between a so so photo, and a great photo. For further reading on the importance of “working the scene”, watch my YouTube lecture or pick up a copy of “Magnum Contact Sheets.”
So if you see a good scene, keep shooting it until either your subject gets pissed off, walks away, or the moment is over. The problem is that street photographers move on too quickly and don’t shoot a scene enough.
When I see a good scene and shoot it on my smartphone, I’ll take 20+ photos whenever possible. Some of my favorite smartphone photos were shot with 50+ images.
b) Look like a dumb tourist
Shooting on a smartphone makes you look like a dumb tourist. Keep shooting and pretend like you’re not shooting your subject and you’re shooting something in the background.
For extra dramatic effect, flare our your elbows and knees. Fanny packs are a bonus, and make you almost invisible. I’m only half kidding.
c) Use the right apps
Every smartphone is different in terms of performance. I recommend trying out different smartphone camera apps to find what works for you the best.
For iPhone I recommend the “pro camera” app (you can prefocus and tap the screen to shoot). You can always use the default camera app too. Hipstamatic is also good for cool looking effects.
For Android, either use your default camera app, or download the Google camera app. Use whatever is faster and more responsive.
For editing and post processing, I recommend VSCO, Snapseed, or a combination of both.
If you don’t like sharing your photos as squares, use “Squaready” on the iPhone, or “Square InstaPic” on Android (to share your photos as a rectangle by adding a white or black border).
You can also try using mobile Lightroom on an iPad, but I find it still a bit clunky.
7. Instagram tips
Garden Grove, 2015. LG G4
To be honest, Instagram is by far the most dominant social media platform at the moment. For this reason, I think it’s the best platform to share your images on.
Don’t focus on getting a lot of likes. Seek to learn. Try to find a few photographers you admire, and seek to get critique or feedback from them by critiquing and giving honest constructive and helpful critique to them.
Focus more on engagement, communication, and interaction on social media. I would rather have 10 followers who is really active and helpful to me on Instagram, than 10,000 passive followers.
As a general rule on social media the quality of feedback you get on your photos is equivalent to the feedback you give others. The more you give the more you will receive in return.
As with hashtags? My personal philosophy: less is more. I try to limit my hashtags to 2 or less. Just try to follow a few hashtags to find good photographers to follow and engage.
Can’t find any hashtags you like? Start your own, like I did with #streettogs and #buybooksnotgear.
Conclusion
Berkeley, 2015. Note 4
Chase Jarvis once wrote: “The best camera is the one you have on you.” To expand on that, I think the best camera is the one you just shot a photo on. Meaning, a camera is only important insofar much as it is a tool to capture a certain image, feeling, or emotion you witnessed. The camera is just an intermediary tool for your eyes and heart.
Nobody gives a shit what camera you use to make images, and neither should you. Shoot with whatever comes is most convenient for you, and “image resolution” doesn’t really matter that much at the end of the day in street photography. Embrace grain, grit, and rawness.
Lastly, just remember to shoot and enjoy yourself. As large format shooters in the past looked down on medium format shooters, and as they looked down on 35mm shooters, and as film shooters looked down on digital photographers, and full frame digital photographers looked down on crop sensor photographers, looked down on compact cameras, looked down on smartphones. Everyone can be a snob with cameras, there is no end.
Let’s preach death to the camera. Long live photography!
Sorry for missing an entire. It has been a fiery and explosive month for me here. (I even lagged behind my Streettogs Academy duties) but all is well right now. Here’s another round of links, reads, and finds for all of you to digest.  Here you go:
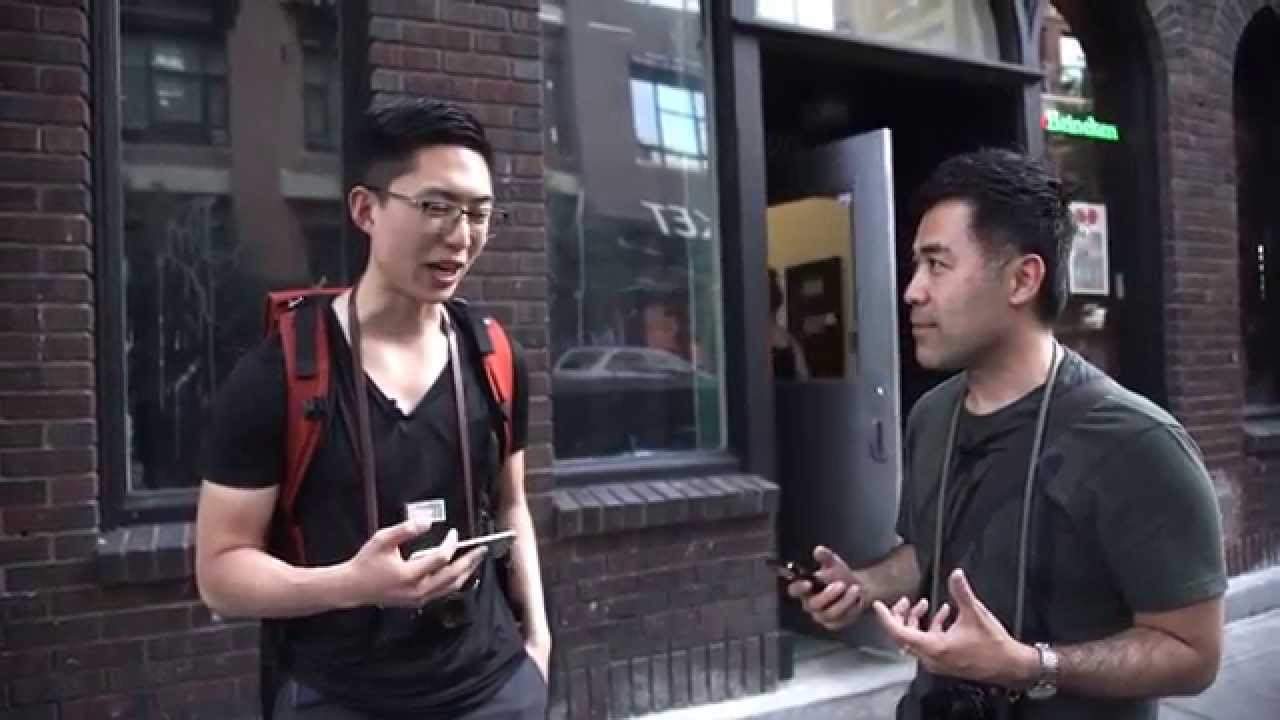
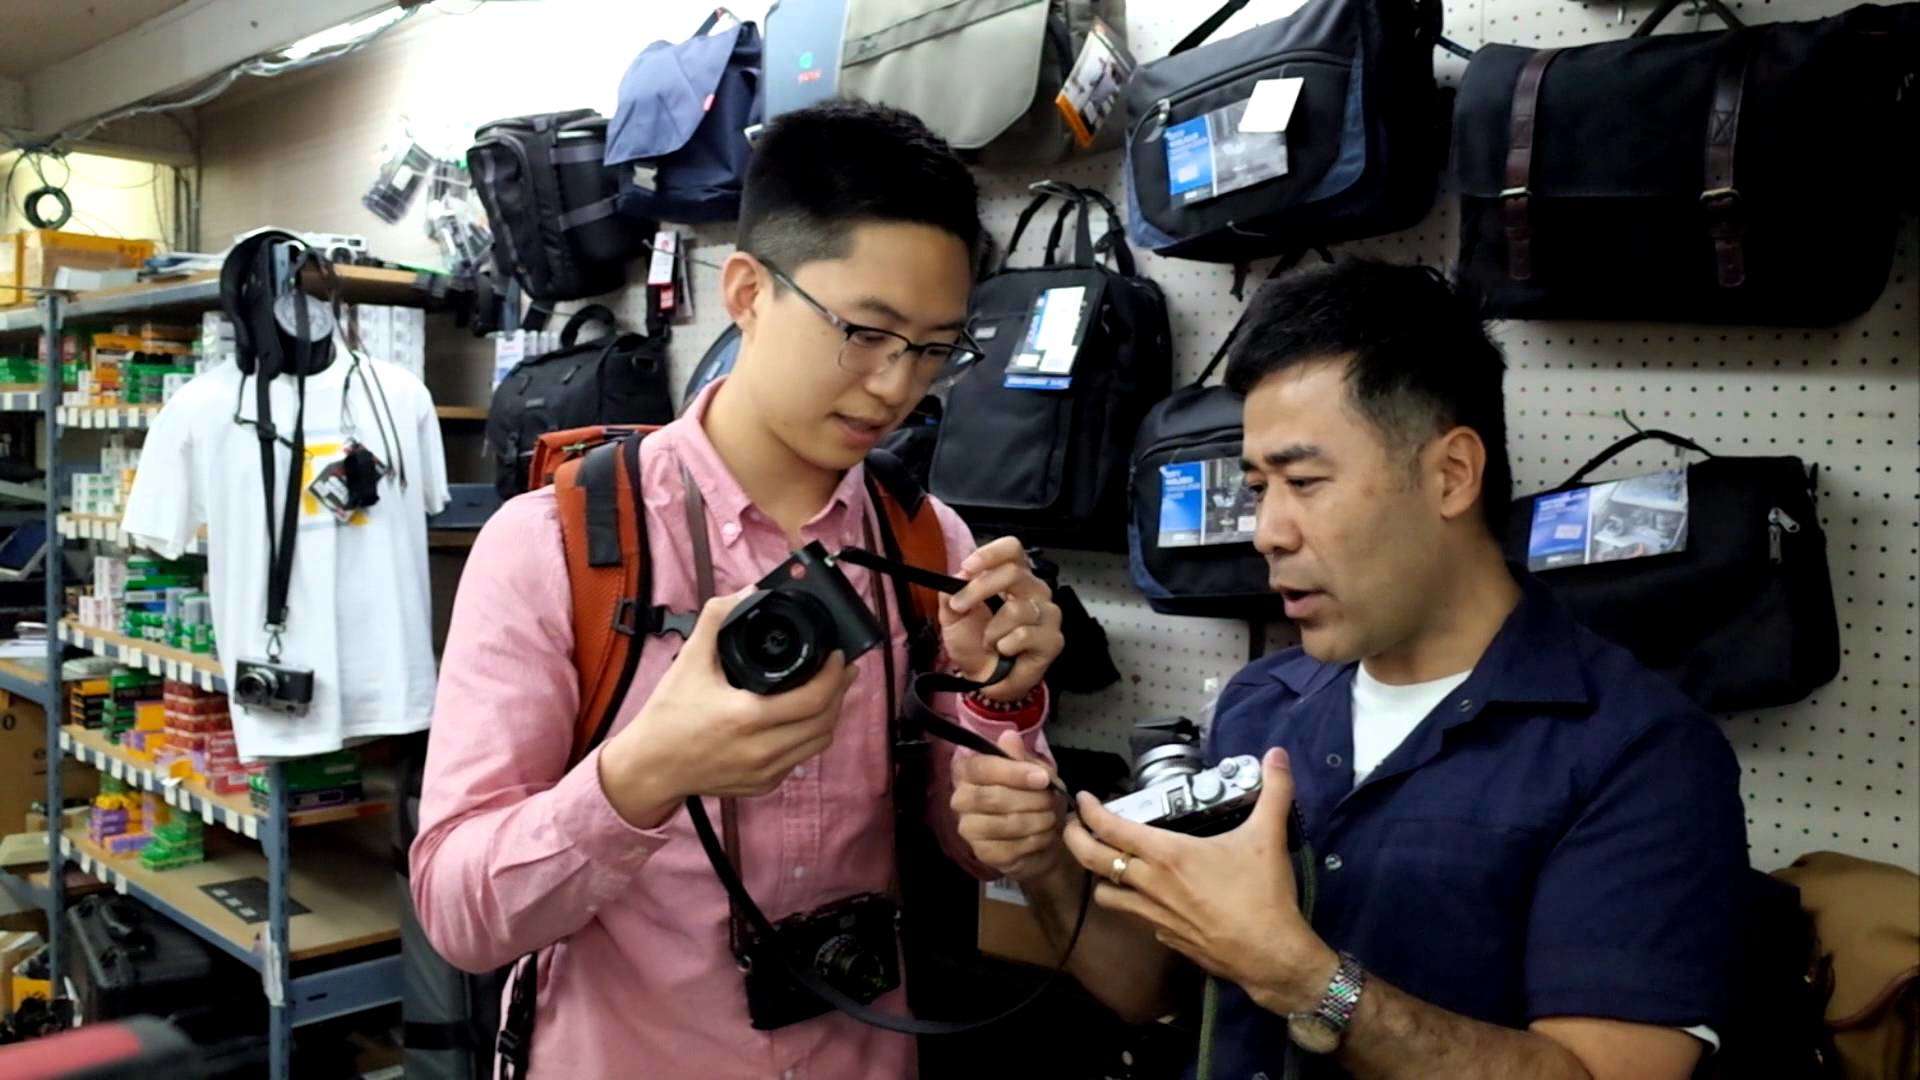
Probably the most fun video I’ve done in a long time: a street photography “Shootout” with bigheadtaco in Vancouver. He used his iPhone 5s while I used my Galaxy S6. The point of the video was to show that smartphones are more than capable cameras for street photography, and often more fun, accessible, and easy.
What are your thoughts on shooting street photography on your smartphone? Share your thoughts in the comments below!
Had a fun little interview and chat with bigheadtaco while I was in Vancouver. Hope you enjoy the video above, and make sure to also follow his YouTube channel!
Hey Streettogs, here is the last gopro video I got from Paris! I hope this gives you some ideas and insights on how I shoot street photography.
My ultimate lesson in Paris (as well in every country), as long as you shoot with confidence, a smile, and without hesitating, you generally have no problems. I shot there for about 2 weeks solid, and only had one negative incident of a confrontation.
I have found most Parisians to be very friendly and open (despite what foreigners have told me). I’ve picked up some French phrases, make an effort to try to speak French, and people are generally very happy to see me try.
Paris is certainly one of the most beautiful places to shoot street photography in the world. If you ever have the chance, come visit, and don’t forget to tell people: “Merci beaucoup” (thank you very much).
Recently I got my laptop stolen in Paris from my backpack. It kinda sucked, but the “blessing in disguise†was that I was able to replace my (slightly) aging 11’’ Macbook air (2012 model).
I started to consider a few options: the 13’’ Macbook Air, the 13’’ Macbook Pro, and the new Retina 12’’ Macbook.
I then did the typical thing: Google reviews of the laptops which are written by “experts.â€
I trudged through reviews on Engadget, The Verge, Cnet, etc— and became frustrated. All of their opinions contradicted another, and there seemed to always be pros/cons with each laptop.
Finally fed up, I disregarded all the reviews online and just decided to buy what I was interested in, and to try it out for myself.
I went to the Apple store in Aix-en-Provence, and picked up the new 12’’ Macbook Retina to try it out. I was happy to know that they had a 14-day return policy, so I could see if I liked the machine or not.
So the last two days I have been using the new 12’’ Macbook, and I like it a lot. Sure it isn’t the perfect device (it is a little bit slower than my 11’’ Macbook Air) and the lack of ports is a bit of a drawback. But for me, it works well. The majority of my work on a laptop is typing and writing (like I am doing now), and my priority is having the lightest and most compact weight (the 12’’ Macbook is surprisingly even lighter than my 11’’ Macbook air).
Everyone has their own preferences. No matter how many reviews of anything you resarch online (for a laptop, camera, lens, etc)— your experiences and preferences will always be different from that of a reviewer.
So for example, let’s say you’re interested in shooting with a film rangefinder. Sure you can read all this stuff online (even on this blog), but you will never truly know the experience until you try it out for yourself.
We are fortunate enough to live in a society that all of the decisions we make are (mostly) reversible. If you’re interested in a new camera for street photography, my suggestion is this: just buy it and try it out for yourself. If you don’t like it, simply return it. I know that BhPhotoVideo.com offers very generous return policies (30 days).
As a general philosophy whenever it comes to anything in life, it is good to ask for the opinion and experiences of others. Sometimes it is good to have a starting point to base our own ideas upon.
However at the end of the day, experience is highly personal. If you have never been to Paris, you can’t simply ask your friends how their experience was. You have to go there and experience it directly for yourself.
If you’ve never shot film, you will never truly understand how the experience is for you, until you actually try it for yourself.
Do you have an idea for a photography project? Don’t ask what others think about your idea. Just try shooting the project. Perhaps after you’ve tried shooting that project, you can show others the photos and ask for their opinion.
Long story short: disregard camera reviews from others (including mine), opinions and experiences of others, and just try things for yourself.
Live a life of self-experimentation, and have fun.
“Geometry is the language of man… he has discovered rhythms, rhythms apparent to the eye and clear in the relations with one an- other. And these rhythms are at the very root of human activities. They resound in man by an organic inevitability, the same fine inevi- tability which causes the tracing out of the Golden Section by chil- dren, old men, savages, and the learned.â€
– Le Corbusier (1931, Towards A New Architecture)
Are you a street photographer and want to learn how to use your intuition to capture better “decisive moments” on the street? Do you feel frustrated that your photos tend to be cluttered, uninteresting, and lack emotion and magic?
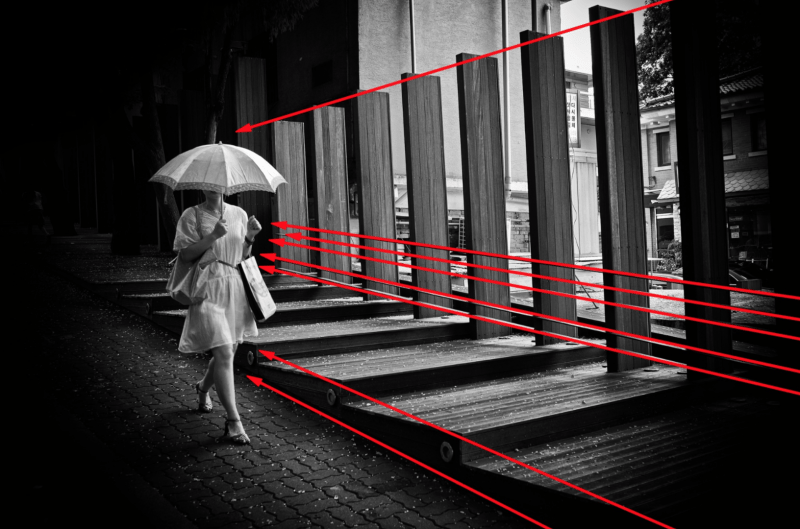
This book will teach you the fundamentals of composition in street photography: the importance of diagonals for dynamic images, strong contrast to separate your subjects from the background via “figure-to-ground,” how to juxtapose your subjects, color theory, and how to create compelling stories.
“Composition must be one of our constant preoccupations, but at the moment of shooting it can stem only from our intuition, for we are out to capture the fugitive moment, and all the interrelationships involved are on the move.â€
– Henri Cartier-Bresson
This book will also provide you with contact sheets and a behind-the-scenes look to some of my most iconic images, and how you can create similar images.
Furthermore, you will learn how changing your perspective will totally transform your images. A subtle change to your approach will make all the difference in your images:
“The photographer’s eye is perpetually evaluating. A photographer can bring coincidence of line simply by moving his head a fraction of a millimeter. He can modify perspectives by a slight bending of the knees. By placing the camera closer to or farther from the subject, he draws a detail– and it can be subordinated, or he can be tyrannized by it.â€
– Henri Cartier-Bresson
This book is a distillation of all the lessons I have learned about street photography and composition over the years. I dispel some of the myths of “the decisive moment,” how you can often see composition after-the-fact, and the secret for making memorable street photographs.
This is a unique book and no other resource exists quite like it. Consider it your practical one-stop guide and manual for improving your composition in street photography. Furthermore, it is open and free for you to download, print, share, distribute, translate, remix, to help support the community of street photography.
I have written this out of pure love, and I hope you enjoy reading it as much as I enjoyed putting it together.
Love,
Eric Kim
@ Aix-en-Provence, France / July 1, 2015
Table of Contents
Below is the overview of all the chapters and sections in the book: