Hey friends,
I’m doing this video to give you a behind-the-scenes look of my image-selection process (editing):
1. Editing vs post-processing
One of the big misconceptions is that when people call ‘editing’ photos, they mean “post-processing.â€
Editing is the art of choosing your best photos. The most difficult art. Especially in todays world of digital photography. To choose your photos is hard— especially when you have thousands upon thousands of photographs to choose from.
I know for me, I think editing is harder than making photos. Especially choosing your personal favorite photos.
2. Edit based on your gut
For me, I edit based on my gut. I choose my best photos, according to what stirs my heart. I’m looking for photos with soul, emotion, and punch me in the stomach.
Another tip: A photo is either a ‘hell fucking yeah’ or a ‘no.’ Avoid the in-between “maybe†photos.
3. Editing process in Lightroom
Step 1: Importing the photos
Okay, so I just plugged in my SD card, photos shot in RAW, from my Ricoh GR II. I applied the free ‘Eric Kim Monochrome 1600’ preset to the images upon import.
I click import, and wait for the photos to import.
I shoot with a high-contrast black and white preview on my Ricoh GR II (in RAW). So when the photos import, the high-contrast black and white preset is applied. If I don’t add the preset upon import — the RAW file will revert back into color.
Step 2: Navigating Lightroom with Hotkeys
First hotkey in Lightroom, I recommend memorizing:
- Shift + Tab: Collapses side-tabs — easier to see all your photos.
Second, I press “L†twice, to turn off the Lights. I can see the thumbnails easier.
I then do a quick look-through the images, and see if any ‘pop off the page.’ I prefer looking at photos as small thumb nails, just how the master photographers used to look at ‘contact sheets.’
By looking at your photos as small thumbnails, you get a better sense of the composition. Also, you save time looking at your photos as small thumbnails. The ultimate resource we have is time. So save time.
Step 3: Picking your favorite photos
I then press ‘P’ (Pick) on any photos that I think might be good.
If I want to ‘Enlarge’ a photo, I press ‘E’ (or just double-click). I wait for the photos to process the preset.
For this photo, I like this little detail on the wall (far left). I also like how Cindy’s face looks like a diamond. Also the darkness, and the mood of the photo is pretty good.
If I’m unsure, I’ll ‘Enlarge’ more photos (E) to look at them closer:
If you want to ‘Unpick’ a photo, press ‘U’.
If I want to darken a photo, I just lower the exposure.
When I’m done with my initial look-through, I press “G†to go back to the Gallery/Grid view.
Shift+Tab to see all the side-modules again.
Step 4: Filter your photos based on what you Flagged
Next step, to see all the photos you ‘Flagged’ — in the bottom-right corner where you see ‘Filter’, click ‘Filters Off’, and then select ‘Flagged.’ Now you will only see the photos you initially flagged (when pressing “P†to Pick the photo).
When it comes to editing your photos, you can only choose one photo per scene. I therefore will press “U†to ‘unpick’ a photo I don’t like.
If I want to see a photo’s effect on me, I press ‘F’ to go into Full-screen mode.
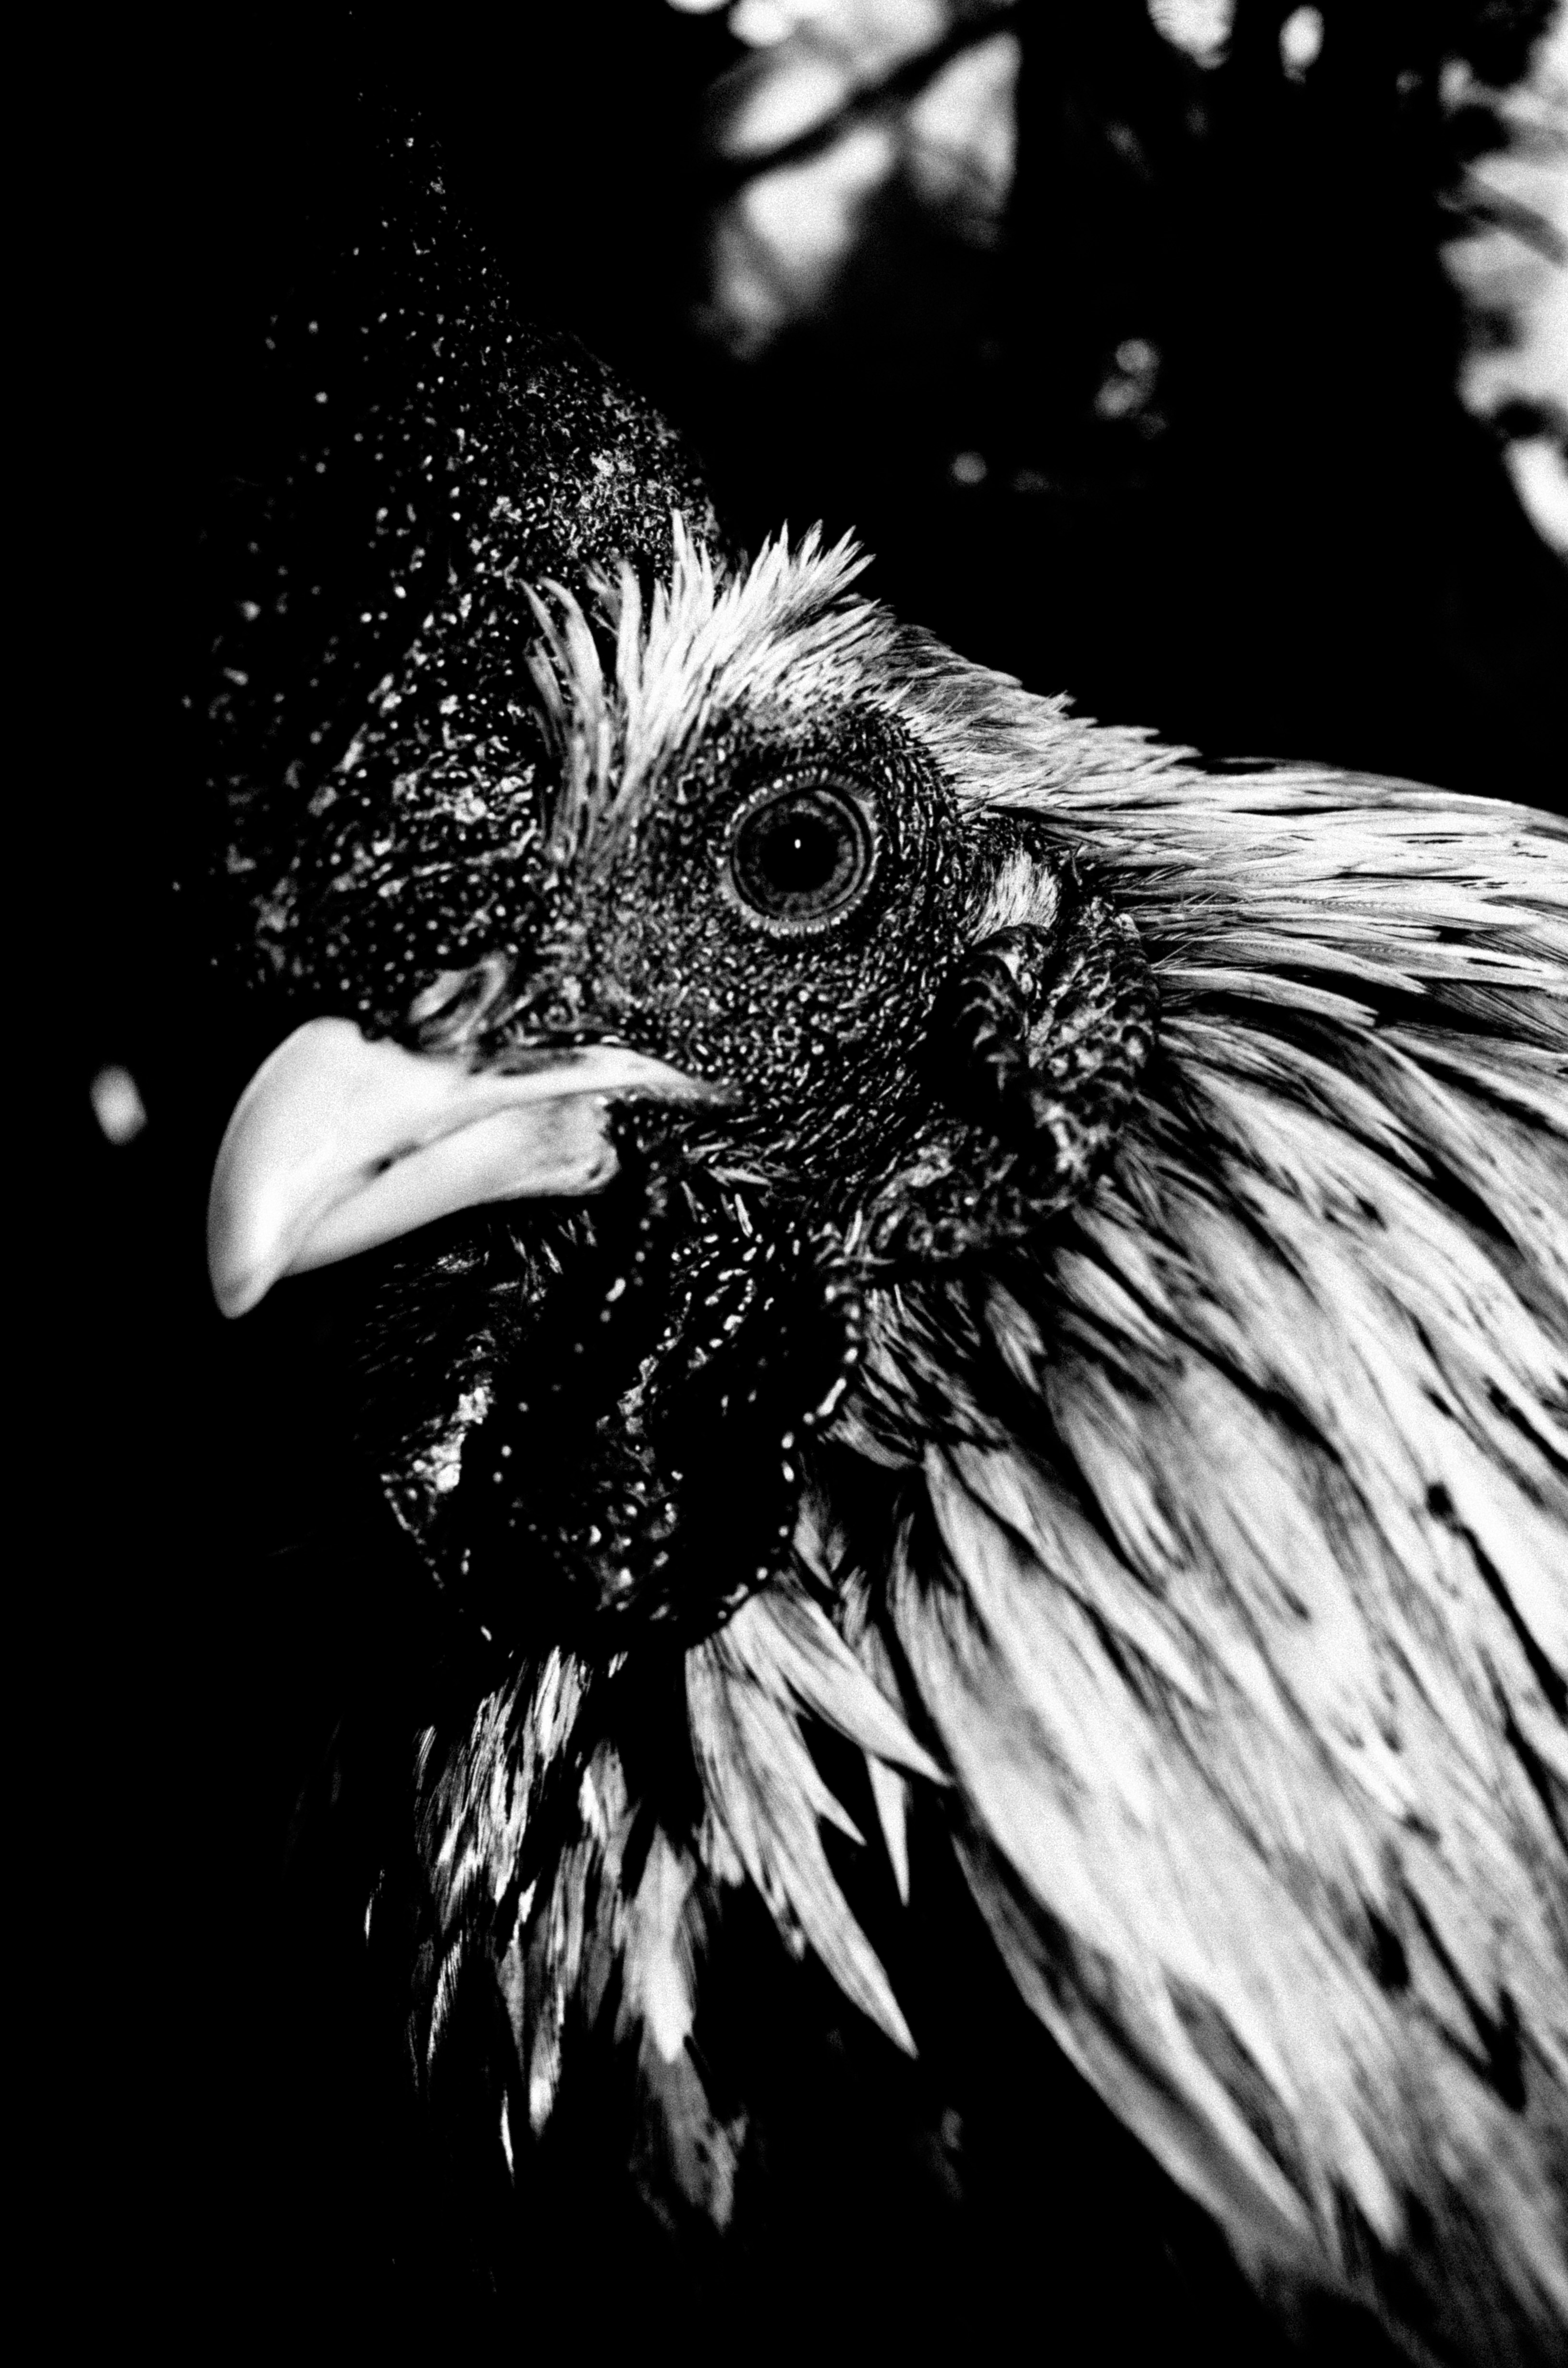
I prefer the sharpness of this rooster photo, and the centered eye:

I don’t like the brightness on top of the frame, so I’ll try the ‘Graduated Filter’ tool (hotkey “Mâ€). You can also go into the Develop module with hotkey “Dâ€.
Looks a lot better now.
If I wanted to ‘cheat’ — I can also use the ‘Adjustment Brush’ (hotkey “Kâ€) to totally darken the top-right part of the frame.
Do you prefer it without the top-right corner?
‘Command Z’ to undo.
You can see the more time I spend post-processing the photo, darkening (dodging) it — the ‘faker’ it looks. Honestly, I prefer the original version.
I also like this photo of Cindy’s hand:

I have two versions of this photo of Cindy’s hand, pointing at the monitor. I prefer the second photo, because you can see the little hook in her thumb.
Also when editing my photos, I look at the edges of the frame. Whatever has cleaner edges of the frame, I keep. I don’t like to crop my photos.

You can see, I’m spending too much time post-processing the photo. It probably means it isn’t a good photo. Therefore, we must ditch it. Press ‘U’ to Unpick.
Step 5: Export your favorite photos
Okay, so we’re down to my three favorite photos. You can just press “Command + A†to select all photos, and we will export the photos into a folder on the computer. i use Dropbox to sync all my stuff.
When I make new folders, I create new versions. So Hanoi “v29†is my newest version. I export new photos, and often re-copy older photos to the newer folders.
I usually rename my photos to ‘Custom Name – Original File Number†so I can add my name to the photos, but also keep the original file number (incase one day I want to refer to the original files).
For file settings, choose JPEG 80% (pretty much means 100%). Like in Photoshop, 80% is the same as 10/10 image quality. In Lightroom if you choose 100% , it is like choosing 12/10 image quality (in Photoshop).
Then I just click ‘Sharpen’ and click Export. I never keep the original RAW files. Just the JPEGS. Makes life easier.
Now you can see my photos on my folder.
Afterwards, I will then upload the photos to my blog, social media, or whatever.
Conclusion
Lightroom is a piece of software in which you need to only know how to use 10% of it, for 90% of the functions.
I believe in KISS (keep it simple, stupid). So don’t feel you need to know everything. Just the basics.
Learn more editing
Learn how to choose your best photos:
- How to Choose Your Best Photos
- Be Your Own Harshest Critic
- Nobody Wants to Look at Your Photos
- 15 Tips How to Choose Your Best Photos