
For today’s composition lesson, we will discuss the Golden Rectangle.
The Golden Rectangle is based on the ‘Golden Ratio’, the idea that there is this golden ratio (1.168) which re-occurs in nature.
I’m not going to talk too much about the scientific or mathematical details; but in practical terms in photography, it is a good way to build stronger, more balanced compositions.
Download
—
1. Draw standard viewfinder (3:2) ratio:
First of all, imagine your viewfinder, the standard 3:2 ratio.

2. Draw diagonal line

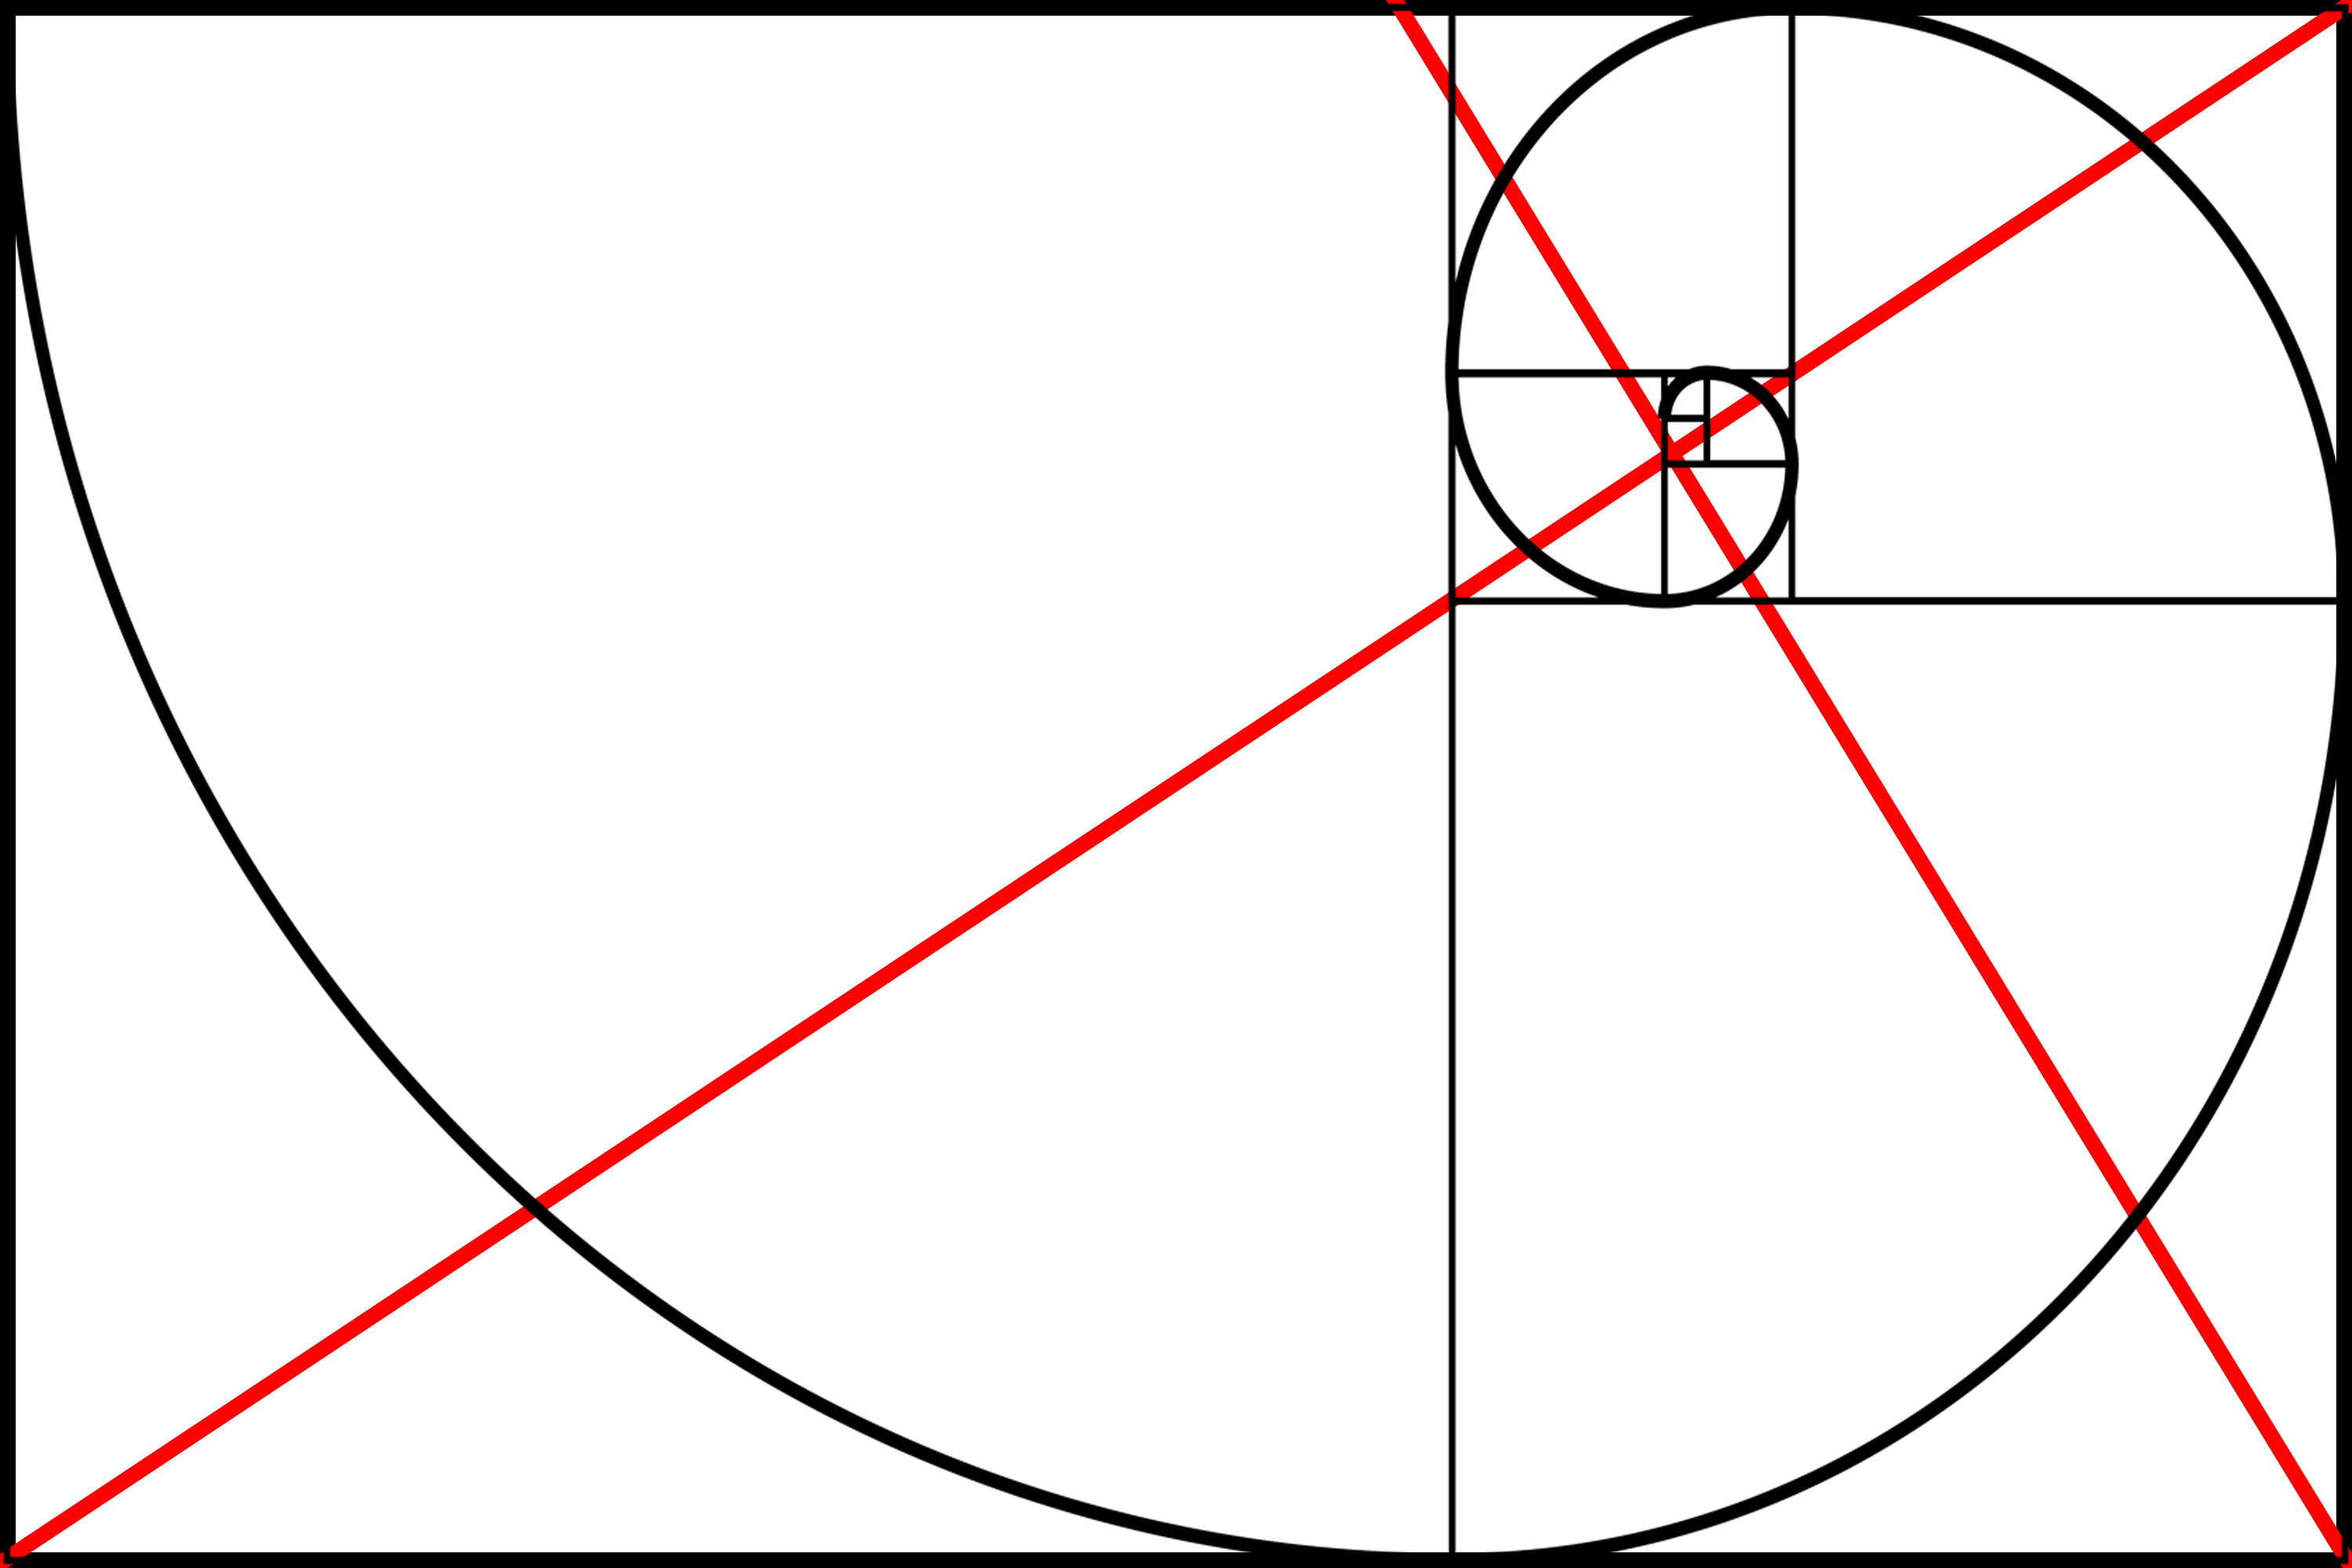
3. Draw 90 degree perpendicular red line:

4. Intersection
Note the intersection of the red lines, is the same as the Fibonacci Spiral:
Let us apply the diagonals to other directions:


And let us work it on the different directions:


Let us start back to the basics, from the blank slate.
Then let us add the red diagonals, and see the grid it forms:


Accessing the golden rectangle in Lightroom
- Open up Lightroom
- Press “D” to go to Develop module
- Press “R” to go into cRop mode
- Press “O” to change Overlay
- Press “Shift+O” to change orientation of Overlay
- Keep toggling until you get the Golden Rectangle:
Example of a photograph of mine:


Now I’m going to bombard you with some images, I hope you can follow along. Note how the golden rectangle and the fibonacci spiral follow one another:


Why the Golden Rectangle?
I don’t know why it works; but it works.
The Golden Rectangle is much more dynamic than the standard rule of thirds. This is because the rule of thirds focuses too much on horizontal and vertical lines, which aren’t as dynamic as diagonal lines.
How can I apply this to my photography?
Essentially what you need to know is this:
- Drawing red lines/blue lines are good to judge your compositions after you’ve made the photographs. This will help better inform your composition and framing next time you go out and make photos.
- When I’m shooting, I try to think of diagonals. I intentionally try to get a diagonal coming from the corner of my frame. This makes my photos more dynamic.
- Think diagonals, don’t think fibonacci spiral. And if your camera LCD screen has a diagonal-grid overlay, turn it on.
- Tilt your camera more. Use the ‘Dutch Angle‘ to create more dramatic images.
- When you’re framing, focus on the edges of the frame, and make sure the edges make diagonals.
Ultimately the point of composition is to create more balanced, dynamic, and interesting frames. And the stronger your composition, the more you can focus on the emotion and soul of the photograph.
More stuff to come soon.
Always,
Eric
Learn more composition >
Take your composition to the next level:
- Center Eye
- Low-Angle
- Dutch Angle
- Deep Depth
- Spacing
- Silhouette
- Leading Lines
- Figure to Ground
- Fibonacci Spiral
- Cropping
- Emotion
- Composition by Eric Kim
Street Photography Composition 101

For distilled lessons on composition, read the free ebook: “The Street Photography Composition Manual.”
Further articles to improve your compositions in photography:
- Composition Lesson #1: Triangles
- Composition Lesson #2: Figure-to-ground
- Composition Lesson #3: Diagonals
- Composition Lesson #4: Leading Lines
- Composition Lesson #5: Depth
- Composition Lesson #6: Framing
- Composition Lesson #7: Perspective
- Composition Lesson #8: Curves
- Composition Lesson #9: Self-Portraits
- Composition Lesson #10: Urban Landscapes
- Composition Lesson #11: “Spot the notâ€
- Composition Lesson #12: Color Theory
- Composition Lesson #13: Multiple-Subjects
- Composition Lesson #14: Square Format
Composition Theory

Learn compositional theory:
- Why is Composition Important?
- Don’t Think About Composition When You’re Shooting Street Photography
- How to Use Negative Space
- Street Photography Composition 101
- The Theory of Composition in Street Photography: 7 Lessons from Henri Cartier-Bresson
Composition lectures
Compositional lessons from the masters of art

In Progress
