Robert Capa is one of the greatest photographers to have ever lived. When he was still alive, he was proclaimed as “The Greatest War-Photographer in the World”. He captured some of the most intense wars during his time, including the Spanish Civil War (1936-39), Chinese resistance to the Japanese invasion (covered in 1938), the European theater of World War II from (1941-45), the first Arab-Israeli War (1948), and the French Indochina War (1954) and tragically passed away by stepping on a mine.
During his lifetime, he co-founded Magnum alongside photographers Henri Cartier-Bresson, George Rodger, David “Chim†Seymour, and William Vandivert in 1947. He also mentored many young photographers in Magnum such as Eve Arnold, Elliot Erwitt, Burt Glinn, Inge Morath, and Marc Riboud.
Capa also famously coined the phrase: “If your pictures aren’t good enough, you’re not close enough†and his bravery on the front-lines helped him capture some of the most intense, intimate, and emotional photos of war.
So who exactly was Robert Capa, the man and the photographer? How did he start off as a photographer, start Magnum, and create a legacy that has lasted for decades? I wanted to learn more about Robert Capa and did some research on him through the biography “Blood And Champagne: The Life And Times Of Robert Capa” as well as the autobiography Capa himself wrote: “Slightly Out of Focus” where he shares his personal stories from World War II.
Interested in learning more about the legend Robert Capa? If so, read on.
I just finished a new book: “The Obstacle is the Way” by Ryan Holiday. The book is a huge source of inspiration for overcoming challenges– and using them to your advantage. In-fact, Ryan uses the quote from Marcus Aurelius for the title of his book: “The obstacle is the way” meaning that if it weren’t for obstacles in our life, we wouldn’t grow, develop, and mature.
I thought a lot about the obstacles I’ve faced in street photography– and how I have used those negative experiences and turned them into positive ones. Here are some thoughts on how you can continue to grow and develop in your street photography– and utilize negative experiences to your benefit.
We would all love to be more creative in our street photography. We want to create work that stands out from the crowd. We want to create images that connect emotionally to our viewers. We want our images to inspire our viewers. We want our images to speak from our heart, and communicate messages to our viewers.
How do we find more creativity in street photography? I have written about creativity in the past, but have recently been inspired by a new book– “Creativity, Inc.†by the president of Pixar.
Pixar is one of the most creative studios in the world. In my opinion, they haven’t made a bad movie so far. In addition, all of their films have been wildly successful both artistically and commercially all around the globe.
I wanted to use this article as an opportunity to meditate upon the creative process a bit more–and see how we can apply it in our street photography (and other parts of our life).
If you are a Garry Winogrand fan, don’t miss out on this rare video interview with him. He talks about everything, including the “ultimate justification” for shooting with a rangefinder (along other things). Gotta love Lee Friedlander’s introduction: “Welcome to the Garry Winogrand Circus– he’ll explain all his pictures!”
When I started off in street photography, I believed in the “myth of the decisive momentâ€. What do I mean by that?
Well, when I first heard of “The Decisive Moment†by Henri Cartier Bresson, I had the wrong impression that he only took one photo of a scene. I imagined Henri Cartier Bresson waltzing into a street scene, carefully aiming his Leica, and taking only one shot and creating masterpieces. I thought he was a demigod– a photographer who somehow had this magic behind his lens.
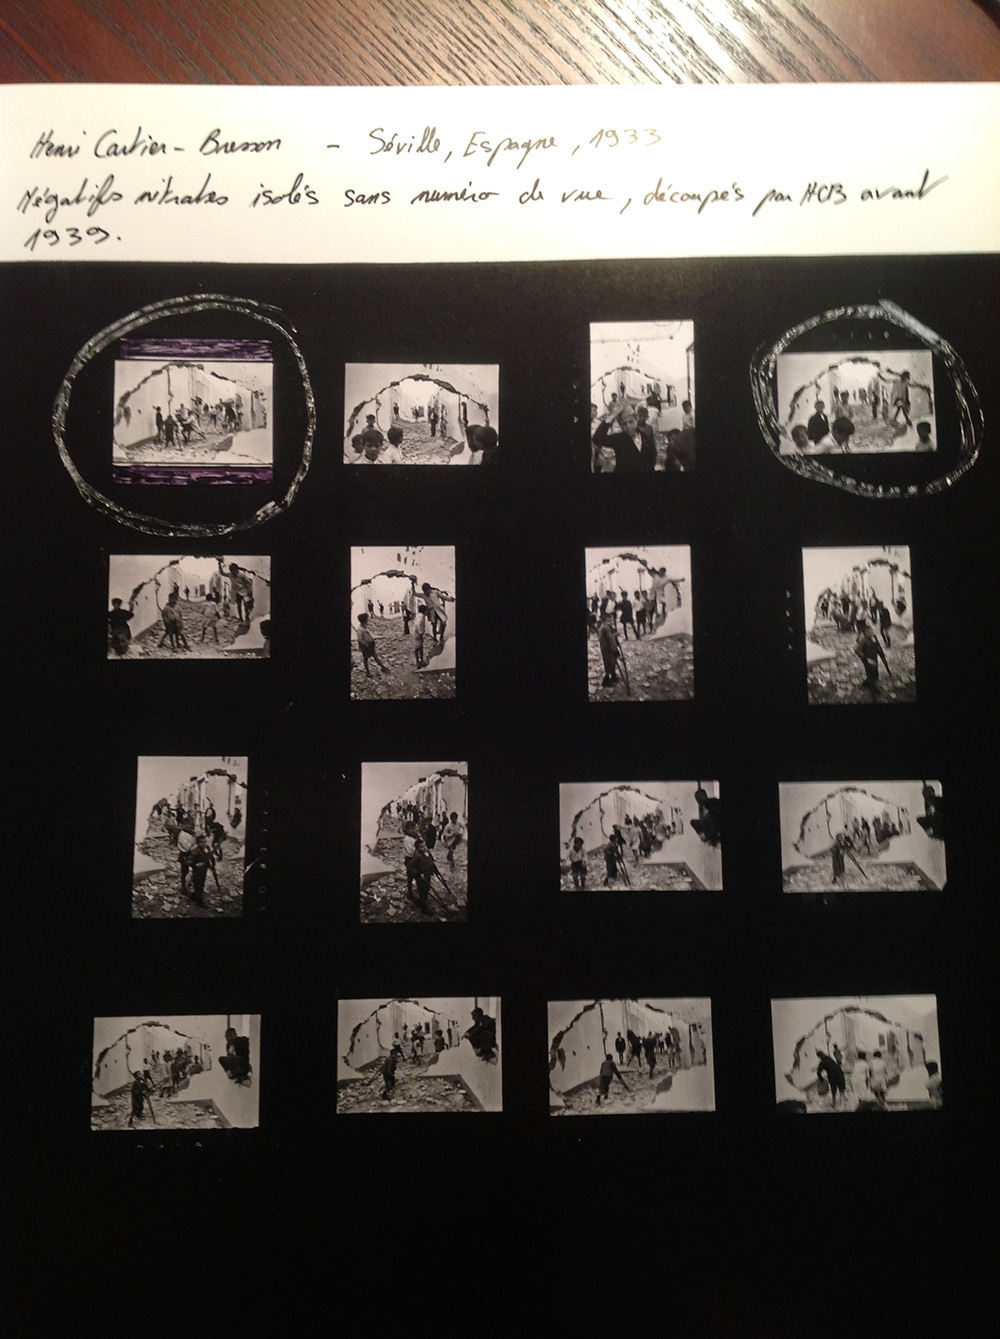
However if we look at his contact sheets, it is a different story. He (and almost all great photographers) never only take one photo of a great potential scene. Out of Henri Cartier Bresson’s contact sheets, you can see that almost all of his great images required him “working the sceneâ€â€“ taking multiple photos of the same scene at different angles, moments, and perspectives. He hustled hard to get the shots he wanted– and would spend considerable time with his contact sheets, determining which photos he decided were his “bestâ€.
Close-ups of the contact sheet from Seville, by Henri Cartier-Bresson:
One mistake that I see a lot of beginner street photographers is that they only take one photo per scene. I think this is because they too believe in the “myth of the decisive moment†and partly because of the fear that they will be caught taking photographs.
I have written about contact sheets several times before. For those of you who aren’t familiar with what a contact sheet is it is pretty much a sheet of paper which shows all the photographs a photographer shot on a roll of film. And with this sheet of paper, a photographer can use a loupe (small magnifying glass for the eye) and edit (choose) their favorite images. This was done in the days of the darkroom, and when digital didn’t exist.
Now of course, we have “Lightroom†where we can identify all of our photos of a scene digitally. Instead of having to look at tiny thumbnails, we can now see all of our “almost†photos in full resolution.
Contact sheets are the best learning tools for a photographer. You can learn from contact sheets from other photographers, and also from your own contact sheets.
Henri Cartier-Bresson. SPAIN. 1933. Valencia. Note the two versions of the photo he was considering from. This was the best.
Henri Cartier-Bresson. SPAIN. 1933. Valencia. This image wasn’t as strong as the prior.
Analyzing contact sheets from the masters who came before us is the closest thing we have to reading their minds. We can see how they “worked the sceneâ€â€“ and how they took photos from different perspectives, decided when to hit the shutter, and how many photos they decided to take. Some photographers are able to “nail†their photos in just 5-6 shots, while other photographers will shoot a full roll of 36 photos in just one scene.
Realize that all these master photographers were shooting on film, where it actually cost something to photograph. Now that most of us shoot digitally, there is no excuse for us to not “work the scene†and take many different photos of the same scene.
Okay, so we’ve talked about the importance of “working the sceneâ€â€“ and how important it is to take multiple photos of a scene (not just one photo). So how do you exactly “work the sceneâ€?
Once again, it is very tempting to only the one photograph when you see a good scene. When I started off in street photography, I would be deathly afraid of offending people or being “caught in the act†of photographing strangers.
However realize that to make a great photograph, you need to work the scene. You will never know when the “best†decisive moment will occur. In a scene, there are many different great potential “decisive momentsâ€. You generally only know which is the best “decisive moment†afterwards in the editing phase.
Another practical tip to better “work the scene†is to not “chimpâ€. What is chimping you ask? Well, it is when you look at your LCD screen after you take a photograph. Why do they call that “chimpingâ€? Well, apparently film photographers used to make fun of digital photographers by saying they looked like a bunch of “chimps†(or monkeys) when they would crowd around their LCD screens and show off the photos they just took.
So what is so bad about “chimping†anyways? I’ve written an article on why street photographers shouldn’t chimp– but to sum up, chimping kills your flow when you’re out shooting on the streets. Rather than checking your LCD screen several times while working a scene to check for exposure, framing, and what you captured– it is better to just take a lot of photos at different angles and moments and choose the best photos later.
“Lingering†is one of the most difficult things about “working the sceneâ€. Lingering is to “overstay your welcomeâ€. It is generally rude to “lingerâ€. Lingering is like “loiteringâ€â€“ you hang around longer than you should, and people look down on it.
One of the most frequently asked questions I get in my workshops is, “How long should I ‘work a scene’ and linger before I know it’s time to leave, or I got the shot?â€
Well, that is the big problem. We have no idea when we either “got the shot†or we’ve hung around “long enoughâ€.
Personally, my philosophy is to be the houseguest that overstays his or her welcome. Did you ever have a friend who asked to stay at your place for a week but ends up staying a few months? Be that guy.
The reason I advocate for “overstaying your welcome†is because it is better to linger for a longer period of time because often your best shot will be the last shot. Looking at a lot of contact sheets, especially this image by Richard Kalvar, you see that his best image was at the very end (on his 37th frame, quite lucky). If he didn’t linger around and work the scene, he would’ve never gotten his iconic shot.
Furthermore in street photography, you will only see a great potential scene once in your life. You might see similar scenes, but you will never see the same exact scene with the same exact people, with that background, that light, and that configuration.
So don’t live with regrets, linger around longer than you should– and “overshoot†a scene.
A technique I learned from my friend Charlie Kirk is if you see a great potential scene, hang around and wait a bit longer before you go in and start taking photos. For example, if you see a cool looking guy smoking– linger around him and wait for him to take a puff– then jump in and take a few shots of him inhaling his cigarette.
Lingering is quite painful to do. It is awkward, makes you feel uncomfortable, and might make your subject feel uncomfortable.
One way I get over the awkwardness of lingering and “working the scene†is by pretending I am photographing something behind them and avoiding eye contact. Because I shoot with a 35mm lens, I don’t have to point my camera directly at my subject to get them in the frame.
Another technique is to smile and interact with my subject while photographing them. For example, if I see a good scene, I might start off by shooting candidly– then if my subject makes eye contact with me, I will also make eye contact, smile, keep shooting, and even start chatting with them (hey, you’re looking good!)
When you are “working the sceneâ€â€“ don’t just put your camera to rapid fire mode and start shooting aimlessly. Rather, be very conscious about when you decide to click the shutter.
Generally I make the decision to click the shutter when I see hand gestures. It can be a gesture of someone covering their face, holding their hands by their sides, or pointing in a certain direction.
Another great tip is to wait for eye contact. Try experimenting taking photos without eye contact, and some photos with eye contact. You never know which photograph will be better. But there is a saying: “eyes are the windows to the soulâ€â€“ which means if you get eye contact in your street photographs, they can be more intimate and emotional.
5. Keep your feet moving
If you ever watch a boxer, they rarely keep their feet still. The most important thing as a boxer is to never put your heels on the ground. The moment you stop moving is the moment you become a sitting duck– and will be a prime target to be knocked out by your opponent.
Take the same mindset as a street photographer. When working the scene, don’t just keep your feet planted on the ground. Keep your feet moving. Take photos from the left, right, take a step forward, a step backwards. Crouch down. Get different angles and perspectives.
6. Shoot both landscape and portrait photos
Contact sheet, VJ Day. Photo by Alfred Eisenstaedt
Also when working the scene, try experimenting taking your photos in both landscape (horizontal) and portrait (vertical) modes. When you are in the heat of the moment and see a great street photography scene, it is often difficult to know which is the “better†orientation of your camera for the scene.
So if you have time, try to work out both orientations of your camera– depending on what kind of image you want to create.
7. Be calm and patient
Jean Gaumy, Iran, 1986.
When you are working a scene, remember to try to stay calm and patient. We can sometimes get into a frenzy when working the scene, and trying to get “the shotâ€. However be calm and patient while you’re shooting– by analyzing when you need to hit the shutter, how close you need to be to your subject to frame them properly, and distracting elements in the background.
Jean Gaumy, Iran, 1986.
When you start off working the scene as a beginner, you might get too much of an adrenaline rush to stay calm and patient when shooting. But realize that with practice be time, you will be more calm and patient when working the scene– which will help you make better rational choices while shooting, and ultimately help you make better images.
When we are shooting on the streets, we can often focus too much on the subject and not enough on the background.
My advice is once you’ve established who your primary subject (or subjects) are– focus your eyes on the background. Try to get a clean background that doesn’t district– and adds to the scene.
Try to avoid getting random heads, poles, trees, or cars in the background. When you are working the scene, move your feet to get a cleaner background. Messy backgrounds are one of the biggest killers of great potential street photographs.
Conclusion
Contact Sheet by Martin Parr from Spain, 1997
To increase your odds of getting “keepers†in street photography, try practicing “working the scene†and lingering longer than necessary. Don’t keep your feet still, always be moving. But at the same time be patient.
Photo by Martin Parr from his “Common Sense†book. Spain, 1997
Also know that by working the scene longer than you need to, it will be strange and awkward. But with time, patience, practice, and a smile– you will be able to overcome this.
If you want to build your confidence in street photography and learn to better “work the sceneâ€â€“ join me at one of my upcoming street photography workshops!
Zack Arias recently took the Fujfiim XT-1 for a trip to Marrakech, Morocco and shot some street photography there. In the video above, he demonstrates his approach and shares some tips and techniques in the streets.
I met Zack Arias in Dubai at Gulf Photo Plus a few months earlier and his enthusiasm and passion to learn more about street photography is infectious. Seriously one of the coolest and most down to earth photographers I have met. Enjoy the video above and make sure to check out Zack’s new DEDPXL website.
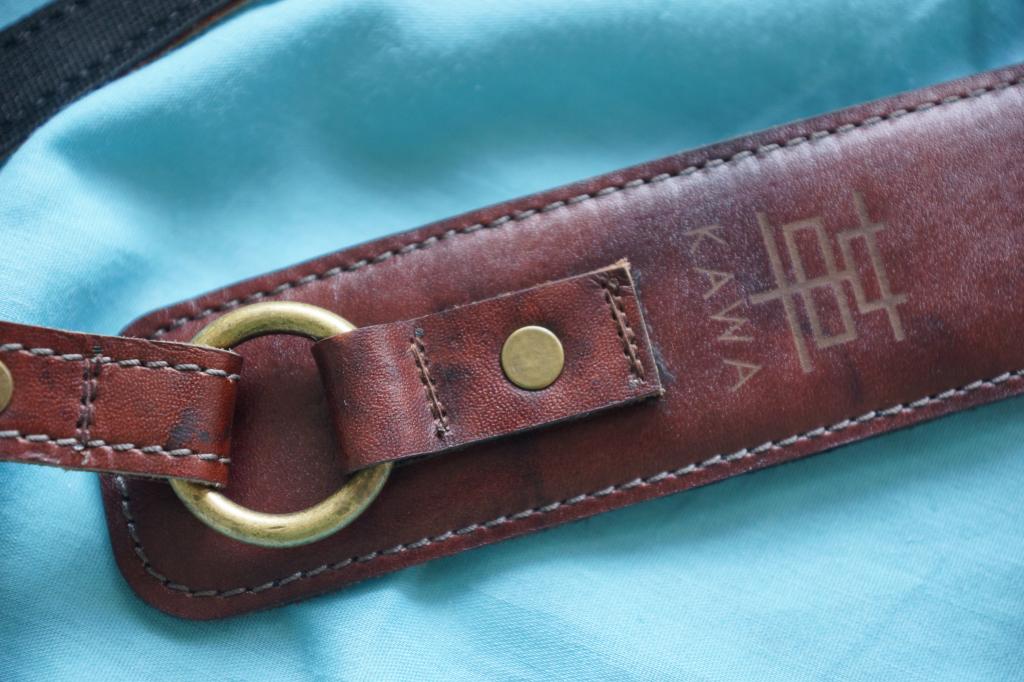
Eric’s Note: We were given a Kawa Pro Strap for free to review for the blog. A.G. DeMesa, a talented photographer and writer based in Manila writes his thoughts about the strap in the review below. Expect more stuff coming from him soon ;)
On Straps
A.G. DeMesa: A strap is what physically attaches a photographer to his camera when not using his hands. It lets the photographer carry the camera and take it to places where he needs to. Therefore it is important for a strap to strike the perfect balance of comfort, robustness, and durability. In addition, speed is also a factor in street photography wherein we clock long hours in the blistering sun anticipating that photo. There are many makes and models that are available in the market that fulfill the criteria but I’m pretty sure none of them is as beautiful as a Kawa pro gear strap.
Recently I’ve been getting really into Dieter Rams and his zen and minimalist philosophies when it comes to design. He has a famous list of “10 Principles of Good Design.” They are the following:
Good design is innovative.
Good design makes a product useful.
Good design is aesthetic.
Good design helps us to understand a product.
Good design is unobtrusive.
Good design is honest.
Good design is durable.
Good design is consequent to the last detail.
Good design is concerned with the environment.
Good design is as little design as possible.
I was inspired by his list, and thought I would do an homage to him by writing this list: “10 Principles of Good Street Photography†— read more to see how I applied Rams’ principles to street photography!
In this video I shot with the Fujifilm x100s and pre-focused my lens to around 5-10 meters (manual focus), shot at f/8, ISO 800, aperture-priority mode, optical viewfinder, and worked on trying to get more layers in the shot. The technique I used here was trying to get someone in the extreme foreground in the photo, and the subject in the background sharp. You can read more about this approach in my “Multiple Subjects” composition lesson.
In addition, I also made a conscious effort to stick around and “work the scene” — by taking multiple shots of the same scene, rather than just taking one shot and moving on. The masters rarely just took one scene of a shot and moved on, as you can see in my article: “10 Things Street Photographers Can Learn From Magnum Contact Sheets“.
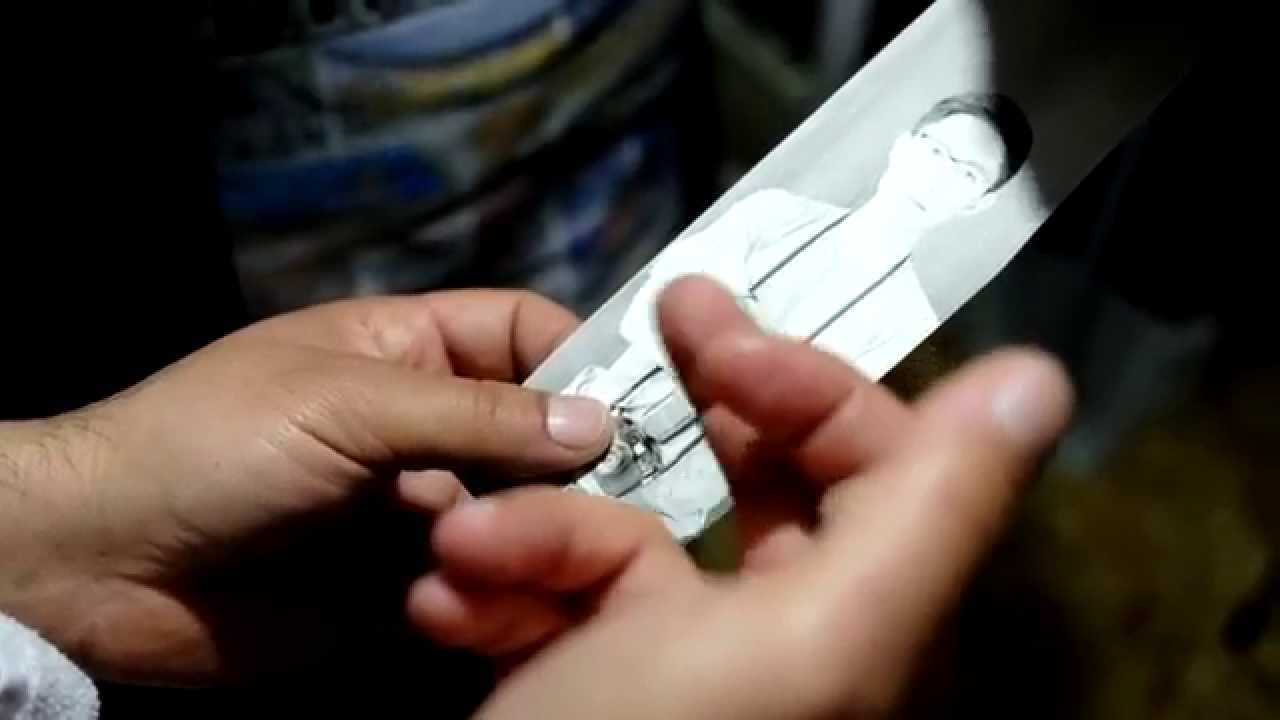
While I was in Istanbul teaching my Week-Long Travel Street Photography Workshop with Charlie Kirk, we both attended an Introduction to Darkroom Film with Taylan Bagci. I hope this video can give you some helpful insight into the developing and printing process, if you’ve never done it before. The entire film is quite long at 2 hours, so I’ve chopped it into the relevant sections below:
Part 1: Introduction to Taylan and Darkroom (Beginning to 10:00)
This article is written by Ayman Oghanna, an award-winning photographer and journalist based in Istanbul.Â
I step into his office and humanity explodes. People everywhere. Moments everywhere. An ocean of smiles, frowns, scowls, and yawns drowning the sidewalks. Since 1981, he has worked these Midtown streets and he’s walking them now as he always has, a step or two faster than everybody else, with an eye on everybody else.
Then he sees her. Twenty yards in front of him, a face-lift in the crowd. A slow moving cartoon of a woman with heavy make up and a shock of peroxide in her hair. She looks like old money and, despite the cosmetic surgery, old-age. A character. He moves towards her, fast, biting his bottom lip with concentration. She’s close now, a few feet away; he steps to the right, looks up and pauses as if lost in thought. She’s about to pass his shoulder. And then it happens. He attacks. Turning and swooping into her face. Right in her face. FLASH. She gasps, his camera clicks and a hand shoots to her startled heart.
Philanthropy need not be the domain of the rich. Art need not be confined to a gallery wall. Permission need not be begged for nor granted. This is a gift.
This is an interview with Andrew Quilty, one of the curators of the Elizabeth Street Gallery in Sydney– a public and outdoor gallery. See how he helping build democracy in art and exposing new talent in the feature below!
Photos in this article are part of my on-going “Somewhere in America” Urban Landscape series.
I recently finished a book titled: “Essentialism: The Disciplined Pursuit of Lessâ€, which made me think a lot about my life, the blog, and street photography. To sum up the book, the author praises the “less is more†ethos, and encourages us to do “less, but betterâ€.
I got inspired to write this article on how being an “essentialist†can help us in our street photography. Below are some ideas you can apply to your work and approach:
I just finished my Toronto Introduction to Street Photography Workshop with my manager (and fellow co-teacher) Neil Ta. I was amazed by how much the students were able to build their confidence, push outside of their comfort zone, and have huge progress in their photography in such a short weekend! Check out all of their before/after photos below.
If you want to conquer your fears in street photography or take your creativity to the next level, join one of my upcoming street photography workshops!
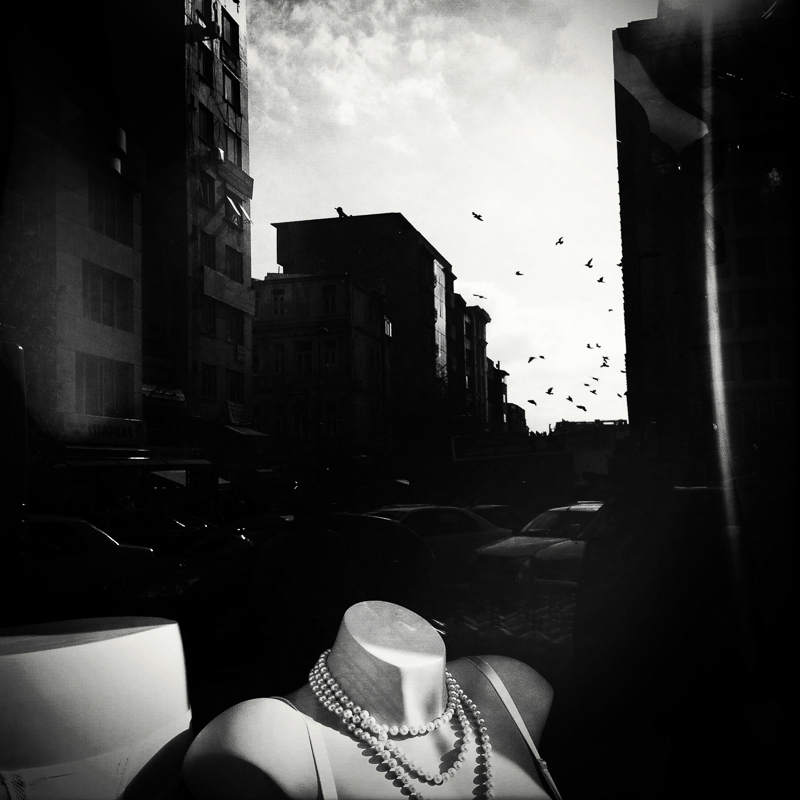
Elif Suyabatmaz is a street photographer part of the Tiny Collective and currently based in Istanbul. My friend Oguz Ozkan introduced me to her beautiful black and white work — which is all shot on her iPhone on hipstamatic. She has a keen eye for composition, design, and emotion in her shot. Hear about her inspirations, technique, and love of black and white in the video interview above. Read more to see her beautiful images.


 Henri Cartier-Bresson looking at contacts at the New York Magnum Office. 1959. © Rene Burri / Magnum Photos
 Henri Cartier-Bresson. SPAIN. 1933. Valencia. Note the two versions of the photo he was considering from. This was the best.
 Henri Cartier-Bresson. SPAIN. 1933. Valencia. This image wasn’t as strong as the prior.
 Contact sheet of Elliott Erwitt, “Bulldogsâ€, New York, 2000. © Elliott Erwitt / Magnum Photos
 “Bulldogsâ€, New York, 2000. © Elliott Erwitt / Magnum Photos
 Alain Capeilleres, 1976. © Martine Franck / Magnum Photos.
 Photo by Martine Franck, Provence-Alpes-Côte d’Azur region. Town of Le Brusc. Pool designed by Alain Capeilleres, 1976. © Martine Franck / Magnum Photos
 Contact sheet of Richard Kalvar, “Piazza Della Rotondaâ€. Rome, Italy, 1980. © Richard Kalvar / Magnum Photos
 “Piazza Della Rotondaâ€. Rome, Italy, 1980. © Richard Kalvar / Magnum Photos
 Che contact sheet. © Rene Burri / Magnum Photos
 Che Guevara. © Rene Burri / Magnum Photos
 Contact sheet, VJ Day. Photo by Alfred Eisenstaedt
 Jean Gaumy, Iran, 1986.
 Jean Gaumy, Iran, 1986.
 Martin Parr contact sheet from “
 Contact Sheet by Martin Parr from Spain, 1997
 Photo by Martin Parr from his “Common Sense†book. Spain, 1997