Your cart is currently empty!
How to Shoot Street Photography

If I started street photography all over again, and could give myself a guide on “how” to shoot in the streets— these are some ideas I would give myself:
1. Wander

The first tip in street photography is to wander without a predetermined destination. Street photography is all about spontaneity, and not forcing yourself to follow an explicit plan.
Just take your camera (it can be any camera, even a smartphone camera), and go for a walk. Walk slowly, and feel the pavement against your feet. Look up and look at the clouds. Look down at the ground, and look left and right.
Notice things. Follow your instincts and guts. Photograph anything that interests you out in public.
Photograph urban landscapes, interesting people you see, or things you find on the streets.
Assignment: Don’t judge

The goal is when you’re shooting, don’t discriminate. Just photograph anything that you instantly find interesting.
My suggestion: only judge your street photos after you take them (when you are at home, looking at your images).
But when you’re shooting, don’t judge and think too much. Just photograph like a child.
2. Juxtapose

“Juxtaposition” is a fancy word for contrasting things.
For example, here are some “juxtapositions” you can find on the streets:
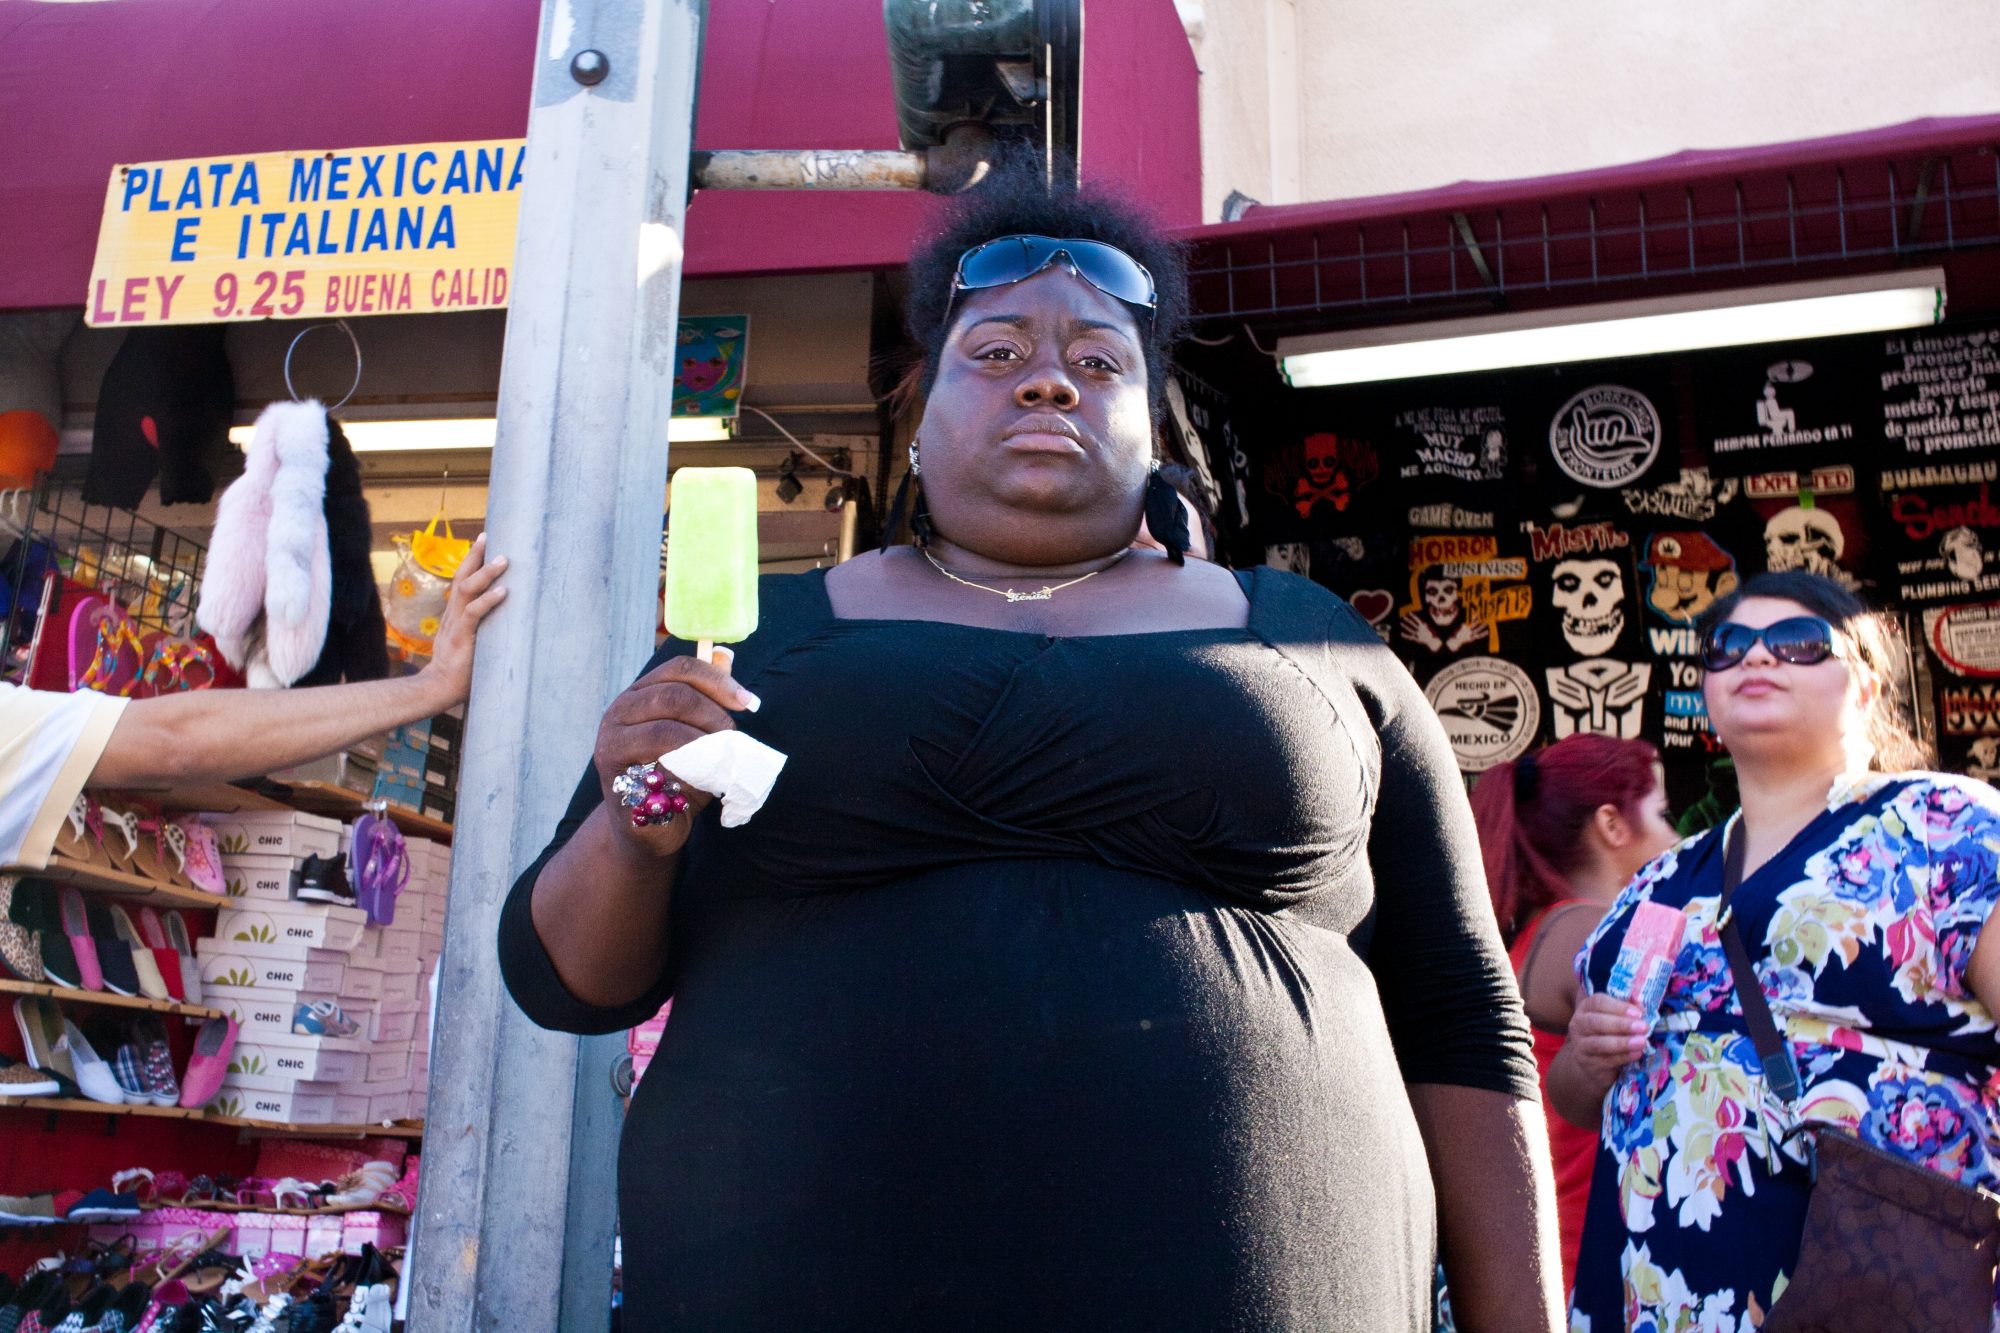
- Fat person next to skinny person
- The color red against the color blue
- A circle against a triangle
- An old person next to a young person
- A brand-new BMW against an old Honda
- Miserable-looking people next to happy-looking people
- Poor person sitting next to a luxury diamond advertisement
One of the best ways to make interesting street photos is to juxtapose whatever you find interesting on the streets, or in a public space.
When you’re starting off— keep it simple. Just find two different subjects, and contrast them with one another.
Start off with one type of subject-matter, then look around the scene, and figure out what you can “juxtapose” it against.
Assignment: The fishing technique

One of the first techniques you can start off in street photography is the “fishing technique”. Start off by looking for an interesting background or scene. Then wait for an interesting person to step into the scene. It is like being a fisherman — finding a good spot in the lake, casting out your reel, and waiting for fish to bite.
The secret is to be patient (like a good fisherman). You might wait 30 minutes-1 hour for a good shot, and get nothing. Or you might get a good shot in 1-3 minutes.
To capture a good shot in this manner means to find an interesting juxtaposition between the subject and background. How do these two elements play off one another? Is it humorous? Is it strange?
Try to capture an interesting story with your image— and keep it open-ended.
3. Make more than 1 photo

The classic mistake a lot of beginner street photographers make is this: they only take 1-2 photos of an interesting street scene, and move on.

Rather, learn how to “work the scene.” Take more than 1 photograph. Take a photograph from different angles, perspectives. Take a step forward, a step back, a step left, a step right. Crouch down.
Assignment: At least 10 photos of everything

If you’re starting off in street photography, try to train yourself to click more than you think you need to.

The assignment is to try to take at least 10 photos of any interesting street photography opportunity. Then when you go home, choose the best 1 photo of each scene. This will teach you the importance of photographing from different perspectives, different timings, and will force you to be more creative on the streets.
4. Look for interesting hand-gestures

Another common mistake in street photography — most beginner street photographs are boring, because they lack any sort of interaction, dynamism, or emotion.
Assignment: Only photograph people with interesting hand-gestures

A practical solution: try to photograph interesting hand-gestures. Photograph people shielding their eyes from the sun. Photograph people with their hands on their hips, on their faces, or on their foreheads.
By capturing hand-gestures, you will capture emotion, soul, and a feeling.
5. Don’t use a zoom/telephoto lens
Another common mistake beginner street photographers make — they rely on telephoto and zoom lenses.
The problem is by using a zoom lens, you will never get intimate with your subject. I feel that with physical proximity comes emotional proximity.
When you’re starting off street photography, I recommend a 35mm “full-frame equivalent” lens. If you don’t own one, just use the widest-angle lens possible, and focus on getting close to your subject.
Don’t zoom with your lens. Rather, use “foot-zoom.” Get closer to your scene and subject by walking closer to your subject.
When you’re getting closer to your subject, focus on the edges of the frame. Make sure the edges of your frame don’t have too much negative space.
Seek to “fill the frame” with your subject, or street scene.
How much negative space do you have on the edges of the frame? Just follow your gut — you don’t want too much negative space, but you don’t want it to be too tight. You can only learn how much negative space to use by studying lots of great street photographs from the masters.
Assignment: Don’t zoom

For a month, don’t use a zoom (or telephoto lens) in your street photography. If you only have a kit lens (like a 18-50mm lens), tape your lens’ zoom function on the widest setting. Then focus getting really close to your subjects, by using your feet.
6. Shoot during golden hour (sunrise/sunset)

Most of the time the light is too harsh to shoot street photography. The best times to shoot street photography is during “golden hour” (sunrise and sunset).
Why? During sunrise and sunset, the light is soft, dramatic, and beautiful. Having great light will make a good street photograph into a great street photograph.
Try to avoid shooting street photography during noon — that is when the light is the harshest.
Assignment: Shoot during golden hour

To shoot during golden hour, you either need to wake up really early (perhaps before work), or to shoot at sunset (after work).
When you shoot during golden hour, play with your “exposure-compensation.” I generally prefer -1 exposure-compensation during “golden hour” — it will turn your backgrounds this lovely black, and highlight your subjects in a dramatic manner.
7. Subtract from the frame

Lastly, the biggest tip I would give in street photography is to focus on subtracting from the frame — rather than adding to the frame.
The problem of most of our street photos is that they are too distracting, cluttered, and messy.
Seek to simplify your backgrounds. Try to photograph against simple walls and backgrounds, and try to avoid over-lapping figures.
Seek to make your street photographs as simple as possible, and focus only on the essential subjects and emotions in your photos.
Assignment: Cut, cut, cut

Think of yourself as a sculptor. You start off with a block of stone. Your job as a street photographer is to chisel away the superfluous stone — to reveal the beautiful statue inside.
In the streets, always ask yourself, “Is this really necessary in my frame? Can I remove it, to highlight the more interesting parts of the frame?”
When in doubt, cut the fat from your frame.
Conclusion

There is no “right” or “wrong” of shooting street photography. However if you’re just starting off in street photography, I feel these guidelines are a good foundation to get you started.
Accumulate your knowledge of street photography. Study the masters of street photography, as well as contemporary masters. Study their compositions, framings, and images. See what strikes your heart in their images. Is it the emotion, mood, or story behind the photo?
Seek to imitate the images you love, and after enough time and practice — you will eventually find your own voice. And then at that time, you can throw away all the “rules” out of the window. You then learn how to “kill your masters” in photography. At this point, you seek to “unlearn” in photography, not to “learn.”

But until that point, stay humble, stay hungry, and curious. Remember, you want to enjoy your process in street photography.
For me, I love that street photography allows me to walk in the streets (and get out of my apartment).
I love the random encounters I have with strangers in the streets.

Lastly, I enjoy most the community of like-minded street photographers. My greatest teachers in street photography have been my friends, and great mentors I have met along the way.
Make street photography your own. Don’t follow the definitions others give you — but use them as guides and sign-posts.
See you on the streets,
Eric
Learn more: Street Photography 101 >